
Summary of Contents for Count Dyna-Cut
- Page 1 MANUAL DYNA-CUT Martin Yale Industries, LLC. 251 Wedcor Avenue, Wabash, Indiana 46992 226600--563-0621 | Fax: 260-563 www.martinyale.com...
-
Page 2: Table Of Contents
TABLE OF CONTENTS Specifications Safety Procedures Care and Maintenance Component Identification Touch Screen Controller Setting Up Your Dyna-Cut -Installing a Flexible Die -Removing a Flexible Die -Delivery Tray Installation -Delivery Tray Sensor Setup Setting Up the Automatic Feeder -Loading the Feeder... -
Page 3: Specifications
*NOTE: The Dyna-Cut is capable of handling many types of applications above and beyond the standard specifications. It is possible to feed quite a variety of jobs. However, the performance of the Dyna-Cut on these special applications is directly related to the experience of the operator. -
Page 4: Safety Procedures
This will prevent damage to your machine by power/voltage spikes. • To unplug cords, always grasp the plug body, never pull on cords to disconnect. Wire fatigue and possible shock could results from improper disconnect procedures. BE ALERT! BE CAREFUL! DYNA-CUT... -
Page 5: Care And Maintenance
CARE AND MAINTENANCE The Dyna-Cut is a precision machine. It is very important to keep it free of excessive dust, dirt, and foreign matter. We recommend that you keep the machine covered when not in use. BEARINGS: The Dyna-Cut uses 2 different style bearings sealed roller bearing and bronze bushings. -
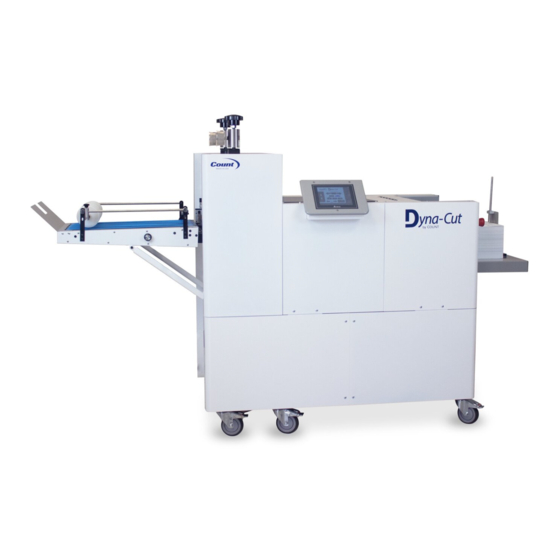
Page 6: Component Identification
COMPONENT IDENTIFICATION DYNA-CUT... -
Page 7: Touch Screen Controller
30 minutes. The power light will stay illuminated letting you know the machine is still on. COUNT LOGO AND SERVICE ACCESS If the logo is pressed a password screen is displayed. This is for factory and service access only. - Page 8 Elevator Stop will stop the elevator if auto up has been pushed. TRANSPORT MOTOR CONTROLS Pressing the ON button will turn on the transport motor which will sync speed with the cylinders. Jog will move paper forward or backwards on the Registration Table. DYNA-CUT...
- Page 9 Margin Adjust Knob Skew Adjust Knob In order to adjust the skew on the sheet use the knob located directly in front of the marble rack. DYNA-CUT...
-
Page 10: Setting Up Your Dyna-Cut
SETTING UP YOUR DYNA-CUT INSTALLING A FLEXABLE DIE 1. Take the pressure off of the dies using the hydra jacks this will make the cylinder easier to spin. 2. Rotate the cylinder so that the 3 threaded guide holes are facing you. -
Page 11: Delivery Tray Installation
SETTING UP YOUR DYNA-CUT DELIVERY TRAY INSTALLATION The motorized delivery is recommended to be installed by two people although it can be done with one. Locate the exit support shaft of the machine. Install the hooks on the delivery tray to the cuts outs show on the shaft below, now support the end of the tray and position the arms into the larger slots on the exit panel. -
Page 12: Delivery Tray Sensor Setup
SETTING UP YOUR DYNA-CUT DELIVERY TRAY SENSOR SET UP In order to have the delivery tray properly advance you need to insure the optic sensor is set for your media. To set place a piece of your media on the table under the sensor. When properly set the orange light will come on and advance the belts until the media clears the sensor. -
Page 13: Setting Up The Automatic Feeder
4. Position the left side paper stop according to the paper size flush against the paper stack. Place the rear paper stop flush against the rear of the stack. Insert the paper weight in the rear paper stop. DYNA-CUT... -
Page 14: Setting The Air Channels
2. Anticlockwise rotation will increase the distance of the sensor relative to the paper. Fanned out paper is made more compact. 3. Set height so that the vacuum belt only pulls one sheet at a time. DYNA-CUT... -
Page 15: Setting Up The Paper Path
1/8” from the alignment ledge. 5. Move first page back and press the feed roller release button. 6. Run a test sheet if you need to adjust your side margin make your adjustment then restart at step one. DYNA-CUT... -
Page 16: Setting Pressure On The Cylinder
4. Set the pressure on the cylinders by adjusting the hydro jacks on top of the machine. 5. Set the pressure to 300 psi to start. Run a test sheet and increase pressure until you get the desired cut. 6. Excessive pressure can cause premature die-wear. DYNA-CUT... -
Page 17: Setting Up Scrap Separator
5. If not properly aligned you will get a paper jam which you will need to clear. Turn off the machine or press the e-stop button before attempting to clear jam. 6. Make necessary adjustments retest until you get a clean diversion of scrap. DYNA-CUT... -
Page 18: Setting Delivery Table
2. The plastic wheels need to be set so that the cut material is hitting the wheel at the same time as it is coming in contact with the belts on the table. 3. Adjusting your speed will adjust how spaced out the shingles are. DYNA-CUT...
Need help?
Do you have a question about the Dyna-Cut and is the answer not in the manual?
Questions and answers