Table of Contents
Advertisement
Advertisement
Table of Contents

Related Manuals for FLX F5 TRAIL


Summary of Contents for FLX F5 TRAIL
- Page 1 OWNERS MANUAL www.flx.bike...
-
Page 2: Table Of Contents
12 Assembly Instructions The latest version of the Owner’s Manual is always available online at: 19 Maintenance Instructions www.flx.bike/manual 20 Brakes Proper assembly and care are crucial to you having the safest ride of your life. 22 Tires If you are unable to complete the assembly or need help with general maintenance, 24 Battery Care please reach out to us. You didn’t just purchase a bike — you joined our team, and we’re here to support you whenever you may need it. 26 Warranty Reach us by email: 28 More Tips support@flx.bike 29 Service Visit our Shop: 4170 Morena Blvd. Suite D 30 eBike Classifications San Diego, CA 92117 Hours: 10am - 5pm Monday - Friday Ready to get started? Let’s ride! - Team FLX... -
Page 3: General Warning
F5 Trail | Owners Manual F5 Trail | Owners Manual GENERAL WARNING Special Note for Parents: Riding an eBike, as with any motorized vehicle, involves the risk of property damage and serious or fatal injury. By choosing to ride an eBike, you assume the responsibility for that risk, so it’s important that you know and practice responsible As a parent/guardian, you are fully responsible for the safety of your minor. riding. Proper use, care and maintenance of your eBike are essential in reducing the This responsibility includes making sure that the eBike is sized appropriately for the risk of injury. This manual will include bold warnings concerning potential child, that it is operating correctly, and the conditions are safe. You must also ensure consequences that can occur as a result of your failure to properly maintain your that you and your child have both learned and understand how to safely operate the eBike or follow safe riding practices. eBike, how to obey local motor vehicle, bicycle and traffic laws, as well as common sense for safe responsible riding. As a parent, it is important that you read through Bolded text combined with this alert symbol, will indicate an array of this manual and familiarize yourself with the warnings and proper operation of this warnings including but not limited to: eBike. Please review them with your child before allowing them to ride. A potentially hazardous situation that could result in injury or death if not... - Page 4 F5 Trail | Owners Manual F5 Trail | Owners Manual GETTING GETTING STARTED STARTED...
-
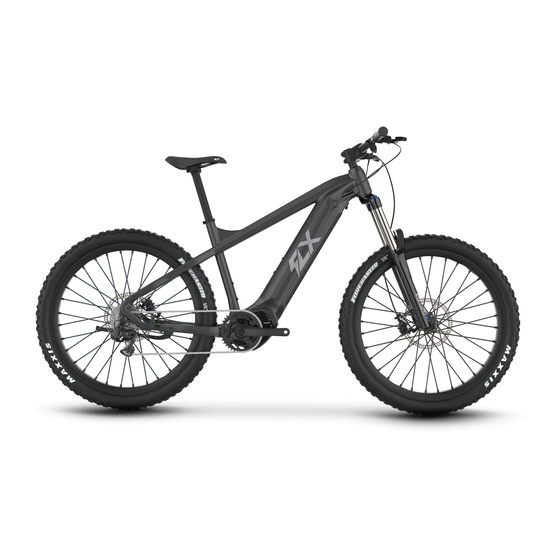
Page 5: Geometry
F5 Trail | Owners Manual F5 Trail | Owners Manual GEOMETRY The F5 Trail comes in one size that has been engineered to suit a variety of riders at different heights. On the following page, you will find a geometry chart with the measurements for the most important parts of your F5 Trail frame. Measurements are given in both Standard and Metric units for your convenience. Please ensure that your eBike is properly sized for you before riding. If your eBike is too small/too large, you may lose control and fall. The most important part of fit is ensuring that the seat position can be adjusted so that the seated rider’s feet can touch the ground. -
Page 6: Fit
F5 Trail | Owners Manual F5 Trail | Owners Manual Seat Position Proper seat adjustment is an important factor when it comes to getting the best of both comfort and performance out of your eBike. Follow the steps listed below to check for your correct seat height. After any saddle adjustments, make sure that the seat adjusting Correct fit is an essential part of eBike safety, comfort and proper mechanism is properly tightened before riding. Failure to do so can performance. -
Page 7: What's In The Box
5. Tools: Allen Key x2 & Wrench 6. Frame + Rear Wheel 7. Charger 8. Front Wheel If for any reason you are missing any parts- please reach out to us at: hello@flx.bike so we can get your missing part to you. www.flx.bike www.flx.bike... - Page 8 F5 Trail | Owners Manual F5 Trail | Owners Manual ASSEMBLY STEP 1: Install the Handlebars 1. Using the 4mm Allen wrench, unscrew the 4 bolts and remove the stem plate. 2. Place your handlebars into the groove and replace the stem plate over the top. Tighten the bolts about 3/4ths of the way. Overview 3. Make the final adjustments on your handlebars positioning, ensuring that they are The following section covers the assembly directions for the F5 Trail. Proper centered and at a comfortable angle before tightening the b olts the rest of the way. assembly is an essential step in ensuring your safety and the proper operation of the bike. If at any point you do not feel comfortable assembling the bicycle your- Note: DO NOT depress the brake levers before installing the front wheel.
- Page 9 F5 Trail | Owners Manual F5 Trail | Owners Manual STEP 3: Secure the Front Wheel 4. Tighten the end cap of the axle about 3/4ths of the way. Then, flip the lever on the other side into the upward/closed position and hold it there while you tighten the axle the rest of the way. (Tightening the axle should be done from the bolt side, not the clamp side) 1. Remove the thru-axle from in-between the forks. Push in the end to collapse the teeth holding it in place, then slide it out by pulling on the other end. 5. Test the tension by opening the lever again. If it is easy to open, tighten the axle end cap further and try again. You want to make sure there is good tension as this will ensure that 2. Slide the wheel into place, making sure the brake caliper slides on to the rotor and the your wheel is on securely. Do not over-tighten the axle, as this can cause malfunction.
- Page 10 F5 Trail | Owners Manual F5 Trail | Owners Manual STEP 5: Attach the Pedals 2. After allowing your bike to fully charge, test to make sure your LCD smart display is working. Press and hold the power button (located on the thumb controls) for 3 seconds, or until the screen lights up. Repeat this step to turn it off. 1. Check the end cap on both pedals in order to identify the left and right pedal. Tip: Imagine you are sitting on the bike to correctly determine left vs.. right side. Note: The right pedal will tighten clockwise, while the left pedal will Pedal Assist (5 Speeds) tighten counter-clockwise. Current Speed 2. Grab your wrench, and screw the pedal tightly into the correct crank. The pedals should thread smoothly and easily if properly aligned. Distance Traveled Battery Life Figure 14. Checking the LCD Display Voila! Your F5 Trail is now fully assembled in all its glory. Give yourself a pat on the back and admire your work. Take some pictures, call a friend, and take a well-deserved break while it charges. Figure 11. Left Vs. Right Pedal Figure 12. Attaching Pedal to Crank...
-
Page 11: Reach Us By Email: Support@Flx.bike
Many eBike service and repair tasks require special tools and knowledge. Do not begin any service on your eBike unless you have learned from FLX how to properly complete it. We recommend that significant repairs be done by a qualified eBike mechanic, as improper service can result in damage to the bike, or an accident which can cause injury or death. -
Page 12: Brakes
F5 Trail | Owners Manual F5 Trail | Owners Manual BRAKES WARNING! Riding with worn brake pads, improperly installed brakes, or wheels It’s important for you to learn and remember which brake lever controls where you can visibly see the wear from the brake pads is dangerous and each brake (front/rear) in order to ensure your safety. -
Page 13: Tires
F5 Trail | Owners Manual F5 Trail | Owners Manual TIRES Be sure to check your tire pressure frequently (at least every week) using a high-quality dial gauge. Your F5 Trail will come standard with Maxxis Forekaster, 27.5” x 2.35” tires. It’s important that you understand the appropriate conditions and terrain hese tires can handle in order to ensure safe riding. Tire Valves Tire Pressure Not all bike tube valves are created equal, and it’s your responsibility to make Tires come available in many different sizes and their uses can range from sure that the bike pump you are using has the appropriate fitting to the valve stems on general purpose to highly specialized weather/terrain conditions. It’s important you your eBike. know which tires your eBike comes with, and understand the limitations and specifications that they can perform under. The F5 Trail will come fitted with a Schrader valve. This valve is common to most bikes, cars and even tractors. To inflate a valve tube using a Schrader headed Size, pressure rating and other information can often be found on the sidewall of bike pump follow the steps below: the tire. Tire Pressure is the most key piece of information for you to remember. -
Page 14: Battery Care
If you plan on storing your bike (or spare battery) for longer than two weeks at a time, Charging time takes about 3 - 4.5 hours. On rare occasion, it may take longer to allow please be sure to follow these guidelines in order to maintain the lifespan of your battery. the battery to fully charge, particularly when the bike is new, or has been stored for a long period of time. It is recommended that you do not leave the battery at lower than an 80% charge when storing for long periods of times. If storing for a month or longer, periodically check Only charge the battery with the supplied FLX charger, as others may the battery and be sure to keep the charge up to at least 80% cause damage to the battery or increase the possibility of fire or explosion. Store your battery in a cool, dry area away from water and other elements at a tem- perature between 50°F – 77°F (10°C - 25°C). While the charger is designed to automatically stop charging once the battery is full, do not leave it plugged in for periods of time greater than 12 hours. Failure to follow proper battery care practices can result in unnecessary Make sure your charger avoids contact with liquids, dirt, and debris. -
Page 15: Warranty
F5 Trail | Owners Manual F5 Trail | Owners Manual WARRANTY The warranty applies only to the original buyer of the product and is not trans- This warranty is not meant to suggest or imply that the products cannot be ferable to subsequent owners or any other party. This warranty is void if the product broken or will last forever. It does mean that the products are covered subject to the is subjected to abuse, neglect, improper repair, improper maintenance, alteration, terms of this warranty. FLX will have no obligation, under this limited warranty, in the modification, an accident or other abnormal, excessively improper use at the sole event that the product is damaged or destroyed as a result of any of the following discretion of FLX. events: wear and tear, component use on a non FLX product. Warranty Exclusions Warranty Information This warranty does not cover: FLX bike warrants that this product is warranted to the buyer against manufac- turing defects in materials or workmanship for a period of (1) year from the oginal date - Damage or failure from abuse, neglect, misuse or accident. of shipment. The original receipt of purchase is required to establish proof of purchase - Damage from stunt riding, ramp jumping, acrobatics, competitive events, and must be provided to FLX Bike for any claims. FLX Bike will require customers to such as bicycle racing, bicycle motocross racing, or similar activities or any complete a mandatory standard procedure for warranty claims that will involve media, activity that is not consistent with the intended use of the product. such as photos and videos to help FLX Bike establish the fault with the product. Only - Damages resulting from improper charging of the battery pack or use of any the individual components themselves are covered by the warranty. The removal, as- charger not supplied by FLX. sembly, and tuning requirements of the component is borne by the customer making - Installation of any parts, accessories, or electrical components not originally the claim. The costs and inconvenience that result from a loss of use of the product is intended for or compatible with the product as sold, or any modification of the not covered whilst the warranty procedure takes place. frame or any components originally supplied; tires, brake pads, chains, lights,... -
Page 16: More Tips
F5 Trail | Owners Manual F5 Trail | Owners Manual TAKING CARE MORE TIPS Service Proper maintenance is essential for your safety and to ensure that you get optimal performance from your eBike. If you are unable to perform the Technological advances have made eBikes and their components more general maintenance yourself, please reach out to a qualified mechanic. - Page 17 F5 Trail | Owners Manual F5 Trail | Owners Manual READY CLASSIFICATION TO RIDE Laws vary in different states / countries. Please check your local regula- tions. Here is a good resource of information in the US: http://peopleforbikes.org/our- work/e-bikes/policies-and-laws/ Electric Bicycles are defined by the California Vehicle Code. New legislation became effective in January 2016. The current regulations define an “electric bicycle” as: a bicycle equipped with fully operable pedals and an electric motor of less than 750 watts, separated into three classes: 1. A “class 1 electric bicycle,” or “low-speed pedal-assisted electric bicycle,” is a bicycle equipped with a motor that provides assistance only when the rider is pedaling, and that ceases to provide assistance when the bicycle reaches the speed of 20 miles per hour. 2. A “class 2 electric bicycle,” or “low-speed throttle-assisted electric bicycle,” is a bicycle equipped with a motor that may be used exclusively to...
- Page 18 www.flx.bike...
Need help?
Do you have a question about the F5 TRAIL and is the answer not in the manual?
Questions and answers
How do you raise the handlebars?
To raise the handlebars on a FLX F5 TRAIL:
1. Use a 4mm Allen wrench to unscrew the 4 bolts on the stem plate.
2. Remove the stem plate and reposition the handlebars to the desired height and angle.
3. Replace the stem plate and tighten the bolts about 3/4 of the way.
4. Adjust the handlebars to ensure they are centered and comfortable.
5. Fully tighten the bolts to secure the handlebars.
This answer is automatically generated