Table of Contents
Advertisement
Available languages
Available languages
Quick Links
Vielen Dank für den Erwerb unseres hochwertigen Luftentfeuchters. Bitte lesen Sie diese Anleitung
sorgfältig durch, bevor Sie das Gerät in Betrieb nehmen. Bei Fragen kontaktieren Sie bitte den
Händler. Bewahren Sie diese Anleitung zum späteren Nachschlagen sicher auf.
Gebrauchsanleitung
1
Modell Nr.
SensoAirDry
Advertisement
Chapters
Table of Contents

Summary of Contents for elv SensoAirDry
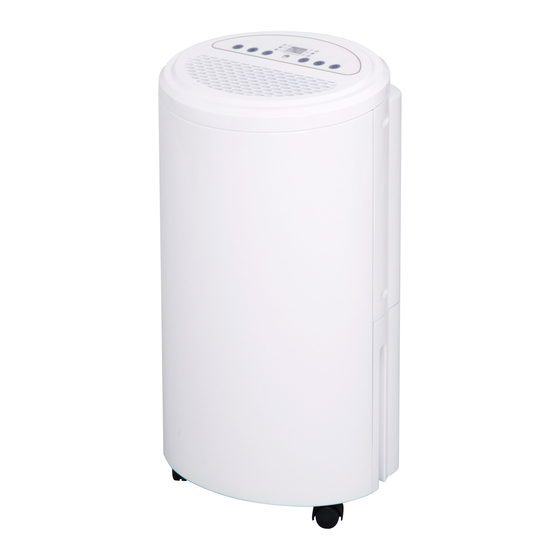
- Page 1 Modell Nr. SensoAirDry Gebrauchsanleitung Vielen Dank für den Erwerb unseres hochwertigen Luftentfeuchters. Bitte lesen Sie diese Anleitung sorgfältig durch, bevor Sie das Gerät in Betrieb nehmen. Bei Fragen kontaktieren Sie bitte den Händler. Bewahren Sie diese Anleitung zum späteren Nachschlagen sicher auf.
-
Page 2: Table Of Contents
Inhaltsverzeichnis Wichtige Sicherheitshinweise………………………………………………………………………………………2 Teile und Funktionen…………………………………………………………………………………………………..3 Bedientafel…………………………………………………………………………………………………………………..4 Betrieb………………………………………………………………………………………………………………………….5 Entwässerung……………………………………………………………………………………………………………….7 Wartung………………………………………………………………………………………………………………………..9 Fehlerbehebung………………………………………………………………………………………………………….11 WICHTIGE SICHERHEITSHINWEISE Lesen Sie vor dem Gebrauch des Gerätes alle Anweisungen sorgfältig durch. 1. Stellen Sie den Senso AirDry auf eine standfeste, ebene Fläche um Vibrationen und Geräusche zu reduzieren. Stellen Sie das Gerät nicht in der Nähe von leicht entflammbaren Gasen oder Stoffen Stellen Sie das Gerät nicht direkt hinter Vorhängen o.ä. -
Page 3: Teile Und Funktionen
WARNUNG Versuchen Sie auf keinen Fall, dieses Gerät selbst zu reparieren, auseinander zu bauen oder zu verändern, da dies zu Schäden am Gerät führen könnte. Selbst das Austauschen des Netzkabels sollte von fachlich qualifiziertem Personal durchgeführt werden. BAUTEILE UND GERÄTEEIGENSSCHAFTEN Eigenschaften Bei der ersten Inbetriebnahme beginnt das Gerät automatisch mit der Luftentfeuchtung bei niedriger Umdrehungszahl und einer Standardeinstellung der Luftfeuchtigkeit von 70%. -
Page 4: Bedientafel
BEDIENFELD 1. Zeitschaltuhr 4. Wahlschalter EINSTELLUNGEN 2. Wahl LÜFTERGESCHWINDIGKEIT 5. Wahlschalter BETRIEBSART 3. IONISIERUNG 6. Einschaltknopf 7. Anzeige FAN LOW 11. Stromanzeige (POWER) 8. Anzeige FAN HIGH 12. Anzeige Luftentfeuchtung 9. Anzeige Schaltuhr 13. Anzeige Ionisierung 10. Kontrollleuchte „Wasserbehälter voll“ (W. F.) -
Page 5: Betrieb
BEDIENUNG Inbetriebnahme Nach dem Einschalten des Gerätes hören Sie ein kurzes akustisches Signal (Piepton). Das Gerät arbeitet noch nicht und der Einschaltknopf blinkt. Bedienung des Geräts Drücken Sie den Einschaltknopf um den automatischen Entfeuchtungsmodus zu starten. Wenn das Gerät das erste Mal betrieben wird, läuft der Lüfter mit niedriger Geschwindigkeit und der Standardeinstellung von 70% Luftfeuchtigkeit. - Page 6 Zeitschaltuhr Wenn das Gerät in Betrieb ist, können Sie den Schalter für die Zeitschaltuhr drücken, um eine Abschaltzeit festzulegen. Drücken Sie den Schalter EINSTELLUNGEN um eine Laufzeit bis zum automatischen Abschalten zu setzen, in fortlaufenden Stundenschritten von 24h – 23h – 22h –...
-
Page 7: Entwässerung
ENTWÄSSERUNG Wasserbehälter Die Anzeige „Wasserbehälter voll“ (W. F.) blinkt, wenn der Wasserbehälter seine maximale Füllmenge erreicht hat. 1. Nehmen Sie den Wasserbehälter aus dem Gerät und entleeren Sie ihn. 2. Setzen Sie den leeren Wasserbehälter wieder in das Gerät ein. ACHTUNG: Entleeren Sie den Wasserauffangbehälter immer, bevor das Gerät an einem anderen Ort aufgestellt oder wenn es eingelagert werden soll! Wie Sie den Wasserbehälter vom Gerät entfernen... - Page 8 Kontinuierliche Wasserentleerung 1. Entfernen Sie den Wasserbehälter vom Gerät. 2. Befestigen Sie einen PVC-Schlauch (Ø 12mm, 300mm empfohlene Länge) am Wasserablaufstutzen und leiten Sie das andere Ende des Schlauches in einen Abfluss am Boden oder in ein Auffanggefäß. Bemerkung: Der PVC-Schlauch gehört nicht zum Lieferumfang. ACHTUNG: 1.
-
Page 9: Wartung
WARTUNG VORSICHT: ZUR VERMEIDUNG VON STROMSCHLÄGEN SOLLTE VOR JEDER WARTUNG ODER REPARATUR DAS GERÄT AUSGESCHALTET UND DER NETZSTECKER AUS DER STECKDOSE GEZOGEN WERDEN. Reinigung Ziehen Sie vor jeder Reinigung den Netzstecker aus der Steckdose. Reinigen Sie das Gehäuse mit einem weichen, feuchten Tuch. Benutzen Sie keine chemischen Lösungsmittel (wie Benzol, Alkohol, Reinigungsbenzin). - Page 10 Einlagerung des Gerätes Falls der Luftentfeuchter über einen längeren Zeitraum nicht genutzt wird: 1. Entleeren Sie den Wasserbehälter vollständig und stellen Sie sicher, dass kein Wasser mehr aufgefangen wird. 2. Ziehen Sie den Netzstecker aus der Steckdose und wickeln Sie das Netzkabel zusammen. 3.
-
Page 11: Fehlerbehebung
FEHLERSUCHE Bevor Sie den Händler wegen einer Reklamation aufsuchen Gehen Sie bitte erst folgende Tabelle durch, bevor Sie den Händler bemühen. Sie könnten dadurch Zeit und Geld sparen. Die Tabelle enthält die am häufigsten auftretenden Störungen, die nicht durch Produktionsfehler oder defekte Materialien verursacht sind. Problem Mögliche Ursache Lösung... - Page 12 Model No. SensoAirDry User Manual Thank you for selecting our high-quality dehumidifier. Please read this manual carefully before using the appliance. If you have any questions, please contact the customer service for help. Keep this manual in a safe place for future reference.
-
Page 13: Important Safety Instructions
List of contents Important Safety Instructions……………………………………………………………………………………….13 Parts and Features ………….…………………………………………………………………………………………...14 Control Panel ..…………………………………………………………………………………………………………….15 Operation …………………………………………………………………………………………………………………….16 Water drainage ……………………………………………………………………………………………………………19 Maintenance .………………………………………………………………………………………………………………21 Trouble shooting ……..………………………………………………………………………………………………….22 IMPORTANT SAFETY INSTRUCTIONS Read all instructions carefully before using the appliance. 1. Put the dehumidifier on a sturdy, level floor to reduce vibrations and noise. 2. -
Page 14: Parts And Features
WARNING Do not attempt to repair, dismantle or modify this appliance as it may lead to damage to the device. Even replacing the power cord should be done by qualified technical staff. PARTS AND TECHNICAL FEATURES Features When initializing the appliance for first use, the device will automatically start dehumidifying in low fan speed and default humidity set at 70% RH. -
Page 15: Control Panel
CONTROL PANEL 1. TIMER 4. SETTINGS Button 2. FAN SPEED 5. OPERATING MODE 3. NEGATIVE INONISING 6. POWER 7. LOW FAN Indicator (LOWER) 11. POWER Indicator 8. HIGH FAN Indicator (HIGH) 12. Dehumidification Indicator (D. H.) 9. TIMER Indicator 13. Negative IONIZATION Indicator (ION.) 10. -
Page 16: Operation
OPERATING At first start-up: After turning on the appliance you will hear a short acoustic BEEP sound. The appliance is not yet running and the POWER indicator will flash. Operating the appliance: Press the POWER button to enter automatic dehumidification mode. When the appliance is running for the first time the standard mode is low fan speed and default humidity set at RH70%. - Page 17 OPERATING MODE Button Press the MODE button to select the operating mode and choose the fan speed and the dehumidification level. The fan speed indicator LOW FAN will flash green and the indicator for dehumidification will flash while setting the humidity level. During the setting process the appliance will run in low fan speed only and the fan speed can not be adjusted.
- Page 18 Control Indicator „Water full“ (W. F.) When the maximum filling level of the water tank is reached, the appliance is automatically shut off, the WATER FULL (W. F.) control indicator is flashing and an acoustic alarm is sounded for five seconds.
-
Page 19: Water Drainage
CAUTION! 1. When the power is restored after a power outage, please wait with resuming dehumidification operation for at least three minutes to avoid any damage to the compressor unit. 2. Always put the appliance on a sturdy and level floor and ensure adequate ventilation. Leave at least 30cm of free space around the appliance (if no drainage hose is connected). - Page 20 Continuous Drainage 1. Remove the water tank from the appliance. 2. Attach a PVC hose (Ø 12mm, 300mm recommended length) unto the water drainage nozzle and guide the other end of the hose to a discharge on the floor or to a water collection tank. Remark: The PVC hose is not included in the scope of delivery.
-
Page 21: Maintenance
MAINTENANCE WARNING: TO AVOID ELECTRIC SHOCKS TURN OFF THE APPLIANCE AND UNPLUG THE POWER CORD BEFORE ANY REPAIR OR MAINTENANCE. Cleaning Unplug the power cord before each cleaning. Clean the appliance with a soft damp cloth. Do not use chemical solvents (such as benzene, alcohol or cleaning petrol) as they may damage the surface or deform the casing as a whole. -
Page 22: Trouble Shooting
TROUBLESHOOTING Before you contact the dealer for claim Please go through the following checklist before calling after-sales service. You might save time and money. The table below adresses the most frequently encountered problems not caused by defects in material or production. Problem Possible Cause Solution...
Need help?
Do you have a question about the SensoAirDry and is the answer not in the manual?
Questions and answers