Advertisement
Available languages
Available languages
Quick Links
Advertisement

Related Manuals for Myria Kids Guard KG2


Summary of Contents for Myria Kids Guard KG2
- Page 1 Manual de utilizare Smartwatch copii Kids Guard KG2...
- Page 3 APP Software Înregistrare 1. Seta i App. 2. Executa i clic pe butonul pentru utlizator nou și accesa i pagina de înregistrare. Selecta i ara sau regiunea și introduce i numarul de telefon pe pagină. Merge i la pasul următor și finaliza i înregistrarea conform instruc iunilor.
- Page 4 Scana i unul dintre codurile QR sau introduce i numărul CID pentru conectarea ceasului: (1) Următorul cod QR Codul QR este important pentru identificarea ceasului adăugat, vă rugăm să păstra i acest cod. (2) Codul QR de pe ambalajul produsului Primul cont de pe care s-a realizat adăugarea ceasului va deveni automat administrator pentru ...
- Page 5 Func ii principale După adăugarea cu succes a ceasurilor, deplasa i imaginea principală și selecta i ceasul care a fost adăugat. 1.Func ii 1) Selecta i pictograma pentru toolbox, pe afișaj sunt prezentate următoarele categorii de informa ii: (1) Reminder vocal Transmisie vocală...
- Page 6 Mod manual de pozi ionare: Ceasul este localizat numai după ce este apăsat butonul pentru pozi ionare. 2) Stare ceas Dacă ceasul este închis, este indicată această stare. 3) Ac iuni în interfa a de setare A) Apăsa i pe butonul de localizare pentru a vizualiza pozi ia actuală a ceasului. (PS: Dacă...
- Page 7 (2) Pentru sisteme IOS: Forma i direct numărul de telefon de pe ceas. (3) Apăsa i pe butonul telefon pentru ascultare la distan ă (Numai pentru administratori este accesibilă această func ie): Apăsa i pe butonul sunet la distan ă. În momentul în care este activat, apela i ceasul.
- Page 8 Infoma iile mele (1) Executa i clic pe ceasul pe care dori i să îl accesa i, pute i să vizualiza i sau să modifica i informa iile cu privire la utilizatorul ceasului. (2) Executa i clic pe agenda telefonică, pute i să modifica i administratorul, să anula i ceasul, să adăuga i un membru nou, să...
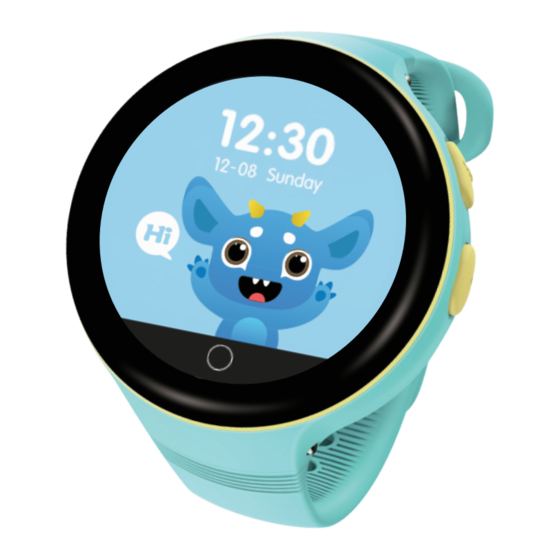
- Page 9 Prezentare ceas și Interfa ă 1. Prezentare ceas Curea ceas Zonă încărcare Difuzor Buton pornire Iluminare Capac compartIment Microfon card NanoSIM 2. Interfa ă...
- Page 10 Utilizarea ceasului I. Dacă nu este instalat cardul SIM, din modul boot se accesează automat modul ceas 1. Se recomandă purtarea în mod normal a ceasului și deschiderea dispozitivului prin apăsarea butonului de pornire timp de 3 secunde. 2. Ecranul se iluminează și sunt afișate informa ii cu privire la timp, dată, săptămână, starea vremii și numărul de pași parcurși.
- Page 11 2. Apăsa i lung butonul de pornire timp de 3 secunde, dacă re eaua pentru ceas este în condi ii normale, într-un minut terminalul se va sincroniza cu server-ul (verifica i cardul SIM – dacă sunt accesate func iile caller ID, trimitere și primire SMS și date GPRS). Card Micro SIM Card Nano SIM Card SIM normal...
- Page 12 Func iile ceasului Watch function Utiliza i aplica ia pentru a vă conecta la ceasul în care este introdus cardul SIM și pentru a realiza sincronizarea cu server-ul. 1. Telefon Numai numerele de telefon introduse în agenda telefonică a aplica iei pot apela ceasul și ceasul poate apela numai numărul din agenda telefonică: Apelare În modul standby, selecta i func ia telefon din partea stângă...
- Page 13 (2) În timpul apelării, apăsa i scurt butonul de pornire sau deplasa i degetul în sus pe ecran pentru a închide telefonul. (3) Apăsa i scurt butonul de pornire sau deplasa i degetul în sus pe ecran pentru a ieși din agenda telefonică.
- Page 14 (2) Numărul de telefon este apelat de 3 ori, periodic, până în momentul în care se ia legătura cu cineva. (3) Apăsa i scurt butonul de pornire sau deplasa i degetul în sus pe ecran pentru a închide telefonul. Conversa ie În modul standby, culisa i degetul pe ecran în stânga și în dreapta pentru a accesa agenda cu conversa ii.
- Page 15 Instruc iuni de încărcare și observa ii Instruc iuni de încărcare Introduce i portul USB al cablului de încărcare într-un adaptor standard de încărcare de 5V, 500M sau în mufa USB a unui computer și introduce i celălalt capăt al cablului de încărcare în mufa de pe ceas.
- Page 16 Prezentare accesorii furnizate 1) Cablu USB 2) Manual de utilizare 3) Certificat de garan ie 4) Șurubelni ă Observa ii 1. Vă rugăm să men ine i acest aparat la distan ă fa ă de surse de foc, să nu îl expune i la medii cu temperaturi ridicate sau cu condi ii extreme.
- Page 17 Specifica ii produs Senzor Senzor de accelerare, 3 axe Afișaj 1,22 inci TFT Rezolu ie 240 x 204 Dimensiuni 42,4 mm (diametru) x 15,25 mm (grosime) x 205 mm (lă ime) Material Policarbonat + afișaj cu oglindă Material curea ceas Poliuretan termoplastic GSM 900/1800 Baterie...
- Page 18 Valoare SAR maximă (10g) Zona expunere Banda folosită Cea mai mare valoare SAR măsurată 10g (W/Kg) GSM900 1.120 Corp GSM900 0.823 (5mm Gap) Valorile SAR găsite pentru MDI sub nivelurile maxime recomandate de 2,0 W / kg ca valoare medie pe 10 g de țesut în conformitate cu EN62209. Valoarea maximă...
- Page 19 Declarația UE de conformitate simplificată Prin prezenta, Complet Electro Serv S.A., Voluntari Șos. București Nord, 10 Global City Business Park, Corp 011, et. 10, declară că Myria MY9515XX este în conformitate cu Directiva 2014/53/EU. Textul integral al declarației UE de conformitate este disponibil la următoarea adresă...
- Page 20 AVERTISMENT: Acest aparat poate fi utilizat de către copiii cu vârstă de peste 8 ani şi de către persoane cu capacităţi fizice, senzoriale sau mentale reduse sau lipsite de experienţă şi de cunoştinţe, dacă acestea au fost supravegheate sau pregătite în vederea utilizării aparatului în condiţii de siguranţă...
- Page 21 User manual Children smartwatch Kids Guard KG2...
-
Page 22: App Software
APP Software Install APP Android... - Page 23 APP Software Register 1. Set up the App. 2. Click the new user button and enter the registration page. Choose your country or religion, and key in your phone number in the page. Click on the next step and complete the registration according to the hint.
- Page 24 Scan one of the QR code or input CID number to connect watch: (1)The following QR code The QR code is the identification for add the watch, please keeping properly. (2)QR code on the product box The fisrt account that succeed to add the watch, it will automactically become the administrator ...
- Page 25 Main Function After adding watches successfully, switch the head image around and select a watch that has been added. 1.Function 1)Select the toolbox bookmark, look at the information on the cue board, including the following categories: (1)Voice reminding Voice timing transmission to reminder event. (2)Security area(Watch support for only GPS functions) The security area of the watch can be set,such as in the school, at home, in···,etc.
- Page 26 Manual positioning mode:Only by clicking the positioning button, the watch is positioned. 2) Watch state If the watch is in a state of shutdown, it shows shut down. 3) Click into the setting interface A: Click the location button to see the current position of the watch. (PS: The watch is inserted into the SIM card and the network is normal, which ensures the SIM card to open the GPRS function).
- Page 27 (2) IOS:Dialing watch phone directly. (3) Click the phone button for remote listening(Only administrators have this function): Click the remote sound button. When prompt in the opening, call the watch phone . The watch no bell, no vibration, automatic monitoring. The phone can hear the sound around the watch remotely, but the watch can't hear the sound of the phone.
- Page 28 My label Click on the watch head to enter, and you can view or modify the data of the watch user. Click on the phone book, you can hand over the administrator, cancel the watch,add the member, view, modify or delete the number of the phone book members or friends. Step counter Showing the number of steps, calorie, walking distance taken in walk.
-
Page 29: Appearance And Interface
Appearance and Interface 1. Appearance watchband Charging hold Loudspeaker Power button Light sensation NanoSIM Microphone card cover 2. Interface... -
Page 30: Device Operation
Device operation I. If the SIM card is not installed, the boot automatically enters the watch mode 1.It is recommended to wear the watch normally and open the machine for about 3 seconds with power button. 2.Light the screen and look at the time,date,week,weather,walking steps. 3.In the standby state,the watch will turn off automatically when press the power button about 3 seconds. - Page 31 2.Long press the power button to start about 3 seconds and the watch network is in normal condition about 1 minutes, the terminal will synchronized with the server(Please make sure that the SIM card has opened the caller ID, send and receive SMS and GPRS data functions). Micro SIM card Nano SIM card Ordinary SIM card...
-
Page 32: Watch Function
Watch function Watch function Use APP to connected with watch which insert the SIM card and synchronizewith the server 1. Telephone Only the number added to the APP phone book can call the watch phone, and the watch can only dial the number in the phone book: Dialing In the standby state, select the telephone from the left and right touch screen, select “... - Page 33 In the process of calling, short press the power button or upwards sliding touch screen to hang up the phone. Short press the power button or upwards sliding touch screen to get out of the phone book. Answer the phone When have a call, you can click“...
- Page 34 (2)Call the phone number 3 times in an automatic cycle until someone is connected or proactive. (3)Short press the power button or upwards sliding touch screen to hang up the phone. Chat In the standby state,slide the touch screen left “ ”and right to get into the chat book.
- Page 35 Charging instructions and reminders Charging instructions Insert the USB port of the charging cable into the national standard 5V, 500MA output power adapter or computer USB interface, and insert the other end into the watch to charge normally, charging for 2 to 3 hours can be full.
- Page 36 Accessory introduction 1)USB cable 2)Owner's Manual 3)Certification 4)Screwdriver Remarks 1 . Please keep the device away from the fire source, high temperature, high heat, and other extreme environments. 2 . Please pay attention to remind children to avoid eating watch. 3 .
-
Page 37: Product Specification
Product specification Sensor three-axis acceleration sensor Display 1.22“ TFT Resolution ratio 240x204 Dimension 42.4mm(diameter)x15.25mm(thickness)x205(length) Material PC+Display window with glass mirror Watchband Material GSM 900/1800 Battery 350mAh Positioning GPS, AGPS, wifi, LBS Display color Color Charging mode Charging seat(Contacts), Magnetic suction... - Page 38 Max. SAR Measured (10g) Exposure Technology Highest Measured Configuration Band SAR 10g (W/Kg) Head GSM900 1.120 Body-worn GSM900 0.823 (5mm Gap) The SAR values found for the MID below the maximum recommended levels of 2.0W/Kg as averaged over for 10g tissue according to EN62209.
Need help?
Do you have a question about the Kids Guard KG2 and is the answer not in the manual?
Questions and answers