Advertisement
Quick Links
Advertisement

Summary of Contents for Allform U-Sectional Series
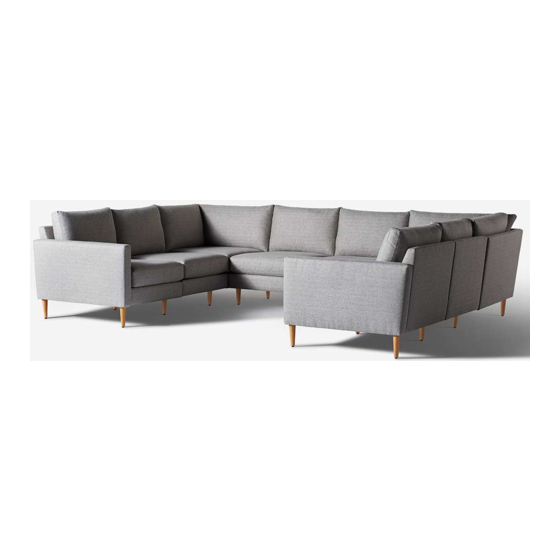
- Page 1 U-Sectional A L L F O R M H O M E . C O M...
- Page 2 THE PARTS...
- Page 3 As a general rule of thumb, we will work linearly with benches, connecting pieces from right to left. A bench is a linear string of consecutive seats excluding corners and arms. • If you purchased a chair, loveseat, sofa (or any configu- ration without a corner), every seat will be in the bench since you have only one •...
- Page 4 Unboxing Note that both Corner modules and Chaise modules are each shipped in two boxes. For larger configurations without a Corner, we will ship a separate Hardware box since not all Hardware (including Legs) will fit in the Arms box. Arms Arm Panels, Hardware (including Legs) SEAt...
- Page 5 HARDWARE Center panel The Panel that connects Seat Bases and Corner Seat Bases; every Center Panel also has holes at the top and bottom for Legs T-BOLT The hand screw that fastens all of our Seat Bases to Backrests WASHER Every T-Bolt comes with a Washer Connecting Pin The detachable pin that connects Arms to Backrests...
-
Page 6: Additional Items
ADDITIONAL ITEMS BASE PLATE The Connecting Pin will screw directly into the Base Plate. Every Backrest will have a Base Plate. The Right Arm will also have a Base Plate. opening PLATE The Opening Plate has recessed teeth lining the interior of the opening below the top. - Page 7 SECURING PIECES WITH THE CONNECTING PIN You will always connect and secure two pieces via the Connecting Pin as follows: Screw the Connecting Pin into the Base Plate Insert the Connecting Pin fully into the top of the Opening Plate Stabilize the pieces being connected and apply pressure downward on the piece with the Base Plate /upward on the piece with the Opening Plate...
- Page 8 Now, onto the assembly! Make sure that you are working in an area with enough space on a clean floor. You can put down towels or blankets if necessary. The floor should be smooth to avoid catching fabric or scratching leather. Happy building!
- Page 9 u sectional...
- Page 11 Step 1 assemble chairs Place the Backrest from each Seat and Chaise box flat with the back on the floor. Flip up The black denim fabric should face away from the Backrest once you flip the Seat Base up Take the Seat Base and arrange the holes in the Seat Base shelf with the holes in the Backrest cutout.
- Page 12 Place a metal washer on the Screw of each T-Bolt and screw in both T-Bolts, securing the Backrest to the Seat. Do this for every Seat and Backrest from the Seat and Chaise boxes. You should now have a series of assembled Seats, each with the Backrest perpendicular to the Seat Base.
- Page 13 Step 2 assemble BENCHES Group your Seats into 3 Benches: Right Bench, Left Bench, and Middle Bench. We’ll begin by connecting the rightmost Seat to its adjacent Seat for the Right Bench. Screw in the first Connecting Pin.
- Page 14 Insert the Connecting Pin into the the Top of the Opening Plate on the adjacent Seat and push the two Backrests all the way together so the pin can no longer be seen. Push down on the Seat on the right relative to the Seat on the left to lock the Connecting Pin inside the Opening Plate.
- Page 15 View the underside of the seat. Note the cutout area – this is where we will place the Center Panel. Take a T-Bolt, place a metal washer over the screw, and place it in the top left hole in the Center Panel. Tighten the T-Bolt, but not all the way.
- Page 16 Take another T-Bolt with a metal washer and screw it in the bottom right hole in the Center Panel. Don’t tighten it all the way. Screw in the other two T-Bolts with washers. Now tighten all 4 T-Bolts all the way.
- Page 17 Repeat steps above to attach the remaining seats to the rest of the Right Bench. Complete this process for every Seat within each Bench, moving right to left. Do not attempt to connect the Benches. Make sure that every T-Bolt is screwed in fully, and that you have pushed all Backrests firmly together.
- Page 18 Step 3 attach arms Start with the Right Arm on the Right Bench. Screw in the Connecting Pin to the Base Plate on the Right Arm. Align the Connecting Pin with the top of the Opening Plate.
- Page 19 Push all the way in. Then, push down on the Right Arm until the Connecting Pin locks into place. You can do this while the Bench is lying with the Backrests on the floor or while it is standing upright. View the underside of the Bench.
- Page 20 Take two T-Bolts with washers, put in the holes in the shelf, and tighten all the way to connect the Right Arm to Right Bench. Place Right Bench aside and change focus to the Left bench. Repeat the process to attach the Left Arm to Left Bench Note 2 differences in assembly of Left Bench: 1.
- Page 21 Now you have three benches: Right Bench with Right Arm; Left Bench with Left Arm, and Middle Bench with no Arms. Right Bench with Right Arm Left Bench with Left Arm Middle Bench with no Arms...
- Page 22 Step 4 Assemble Corners Open 1x Corner Back and 1x Corner Seat Box. Remove everything including the Hardware from the Hardware box (found in the Corner Back box). Put the cushions aside.
- Page 23 Stand the right Corner Back up on its shelf. Screw the Connecting Pin into the Base Plate on the angled edge. Align the two Corner Back pieces such that they are perpendicular. Place the Connecting Pin into the top of the Opening Plate of the Left Corner Back and push them fully together.
- Page 24 Place the Corner Seat Base such that the Shelves from the Corner Backs fit into the cutouts on the bottom. This is how the Corner should look at this point.
- Page 25 Flip the Back so that the Right Corner Back is lying on the floor and the Corner Seat is perpendicular to the floor. Screw in 4x T-Bolts and Washers, starting with the top left and followed by the bottom right to secure the corner. Make sure they are all fully tightened.
- Page 26 Flip the Corner so the Corner Seat Base is on the floor. Push the Corner Back pieces together to make sure the Connecting Pin is all the way secured. Repeat this same process to assemble the second Corner.
- Page 27 Step 5 Attach Corners Start with the Right Bench. Screw the Connecting Pin into the Backrest of the leftmost Seat. Align the Connecting Pin with the top of the Opening Plate on the Right Corner Back. Push them all the way together. Apply pressure down from the top of the Backrest of the Bench and up from the bottom of the Corner Seat to lock the Connecting Pin into place.
- Page 28 With the pieces lying on their backs, place a Center Panel in the cutout area on the bottom between the Corner and the leftmost Seat. Using a T-Bolt with Washer, screw in the top left, followed by bottom right, followed by top right, followed by bottom left. Make sure to tighten them fully.
- Page 29 Attach a Center Panel to the cutout in the Corner that is not attached to anything using 2x T-Bolt and Washer. Get Legs and Leg Washers ready. Place the Leg Washers on the Legs. Screw in the Legs in the areas circled above.
- Page 30 With 2 people, flip the Right Bench up onto its feet. Repeat this process to attach the other Corner to the Left Bench.
- Page 31 Step 6 Attach benches Screw feet onto the Middle Bench. With two people, flip the Middle Bench onto its legs. We will first connect the Middle Bench to the Right Bench Corner. Screw in the Connecting Pin to the Corner Back of the Right Bench.
- Page 32 Guide the Middle Bench such that the Connecting Pin goes into the top of the Opening Plate. This will also guide the Center Panel into place underneath the Middle Bench. Push the pieces together. Grab the 2x T-Bolts and Washers. You’ll need to get on the floor to reach underneath the sofa and screw in the last two T-Bolts.
- Page 33 Repeat this same process to attach the Corner module on the Left Bench to the Middle Bench. Now, put on your cushions and relax!
- Page 34 questions? Please don’t hesitate to reach out to us at www.allformhome.com or help@allformhome.com...
Need help?
Do you have a question about the U-Sectional Series and is the answer not in the manual?
Questions and answers