
Summary of Contents for InFocus The Woodstove
- Page 1 Owners Manual The Woodstove Heater Manuel de l'utilisateur Designed and built by Box 10, Ste Agathe, MB, Canada, R0G1Y0 www.infocusmfg.com KEEP THIS OWNERS MANUAL FOR FUTURE REFERENCE...
- Page 2 The Woodstove APPLICATION: THE WOODSTOVE MUST BE USED FOR RECREATIONAL PURPOSES ONLY, SUCH AS ICE FISHING, CAMPING AND HUNTING. IT WAS NOT DESIGNED FOR RESIDENTIAL HEATING. IT IS IDEAL FOR COOKING AS WELL AS HEATING FOR TEMPORARY INSTALLATIONS SUCH AS TENTS.
- Page 3 ASSEMBLY / ASSEMBLAGE: 1. Place the top upside down on a level surface with vent hole away from you. Stand side panel as shown in Fig. 1 and place 1 bolt through square hole that is circled in the middle of the side panel. Apply nut and snug with 7/16 wrench.
- Page 4 2. Stand back panel in place as shown on Fig. 2. Install bolts and nuts in the 4 holes circled. Posez le panneau arrière à sa place comme indiqué sur la Fig. 2. Installez les boulons et les écrous dans les 4 trous encerclés au rouge. Back Panel Panneau arrière Fig.
- Page 5 4. Stand other side panel in place as shown in Fig. 4. Install bolts in circled holes and tighten. Posez l'autre panneau latéral à sa place comme indiqué à la Fig. 4. Installez les boulons dans les trous encerclés au rouge et resserrez Fig.
- Page 6 6. Slide bottom plate into place from front and bolt middle locations. Snug tighten only. Fig. 6. Faites glisser la plaque du dessous en place par l'avant. Installez les boulons du milieu et serrez. Fig. 6 7. Position 4 legs as shown and bolt in place. Tighten all bottom bolts. Fig. 7. Installez les 4 pieds comme indiqué...
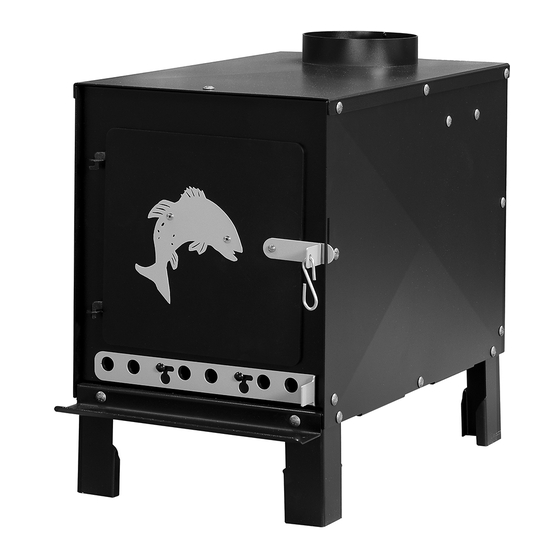
- Page 7 8. Flip stove right side up and install vent and door. Fig. 8. Retournez le poêle à l'endroit puis installez la bouche d'aération et la porte. Fig. 8. Fig. 8 Chimney Installation / Installation de la cheminée: Stove must be coupled to the chimney with a 6" stove pipe. Verify clearance between your stove pipe and the surrounding combustible material.
- Page 8 USE / UTILISATION: Once you have a good bed of coals, you should reload unit. It is recommended to operate the stove with a wood level not higher than 6 inches. Une fois que vous obtenez un bon lit de braises, ajoutez du bois dans l'appareil. Il est recommandé...
Need help?
Do you have a question about the The Woodstove and is the answer not in the manual?
Questions and answers