Advertisement
Quick Links
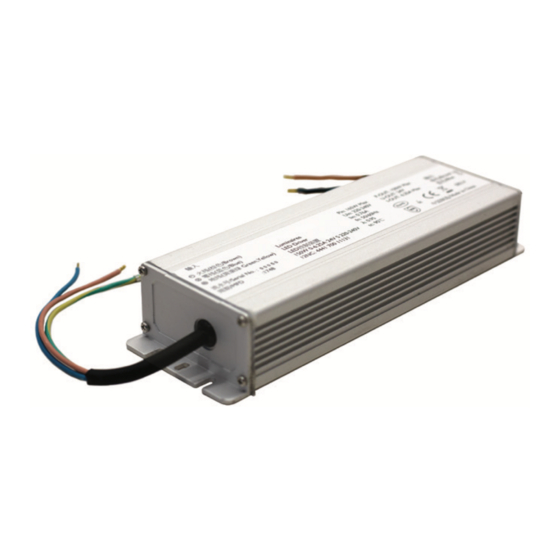
Vaya Flood HP 150W
Replacement Power Supply
Installation Instructions
INSTRUCTIONS D'INSTALLATION INSTRUCCIONES DE INSTALACIÓN
ISTRUZIONI PER L'INSTALLAZIONE INSTALLATIE-INSTRUCTIES
INSTALLATIONSANWEISUNGEN インストール手順 安装指示
A
Must be installed by a qualified electrician in accordance with all
national and local electrical and construction codes and regulations.
Doit être installé par un électricien qualifié conformément aux codes et réglementa-
tions électriques nationaux et locaux du bâtiment.
La instalación debe realizarla un electricista calificado siguiendo todos los códigos y
normativas eléctricas y de construcción, tanto nacionales como locales.
Devono essere installati da un elettricista qualificato in conformità con le norme
locali e nazionali vigenti in materia di costruzioni edilizie e installazione di impianti
elettrici.
Moet door een gekwalificeerd elektricien overeenkomstig alle nationale en lokale
elektrische verordeningen worden geïnstalleerd.
Muss von einem geprüften Elektriker in Übereinstimmung mit allen nationalen und
örtlichen elektrischen Codes und Regelungen installiert werden.
国または地域の建築コードおよび規制にすべて従い、 資格のある電気技師が設置してくだ
さい。
必须根据所有国家和地方的电气和施工准则及规范,由符合资格的电工进行安装
IEC
60598
PUB-000466-00 (R01)
13 December 2018
B
Before installing this product, please visit the product page
at www.colorkinetics.com for the latest version of the installation
instructions. Due to continuous improvements and innovations,
installation instructions may change without notice.
Avant de procéder à l'installation de ce produit, veuillez consulter la page Web du
produit à l'adresse www.colorkinetics.com pour obtenir les instructions de montage
les plus récentes. En raison des améliorations et innovations sans cesse entreprises,
les instructions de montage peuvent être modifiées sans préavis.
Antes de instalar este producto, visite la página del producto en www.colorkinetics.
com para consultar la última versión de las instrucciones de instalación. Debido a las
continuas mejoras e innovaciones, las instrucciones de instalación pueden cambiar
sin previo aviso.
Prima di installare il prodotto, visitare la pagina relativa all'indirizzo www.colork-
inetics.com per la versione più recente delle istruzioni d'installazione. Grazie ai
miglioramenti e alle innovazioni continue, le istruzioni sono soggette a modifiche
senza preavviso.
Ga voordat u dit product installeert, eerst naar de productpagina op www.colork-
inetics.com voor de meeste recente versie van de installatie-instructies. Vanwege
voortdurende verbeteringen en innovaties kunnen de installatie-instructies zonder
bericht gewijzigd worden.
Besuchen Sie vor der Installation des Produkts bitte die Produktseite unter www.
colorkinetics.com, um die aktuellen Installationsanweisungen herunterzuladen.
Aufgrund kontinuierlicher Verbesserungen und Innovationen können die Installa-
tionsanweisungen ohne Vorankündigung geändert werden.
この製品を設置する前に、 www.colorkinetics.com の製品ページにアクセスして、 最新の設置
手順を確認してください。 改善 ・ 改良を継続的に行っているため、 取り付け手順が予告なく変
更されることがあります。
安装该产品之前,请先访问产品页面 www.colorkinetics.com 以获取最新版的安装说明。
由于在不断地改进和创新,安装说明可能会有所改动,恕不另行通知。
www.colorkinetics.com/vaya
Advertisement

Summary of Contents for Color Kinetics Vaya Series
- Page 1 Vaya Flood HP 150W Replacement Power Supply Installation Instructions INSTRUCTIONS D’INSTALLATION INSTRUCCIONES DE INSTALACIÓN ISTRUZIONI PER L’INSTALLAZIONE INSTALLATIE-INSTRUCTIES INSTALLATIONSANWEISUNGEN インストール手順 安装指示 Must be installed by a qualified electrician in accordance with all Before installing this product, please visit the product page national and local electrical and construction codes and regulations. at www.colorkinetics.com for the latest version of the installation instructions.
-
Page 2: Make Sure Power Is Off
Confirm all components received. Confirmez la réception de l’intégralité des composants. Compruebe si ha recibido todos los componentes. Confermare tutti i componenti ricevuti. Controleer alle ontvangen componenten. Bestätigen Sie, dass Sie alle Bestandteile erhalten haben. すべてのコンポーネントが揃っていることを確認します。 确认收到了所有部件。 Make sure power is OFF. Assurez-vous que l’alimentation est coupée Asegúrese de que la alimentación eléctrica esté... - Page 3 Remove power housing cover. Retirez le cache de protection du boîtier d’alimentation. Retire la cubierta de la carcasa de alimentación. Rimuovere la copertura del corpo dell’alimentatore. Verwijzer de kap van de voedingsbehuizing. Entfernen Sie die Gehäuseabdeckung. 電源筐体のカバーを取り外します。 取下电源外壳罩。 Hex wrench A/F 3.0 mm (4) Hex screws with split lock washers.
- Page 4 Remove the power supply. Retirez le bloc d’alimentation. Retire la fuente de alimentación. Rimuovere l’alimentatore. Verwijder de voeding. Nehmen Sie das Netzteil ab. 電源を取り外します。 取下电源。 (4) Screws with split lock washers. (4) Vis avec rondelles Grower. (4) Tornillos con arandelas planas. (4) Viti con rondelle di sicurezza aperte.
- Page 5 Reconnect power supply wires. Reconnectez les câbles d’alimentation électrique. Vuelva a conectar los cables de la fuente de alimentación. Ricollegare i fili di alimentazione. Sluit de draden van de voeding weer aan. Schließen Sie die Kabel für die Stromversorgung wieder an. 電源ケーブルを再度接続します。...
- Page 6 Use alignment pins to position power housing cover and replace screws. Utilisez les goupilles d’alignement pour positionner le cache de protection du boîtier d’alimentation et replacez les vis. Utilice los clips de alineación para colocar la cubierta de la carcasa de alimentación y sustituya los tornillos. Utilizzare i perni di allineamento per posizionare la copertura del corpo dell’alimentatore e reinserire le viti.
- Page 7 Aim the luminaire, lock luminaire in place. Pointez le luminaire et verrouillez-le une fois en place. Oriente la luminaria y fíjela en su posición. Puntare l’apparecchio di illuminazione, quindi bloccarlo in posizione. Richt de armatuur en zet deze vast. Richten Sie die Leuchte aus und verriegeln Sie die Leuchte in der gewünschten Stellung. 照明器具を所定の位置に向けて固定します。...
- Page 8 Do not use a luminaire if the lens, housing, or power cables are Reinforced insulation between LV power and control conductors, damaged. basic insulation between control circuit and led module. N’utilisez pas un appareil d’éclairage si la lentille, le boîtier ou les câbles d’alimentation sont Isolation renforcée entre l’alimentation basse tension et les conducteurs de commande, endommagés.


Need help?
Do you have a question about the Vaya Series and is the answer not in the manual?
Questions and answers