Chapters
Table of Contents

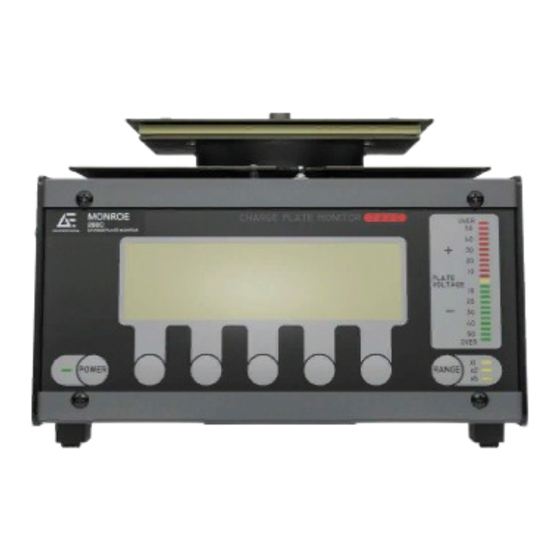
Summary of Contents for Monroe Electronics 288B
- Page 1 Operators’ Manual Monroe Electronics, Inc. Model 288B Charge Plate Monitor P/N 0340174 288-1/100 V2.01 060109 100 Housel Ave PO Box 535 Lyndonville NY 14098 1-800-821-6001 585-765-2254 fax: 585-765-9330 monroe-electronics.com...
-
Page 2: Table Of Contents
Page 19 Charge state indicator Page 19 Calibration Page 19 References Section 6 References Page 20 Warranty Information Page 21 Page 22 Repair Information Copyright© 2008 Monroe Electronics, Inc. Printed in USA Specifications and procedures subject to change without notice 2... - Page 3 3...
-
Page 4: Specifications
Section 1 Specifications All specifications are referred to plate voltage unless otherwise specified. Display 240 x 64 character/graphic Voltage - 3½ digit display (Decay and Peak reading) Accuracy ±0.1% of reading ± 1 lsd Resolution 1 volt for readings > 99 volts 0.1 volt for reading <... -
Page 5: Accessories Included
Size 11” x 9” x 6” (280 x 229 x 152 mm) Weight 12 ½ lb (5.7 kg) Accessories Included: CD containing: 288B Operator’s Manual 288B Data Sheet 288COM Software 288COM Software Operator’s Guide 288B Graph Data Sheet 110V Line Cord... -
Page 6: What This Instrument Does
Adjustable start and stop voltages for decay tests A serial interface and applications software to control ionization tests from a computer The Model 288B has been improved to provide the following capabilities: The ability to resolve the plate voltage with 100 mV resolution ... -
Page 7: General Information
Section 2 GENERAL INFORMATION Model 288 performs manual or automatic decay and balance tests for qualification and periodic verification of ionization equipment. It then stores the results and balance averages for manual tests and complete automatic test sequences up to a maximum of 1500 tests. Temperature and relative humidity are displayed real-time and recorded with the test data. -
Page 8: Setup
“Select Operation”. The test-numbering scheme begins with 1500 and displays the number of remaining tests. Figure 1. Main Screen One of the menu options is SETUP. MAIN 288B 2.00 06/18/08 11:23:02A Once significant programming has been S/N 012345... -
Page 9: Setup For Manual Test Menu
RAM/EE – The first screen under this option asks, “Clear all test data – Y/N?” A “Y(es)” response will permanently erase all accumulated test data from memory. The next two windows prompt a similar decision for whether to restore defaults to Group/Location names and test setups. These decisions should not be taken lightly as deletions are irreversible. -
Page 10: Setup Option Menu
SETUP - OPTION Menu: Options are for display backlighting, power off, and beep settings. The first two options will apply when the 288 unit is running on battery. Figure 6. Setup – Option SETUP OPTION The first two options apply to when the 288 unit is using battery power. -
Page 11: Operation
Section 4 OPERATION MANUAL OPERATION: From the manual screen the user can choose to run a positive decay, negative decay or balance. Also the option exists to enter the group and location screen to select the proper designation for the ionizer under test. See Figure 8 below: Figure 8. - Page 12 Figure 10. +Decay Test Result: M +DECAY 06/18/08 11:23:02A REVIEW: review the test results. StartV 1000v Group A MANUAL: go back to MANUAL Stop V 100v Location 1 screen. MaxDcy 300s 30C 56%RH +DECAY: start a +Decay test. REVIEW MANUAL +DECAY REVIEW: displays the manual test results and settings as in...
-
Page 13: Programming Features For Manual Test
Confidence Test – One of the major weaknesses in all CPM’s has been the inability to properly verify the main function of these devices, DECAY. In all the existing instruments it is possible to test the plate voltage, timer performance and other parameters but not the actual decay function. -
Page 14: Automatic Operation
AUTOMATIC OPERATION: Once the desired test parameters are set up, the user simply selects the “start” button to begin the tests. All the parameters are shown in the automatic screen. Figure 14. Auto Sequence Test ___ From the MAIN screen, press AUTO: AUTO 06/18/08 This shows the... -
Page 15: Programming Features For Auto Sequence
When the auto sequence tests are finished, data will be shown as follows: Figure 16. Auto Sequence Test Review: 3 +Decay EndV -Decay EndV NxtCyc: highlight the next Group A 6.5s 6.5s data row. Location 2 6.5s 6.5s 06/22/08 6.4s 6.5s MAIN: back to MAIN screen. - Page 16 From the MAIN Screen (Figure 1), press SETUP – AUTO. Then highlight the A.Setup 1, press DISPLAY. The following screen will appear: Figure 17. Setup for Auto Sequence Test: Press NEXT or PREV to highlight the SETUP A.TEST 1 StartV 1000v MaxDcy item, then press EDIT to make changes.
-
Page 17: Additional Features
ADDITIONAL FEATURES Group and Location – By accessing this screen the tests can be organized to reflect the ionizers’ locations. There are up to 17 Groups available, with a maximum of almost 700 locations. The total number of group/locations available will vary depending on how extensive the tests are for the individual locations (i.e. -
Page 18: Peak Reset
Figure 19. Review Data: From MAIN screen (Figure 1), press DATA RvwMan: Review Manual test data. See DATA Figure 11. RvwAuto: Review Auto sequence data. Group A See Figure 16. Location 1 TstAvai 1450 GRP/LOC: Select group/location. RvwMan RvwAuto GRP/LOC MAIN CLR: Erase data. -
Page 19: Maintenance
Calibration is not a user function and is beyond the scope of this manual. Calibration information is available from the factory. Monroe Electronics recommends annual calibration and/or when the instrument is damaged or repaired or where called for more often by contract. -
Page 20: References
ESD Association Advisory – ESD ADV1.0 – Glossary Are available from: ESD Association, Inc. 7900 Turin Rd. Building 3, Suite 2 Rome, NY 13440-2069 Phone (315) 339-6937 Fax (315) 339-6793 eosesd@aol.com http://www.eosesd.org Monroe Electronics, Inc. does not supply copies of standards or advisories. 20... - Page 21 Monroe Electronics unless in writing signed by a duly authorized representative of Monroe Electronics. In the event of a breach of the foregoing warranty, the liability of Monroe Electronics shall be limited to repairing or replacing the non-conforming goods and/or defective work, and in accordance with the foregoing, Monroe Electronics shall not be liable for any other damages, either direct or consequential.
- Page 22 Repairs will be returned promptly. Repairs are normally returned to the customer by UPS within 10 to 15 working days after receipt by Monroe Electronics, Inc. Return (to the customer) UPS charges will be paid by Monroe Electronics on warranty work. Return (to the customer) UPS charges will be prepaid and added to invoice for out-of-warranty repair work.
Need help?
Do you have a question about the 288B and is the answer not in the manual?
Questions and answers