Table of Contents
Advertisement
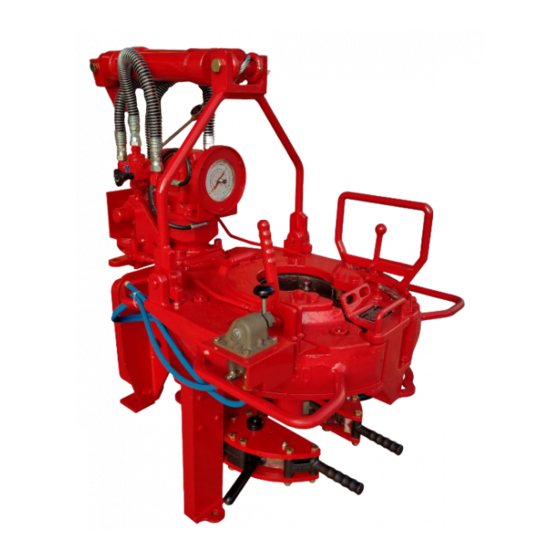
MODEL 5500
HYDRAULIC TUBING TONG
PRODUCT MANUAL
805-648-5004
Street Address:
1360 N. Olive Street Ventura, CA93001 |
CONTACT:
www.westcointl.com
MANUFACTURED IN THE USA
SPECIFICATIONS
MAINTENANCE
OPERATIONS
ASSEMBLY
805-648-5018
Mailing
Address: P.O.Box 66 Oak View, CA 93022
REV: 1
Date:07/23/2019
Approved by: Bryan Sta ord
Advertisement
Table of Contents

Related Manuals for Westco 5500

Summary of Contents for Westco 5500
- Page 1 MANUFACTURED IN THE USA MODEL 5500 HYDRAULIC TUBING TONG PRODUCT MANUAL SPECIFICATIONS MAINTENANCE OPERATIONS ASSEMBLY REV: 1 Date:07/23/2019 Approved by: Bryan Sta ord CONTACT: 805-648-5004 805-648-5018 Street Address: 1360 N. Olive Street Ventura, CA93001 | Mailing Address: P.O.Box 66 Oak View, CA 93022...
- Page 2 Experience and other specialized training can complement the materials used in this manual. C. WESTCO makes no representation as to the accuracy or completeness of the materials in this operating manual. All materials are provided “AS IS” WITHOUT WARRANTY OF ANY KIND WHATSOEVER, EITHER EXPRESS OR IMPLIED, INCLUDING BUT NOT LIMITED TO, THE IMPLIED WARRANTIES OF MERCHANTABILITY, FITNESS FOR PARTICULAR PURPOSE OR NON-INFRINGEMENT.
-
Page 3: Table Of Contents
TABLE OF CONTENTS Introduction Safety Tubing Tong Specifications Torque Chart Fluid Requirements Grease Specification Envelope Dimensions Controls First Time Startup Procedure Installation Operation Tubing Tong Adjustments Gear Train Timing Procedure Preventative Maintenance Troubleshooting Tubing Tong Replacement Parts Tong Assembly Exploded View Duel Suspension Hanger Assembly Jaw Assemblies Bushing Assemblies... -
Page 4: Introduction
This manual contains instructions on the installation, operation, safety, and maintenance of the WESTCO model 5500 hydraulic tubing tong. Illustrations with detailed notes are included in this manual in order to help assemble, disassemble, and or maintain these tongs. Proper maintenance is highly recommended in order to maximize the service life of the tong. - Page 5 Designated Use WESTCO model 5500 Hydraulic Tubing Tongs are fast, safe, and accurate tongs for making up and breaking out 1.315” to 4.75” O.D. tubing. Hydraulic power is directed to a manually controlled throttle valve and hydraulic motor unit. Fluid power input is converted to the rotary mechanical output, which drives the tong's gear train.
- Page 6 Immediately shutdown and repair the hydraulic system if leaking is present. • Never disconnect any hydraulic hose while it is under pressure. • Use only spare parts from WESTCO or WESTCO approved vendors. • Allow only qualified personnel to carry out troubleshooting, service, and maintenance tasks. •...
- Page 7 Precautions for Transportation The tubing tong must be secured properly to avoid any movements during transportation. Before moving any components, verify that you have proper lift equipment and space to safely move the tubing tong. The operator must have adequate training and follow standard safety procedures such as always move a suspended load slowly and smoothly;...
-
Page 8: Torque Chart
MODEL 5500 TUBING TONG SPECIFICATIONS • Hydraulic Nominal Requirements: 35-40 GPM @ 2,500 PSI • Pipe Size Range: 1 ¼” to 4 ½” • Max Torque in Low Gear: 8,750 ft-lbs. • Max RPM in High Gear: 100 RPM @ 40 GPM •... -
Page 9: Fluid Requirements
Fluid Requirements To obtain the proper torque during make/break operations, the tubing tong requires a flowrate of approximately 35 to 40 gallons per minute (132.5 LPM to 151.4 LPM) at 2000 PSI. Every effort should be made to keep the hydraulic system clean. Whenever the hoses are disconnected, make sure the quick-coupling ends are capped/plugged to prevent any debris from entering the hydraulic system. -
Page 10: Grease Specification
Grease Specification Tong grease lubrication is very important to ensure optimum performance. In addition, proper lubrication is key to increase the service life of the tong. WESTCO Int. recommends the following grease: • Standard Service – Chevron Ultra-Duty Grease EP NLGI 0,1 or 2 (or equivalent) •... -
Page 13: First Time Startup Procedure
FIRST TIME STARTUP PROCEDURE When preparing to operate a new or re-conditioned hydraulic tubing tong or a tong that has been in storage, perform all of the operations listed below: Tong: Clean the tong and remove any packing material. Grease, oil, and lubricate brake band. Function test linkage and shift mechanism for free operation. -
Page 14: Installation
To ensure accurate torque readings, the back-up line must be perpendicular to the tong. o WESTCO International recommends the use of a safety sling to prevent injuries caused by failure of the main back-up line or stiff-arm assembly. Attach one end of the safety sling to the eyebolt... - Page 15 located on the back of the tong. Attach the other end of the sling to the rig. The safety sling should also be rated for 9,000 lbs. NOTE: A back-up line must always be used, with or without the coupling back-up assembly •...
- Page 16 JAW AND BUSHING ORIENTATION The jaw and bushing are reversible, depending upon the desired direction of rotation. If the jaw is installed on the left side (standing in front of the tong, as you look into the opening of the tong), the tong will rotate the pipe to the left (Figure 1).
- Page 17 REMOVAL OF JAW AND BUSHING Position the tong as shown in Figure 3. Throttle the tong in reverse and position the bushing as shown in Figure 3. Slightly move the outer ring to eliminate any force acting on the pivot pin. Remove the pivot pin and then remove the bushing.
- Page 18 JAW AND BUSHING SIZES: Jaw and bushing sizes are stamped according to the actual O.D. of the tubing that they will fit - not the “nominal” size of the tubing. NOMINAL STAMPED NOMINAL STAMPED " " " 1.050" 1" 3" "...
-
Page 19: Operation
OPERATION While the tong is suspended, move the gearshift lever (located towards the front of the tong) into high gear. Open the tong guard door and position the tong onto the pipe (the door spring assembly will close the door once the pipe is centered on the tong). -
Page 20: Gear Train Timing Procedure
GEAR TRAIN TIMING PROCEDURE The high-speed pinion gear (item 51) must be timed properly to the two cluster gears (item 56/57) in order for the gear train to rotate properly. Incorrect timing will cause the gear train to bind during operation. NOTE: This timing procedure must be followed each time the tong’s gears are replaced. -
Page 21: Preventative Maintenance
• Before and after each job, grease fittings should be lubricated thoroughly. Refer to illustration 223 (ILL- 223) for grease point locations. During long periods of continuous use, WESTCO recommends greasing these areas every two hours. •... - Page 22 • Grease and oil the tong as recommended under "Preventive Maintenance" procedure. • Cover the entire tong with a good water proof cover. Extended Storage Storing the tong for a period of 30 days or more: • Perform the first two steps in "Temporary Storage" procedure above. •...
-
Page 23: Troubleshooting
TROUBLESHOOTING A. TONG RUNNING TOO SLOWLY Pump intake line plugged. Clean intake line and filter. Reservoir oil lever too low. Add oil. Air leak in pump intake line (oil in reservoir may Identify source of leak and make necessary repairs. be too foamy). - Page 24 C. TONG WILL NOT PRODUCE SUFFICIENT TORQUE Tong valve or relief valve on tong not working: Check for dirty or gummy sludge. Check for a. Valve stuck contamination of oil. Check for broken spring valve. Check valve seat for damage. Check oil seals. Check b.
-
Page 25: Tubing Tong Replacement Parts
MODEL 5500 TUBING TONG REPLACEMENT PARTS... - Page 27 See ILL-168 Item # Part Number Description Weight/Lbs. Bottom Transmission Assembly 55011-100 (Includes items #: 11, 12, 17, 48, 50-52, 61-64, 72, 78, 97) 45011 Bottom Transmission Cover 10.00 45012 Bushing 45015 Bearing Spacer 45016 Thrust Washer 45017 Shift Fork 45018 Gear Shaft Bushing Hanger Assembly...
- Page 28 992134-86 Set Screw 900572-5 1/4" Ball 992007-05 Cap Screw 992007-03 Cap Screw 992051-14 Lock Washer 992005-03 Cap Screw 992051-10 Lock Washer 992162-09 992082-95 Short Dowel Pin 992073-01 Grease Fitting 992073-04 Grease Fitting 992253-200 Snap Ring 992011-138 Roll Pin 992007-02 Cap Screw 940021-206 Bearing 45095...
- Page 29 45193 Stud 45137-200 Gear Frame Assembly (includes items #: 138-140) 3.00 992082-97 Planet Gear Shaft 45139 Bearing 45140 Planet Gear 903317-17 Bearing 45142 Thrust Washer 940016-208 Bearing 45144-200 Back Swivel 1.00 992005-17 Cap Screw 992089-09 Nylon Lock Nut 992164-05 Hex Nut 992155-04 Flat Washer 150-1...
- Page 30 45189 Fixed Control Valve Yoke 45190 Control Valve Pivot Plate Control Valve Link Assembly 45191 (includes items #: 130, 131, and 190) 45192 Safety Latch Pin 992005-05 Cap Screw 45201 Motor Adapter 2.00 992019-06 Cap Screw 45203-1 Rear Shift Lever Handle 5.00 992023-05 Cap Screw...
- Page 31 Back Guard Tong Assy (for tong with relief valve) (includes 45430-200 2.50 items #: 410R, 411R, 415, 416, 147) 410R 45430-01 Back Guard (For Tong with Relief Valve) 2.40 45410 Back Guard 2.00 992327-018 U-Clamp 1.00 411R 992327-019 U-Clamp (For Tong with Relief Valve) 1.00 992453-12 Hydraulic Swivel 3/4"...
-
Page 32: Duel Suspension Hanger Assembly
Dual Suspension Hanger Assembly Item # Part Number Description 45030-100 Dual Suspension Hanger Assembly Suspension Hanger 45023-100 45233-200 Hanger 45231 Sleeve 992008-19 Bolt 992162-09... -
Page 33: Jaw Assemblies
JAW ASSEMBLIES (For 5500,5600, and 4500 Tubing Tongs) Item # Part Number Description Weight/Lbs. 45291H-100 1.66" Jaw Assembly (1- 1/4" Pipe) 8.50 45291H 1.66" Jaw 6.50 45293H 1.66" Die 2.00 992012-72 Cotter Pin 45291F-100 1.900" Jaw Assembly (1- 1/2" Pipe) 7.50... -
Page 34: Bushing Assemblies
45293D 3/8" x 1" x 1- 7/16" Die 992015-02 Screw BUSHING ASSEMBLIES (For 5500,5600, and 4500 Tubing Tongs) Item # Part Number Description Weight/Lbs. 45292H-100 1.66" Bushing Assembly (1- 1/4" Pipe) 20.50 45292H 1.66" Bushing 16.00 45293H 1.66" Die 2.25... - Page 35 4- 3/4" Bushing 5.00 45293D 3/8" x 1" x 1- 7/16" Die 992015-02 Screw 2- 3/8" BUSHING WITH REDUCING DIE (For 5500,5600, and 4500 Tubing Tongs Item # Part Number Description Weight/Lbs. 45296-000 2- 3/8" Bushing/1.06" Reducing Die Assembly 19.00 45292A 2- 3/8"...
- Page 36 992012-72 Cotter Pin 45295-102 2- 3/8" Jaw/1.90" Reducing Die Assembly 6.25 45291A 2- 3/8" Jaw 4.50 45294-03 2- 3/8" x 1.90" Reducing Die 1.75 992012-72 Cotter Pin 45295-103 2- 3/8" Jaw/2.06" Reducing Die Assembly 6.00 45291A 2- 3/8" Jaw 4.50 45294-04 2- 3/8"...
-
Page 37: Tubing Tong Spare Parts List For One-Year Operation
TUBING TONG SPARE PARTS LIST FOR ONE YEAR'S OPERATION Part Number Qty Required Description 45288-200 Brake Band 45277 Large Roller 45278 Small Roller 45279 Bushing 45280 Roller Pin 45290 Jaw Pin 45287 Inner Ring 45289 Brake Band Pin 45025 Door Spring 992154-214 O-Ring for Spool... -
Page 38: Tubing Tong Back-Up Assemblies
TUBING TONG BACK-UP ASSEMBLIES M/S Manual Back-up Operation • Install the manual back-up hanger assembly on the tong. Make sure the leveling adjustment bolt is to the rear of the tong. • Install the back-up tool in the hanger assembly; then place the pin and safety clip in the lever to secure the entire assembly. - Page 40 REPLACEMENT PARTS FOR M/S MANUAL BACK-UP ASSEMBLY SEE ILL-069 Item # Part Number Description Weight/Lbs. 992012-36 Cotter Pin 45206 Latch Spring 45209 45266 Lever 1 5/16" - 2 1/16" 2.00 45267 Lever 1.900 - 4 1/2" 2.00 992015-02 Socket Screw 45359 Hanger Pin Assembly 1.00...
- Page 41 Three Jaw Open Mouth Back-up The back-up accessory is used for both “make-up” and “break-out” operations. The back-up works by grabbing the bottom half of the joint while the tong’s jaws rotate the top section. The height of the back-up can be adjusted easily by changing the location of the pins on the mounting assembly.
- Page 43 THREE JAW OPEN MOUTH BACK-UP PARTS LIST (FOR PNEUMATIC AND HYDRAULIC BACK-UP) SEE ILL-056-1 Item # Part Number Description 55157-100 2-7/8” – 5-9/16” Straight Tooth Jaw Assembly 55101 55157 Straight tooth insert 55140 Screw 992116-05 Nylock Nut 55177-100 1.900”-4-1/2” Straight Tooth Jaw Assembly 55101 55177 Straight tooth insert (1.900”-4-1/2”)
- Page 44 992264-04 Hydraulic Cylinder 992264-02 Clevis Mount 992264-03 Female Rod Clevis 55146-100 Cylinder Pivot Pin Assembly 55121 Spacer 992049-135 Clevis Pin 992047-10 Bridge Pin 992141-S-4-4 Elbow Fitting 992012-35 Cotter Pin 55147-100 Stem Bolt Assembly 992166-14 Nylock Hex Nut 992294-13 Screw 55178 Tube Stop 55179-100 T-handle Timing Assembly...
-
Page 45: Standard Back-Up Mount Assembly
STANDARD BACK-UP MOUNT ASSEMBLY SEE ILL-268 Item # Part Number Description 55200XS-200 Standard back-up Mount Assembly 55138-100 Rear Support Pin 55139-100 Front Support Pin 55229-100 Spring Housing (OBSOLETE USE 55229-101-KIT) 55229-101-KIT Spring Housing Kit (includes items #: 3A, 7, and 18) 55229-101 Spring Housing 55237-100... -
Page 47: Universal Stiff-Arm Assembly
Universal Stiff-Arm Assembly For Open Mouth Tubing Tong Item # Part Number Description 58019-101 Universal Stiff-Arm Assembly 58022-300 Female Arm Weldment 58021-300 Male Arm Weldment 992252-84 Safety Sling 992331-3A-06 Shackle 58028-300 Rig Bracket 58025-400 Anchor Pin Assembly 992164-17 992047-13 Hair Pin 992007-07 Bolt 992047-11... -
Page 48: Control Valve Assembly
Control Valve Assembly Item # Part Number Description 45240 Control Valve Assembly 45242 End Cap Valve Body 45245 Spool 45246 Washer 45247 Spacer Cup 45248 Spacer 943981-1009 Compression Spring 992019-03 Cap Screw 992154-214 O-ring 992256-56 External Retaining Ring 943981-1008 Compression Spring *Valve Body not sold by itself. -
Page 49: Torque Gauge Assemblies
4 ½” Gauge Assembly For Models 5500/55700 Tongs [PSI/FT-LBS Units] Item # Part Number Description 55403-101 4 ½” Gauge Assembly Hose Assembly 700B-04-024-02 55850-01 Gauge 55404-200 Gauge Mount 55405-01 Gauge Retaining Plate 992089-01 ¼-20 Nut 992204-52 ¼-20 X .875 Screw Adapter 45 Fitting ¼... - Page 50 4 ½” Gauge Assembly For Models 5500/55700 Tongs [BAR/N-M Units] Item # Part Number Description 55403-102 4 ½” Gauge Assembly Hose Assembly 700B-04-024-02 55850-02 Gauge 55404-200 Gauge Mount 55405-01 Gauge Retaining Plate 992089-01 ¼-20 Nut 992204-52 ¼-20 X .875 Screw Adapter 45 Fitting ¼...
-
Page 51: Hydraulic Motor Seal Replacement
Motor Seal and Retainer For Motor Part Numbers: 970400-5, 970400-6, 970400-7, 970400-10, 970400-15, and 970400-20 Item # Part Number Description 452581 Retainer Assembly 45970 Shaft Seal Assembly...
Need help?
Do you have a question about the 5500 and is the answer not in the manual?
Questions and answers