Table of Contents
Advertisement
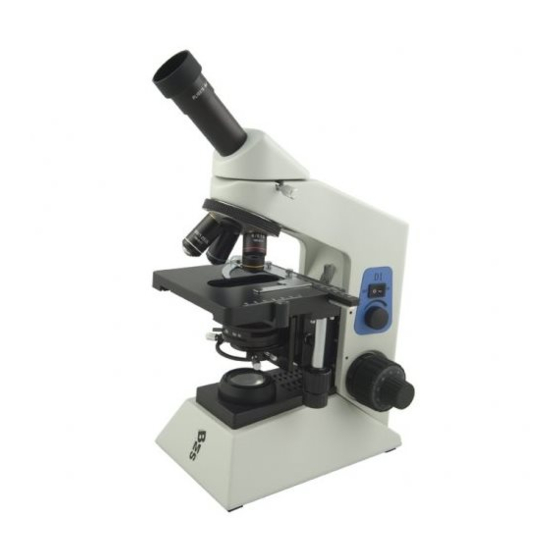
BMS D1 series Biological
Microscope
INSRUCTIONS
This manual expatiates the using method, troubleshooting, and maintenance about
the microscope particularly. Please read it before using carefully. The manufacturer
is entitled to amend or improve the instrument.
The quality for this microscope is according to GB/T2985-1999 biological
microscope standard.
Advertisement
Table of Contents

Related Manuals for BMS D1 Series


Summary of Contents for BMS D1 Series
- Page 1 BMS D1 series Biological Microscope INSRUCTIONS This manual expatiates the using method, troubleshooting, and maintenance about the microscope particularly. Please read it before using carefully. The manufacturer is entitled to amend or improve the instrument. The quality for this microscope is according to GB/T2985-1999 biological...
-
Page 2: Table Of Contents
3-13. Select light path ……………………………………………………………..……..11 3-14. Set video device ………… …………………………………………………..…….…11 3-15. Set photo adapter ………… …… …… ………………………………………..….…11 4. General specification …………………………………………………………….…. … .. 4-1. D1 series biological microscope specification …………………………………….….12 4-2. Objective parameters ……………………………………………………………….…12 5. Troubleshooting … ……………………………………………………………….…. … .. -
Page 3: Before Use
Before Use D1 series 1. Notice ⑴ As the microscope is a precision instrument, a always operate it with care, avoiding physical shake during the operation. ⑵ Do not let the microscope emerge in the sun directly, either not in the high temperature, damp, dusty or acute shake place. - Page 4 D1 series 2.Maintenance ⑴ Wipe the lens gently with a soft lens tissue. Carefully wipe off oil or fingerprints on the lens surfaces with tissue moistened with a little of 3:7 mixture of alcohol and ether or dimethy lbenzene. ★ Alcohol and ether is flammable. Don’t place these chemical near to fire or fire source. For example, when turning on or turning off the electric device, you should use these chemical in a ventilated place.
-
Page 5: Nomenclature
1.Nomenclature D1 series BMS D1 binocular Nosepiece Sliding binocular head Eyepiece Objective Stage Condenser for Normal Coarse illumination adjusting knob Focusing arm Fine adjusting Light condenser for knob Normal illumination... - Page 6 D1 series BMS D1 trinocular Gemel trinocular head Lock-screw Power switch Condenser for Kohler illumination Light adjusting knob Tightness Light condenser adjusting knob Kohler illumination...
-
Page 7: Assemblage
2. Assemblage D1 series 2-1 Assemble scheme: The below numbers denote the assembling older. ★ Before assembling, make sure there is no dust or dirt. Assemble carefully and do not scrap any part or touch the glass face. -
Page 8: Assemble Steps
D1 series 2-2-1 Set Condenser (Figure 4/5) Assemble Steps Set condenser for normal illumination 1.Turn the coarse knob with the direction showed to make the stage to highest position. (Figure 4) 2. Turn the condenser knob with the direction showed to make the condenser holder down to suitable position. - Page 9 D1 series Set or replace bulb (Halogen 7) 2-2-3 ◎ Please use assigned Philips 7388 halogen bulb 6V20W. In order to use the bulb longer or prevent blowout, please do not touch it barehanded. Please swap it with soft cloth if you leave fingerprint on the bulb.
-
Page 10: Operation
3. Operation D1 series illumination (Figure 10) 1. Set the power switch ① at “ON” after connect power suppler. 2. Use knob ② to adjust the brightness more comfortable. Clockwise for brightness and counter-clockwise for darkness. (Figure 10) Under low power, the bulb will have long life. -
Page 11: Adjust Tightness Of Focusing
D1 series Adjust tightness of focusing If the coarse adjustment is too tight or uncomfortable or image swiftly out of focal plane after focusing or the stage sleeks down, please use knob to adjust. (Figure 13) Turn the knob with the direction showed to tight the knob. -
Page 12: Adjust Interpupillary Distance
D1 series Adjust interpupillary distance Slide the board with direction showed to make image through both eyepieces syncretic. (Figure The interpupillary distance: 52-75mm Please remember own interpupillary distance for future using. (Suitable for sliding head) Turn both prism houses to adjust interpupillary distance till the image through both eyepiece syncretic. -
Page 13: View Field Diaphragm
D1 series View field diaphragm(Figure 19) The view field diaphragm can prevent the light diameter into condenser in order to remove varied-light and strength the image. When the image of view field diaphragm is just outside of view field, the objectives can provide optimal performance to get the clearest image. -
Page 14: Use Objective With Oil
D1 series 3-10 Use objective (100X) with oil 1. Use objective 4X to find image. 2. Drop oil on sample. (Figure 22) 3. Turn the nosepiece counter-clockwise and slide the objective 100X into light path. Then turn fine adjusting knob to make image clear. -
Page 15: Select Light Path
D1 series 3-13 Select light path (Figure 25) The light path selecting lever controls the prismatic between binocular and trinocular. When the lever is in the most inside, light enters the binocular fully; when the lever is in the most outside, the prismatic is 8:2 for binocular and trinocular. -
Page 16: General Specification
4. General Specification D1 series D1 series biological microscope specification Optical system Color corrected optical system Sliding binocular head, 45°inclined, 360°rotatable Gemel binocular head, 30°inclined, 360°rotatable Head Gemel trinocular head, 30°inclined, 360°rotatable with prismatic: binocular100%, binocular/trinocular 80%/20% Eyepiece PL10X high point plan eyepiece, 18mm... -
Page 17: Troubleshooting
5. Troubleshooting D1 series Symptom Cause Remedy 1. Opticis View field diaphragm is not large enough Open the diaphragm more Condenser is too low Adjust condenser position The lamp is not bright enough Condenser is not center Center condenser Light path selecting lever is not at position for... - Page 18 D1 series Symptom Cause Remedy interpupillary is not correct Adjust it The eyes tired easily. The both view field are Diopter is not correct Adjust it not superposition The both eyepieces are different Please use same one 2. Mechanics image is not focused...
Need help?
Do you have a question about the D1 Series and is the answer not in the manual?
Questions and answers
I can't adjust the interpupilar distance because the oculars fall