Table of Contents
Advertisement
Quick Links
Advertisement
Table of Contents

Summary of Contents for Currys Essentials C11DECT10
- Page 1 INSTRUCTION MANUAL CORDLESS PHONE C11DECT10 2 HANDSET CORDLESS PHONE C22DECT10...
-
Page 2: Table Of Contents
CONTENT UNPACKING ��������������������������������������������������������������� 5 GETTING STARTED����������������������������������������������������� 7 Location ������������������������������������������������������������������������������������������������������������� 7 Talk / Standby Time ������������������������������������������������������������������������������������ 7 Battery Low Warning ��������������������������������������������������������������������������������� 8 Battery Performance ���������������������������������������������������������������������������������� 8 Handset Range ���������������������������������������������������������������������������������������������� 8 Signal Strength���������������������������������������������������������������������������������������������� 8 INSTALLATION YOUR PHONE ������������������������������������� 9 Connecting the Base Unit ���������������������������������������������������������������������� 9 Installing and Charging the Batteries����������������������������������������������... - Page 3 Setting the Flash time �����������������������������������������������������������������������������16 Setting the Ringer Volume and Melody ����������������������������������17 Handset Melody �����������������������������������������������������������������������������������������17 Handset Ring Volume �����������������������������������������������������������������������������17 Keypad Lock ��������������������������������������������������������������������������������������18 CALL-ID FUNCTION (CLIP)���������������������������������������� 19 New Calls ��������������������������������������������������������������������������������������������19 Consulting the Call List ������������������������������������������������������������������19 Calling a Number from the Call List ������������������������������������������20 Erasing a Number from the Call List �����������������������������������������20 Store a Number from the Call Log into the Phonebook Memory���20 Add New Records to Phonebook Memory �������������������������������21...
- Page 4 Congratulations on the purchase of your new Curry Essentials Cordless Phone� We recommend that you spend some time to read this Instruction Manual in order to fully understand how to install and operate it� Read all the safety instructions carefully before use and keep this instruction manual for future reference�...
-
Page 5: Unpacking
Base Unit x 1 PN: 810+71001-82600-00 Mains Adaptor x 1 PN: 5E-AD060050B AAA Batteries x 2 PN: GP45AAAHC Telephone Line Cord x 1 INSTRUCTION MANUAL PN: 108+05182-00000-00 CORDLESS PHONE C11DECT10 Instruction manual x 1 2 HANDSET CORDLESS PHONE PN: 703+07100-00100-00 C22DECT10 GB-5... - Page 6 (for C22DECT10 only) Cordless Telephone x 1 PN: 800+71002-82600-00 Charging Cradle x 1 PN: 880+71002-82600-00 AAA Batteries x 2 PN: GP45AAAHC If items are missing, or damaged please contact Partmaster (UK only). Tel: 0870 6001 338 for assistance. GB-6...
-
Page 7: Getting Started
GETTING STARTED Location You need to place the base unit within 1�8 metres of the mains power socket and telephone socket so that the cables will reach� Make sure it is at least 1 metre away from other electrical appliances to avoid interference� Your telephone works by sending radio signals between the handset and the base unit�... -
Page 8: Battery Low Warning
Battery Low Warning If the icon is flashing in the display and you hear a warning beep every minute during a call, you will need to recharge your handset before you can use it again� Battery Performance To keep the batteries in the best condition, leave the handset off the base unit for a few hours at a time�... -
Page 9: Installation Your Phone
INSTALLING YOUR PHONE Connecting the Base Unit 1� Plug the mains adaptor cable & telephone line cable into the base unit� 2� Then plug the mains adaptor and telephone line cable into their wall sockets� 3� Always use the cables provided in the box� Installing and Charging the Batteries 1�... -
Page 10: Handling The Batteries
4� Put the handset on the base unit to charge� Charge for 14 hours the first time you charge� A beep indicates that the handset is properly placed on the base unit� Use only base unit provided. Use only NiMH rechargeable batteries. Handling the Batteries • Improper or incorrect use of batteries may cause corrosion or battery leakage, which could cause... - Page 11 (for C22DECT10 only) Place charging cradle within reach of a mains power wall socket� 1� Plug the charging cradle into the mains power wall socket� 2� Insert the 2 x AAA rechargeable batteries supplied, taking note of the ‘+’ and ‘-’ markings inside the battery compartment, then slide the battery compartment shut�...
-
Page 12: Getting To Know Your Phone
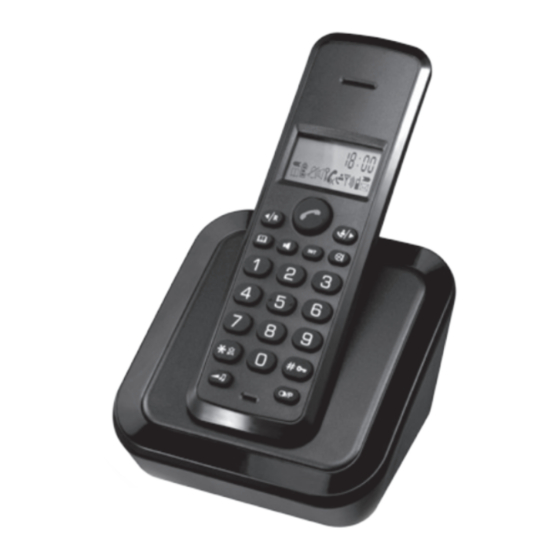
GETTING TO KNOW YOUR PHONE Handset TALK ON / OFF LEFT / FLASH CALLER ID / RIGHT PHONE BOOK SPEAKER INTERNAL CALL MUTE / DELETE RINGER ON / KEYPAD LOCK RECEIVER VOL / RINGER TONE / RINGER VOL LNR / PAUSE / FLASH LONG SHORT Display... -
Page 13: Operation
OPERATION Outgoing Calls Making a Phone Call 1� Press the button� You will hear the dial tone� 2� Enter the desired telephone number� 3� Press the button again when you want to terminate the call� Call Setup with Dial Preparation 1�... -
Page 14: Storing Redial Number To Memory
Remark: button can be used as the button to toggle the last 3 numbers dialed. Storing Redial Number to Memory 1� Select your favour redial number that you want to store 2� Press and hold the button for 2 seconds 3�... -
Page 15: Programming A Memory Number
Programming a Memory Number You can program 20 indirect numbers (of max� 24 digits) in the phone’s memory� 1� Press and hold the button until the icon flashes on the display� 2� Enter the telephone number you wish to store� 3�... -
Page 16: Setting The Volume
microphone will be deactivated� The icon appears on the display� Press the button again when you want to continue the conversation� Setting the Volume 1� During a conversation you can set the volume by pressing the button� 2� You can set the volume between using button�... -
Page 17: Setting The Ringer Volume And Melody
2� The display will show: [S] or [L]� 3� The flash time setting will disappear after 2 seconds from the display� Setting the Ringer Volume and Melody Handset Melody 1� Press and hold the button until the current melody is heard� 2�... -
Page 18: Keypad Lock
Keypad Lock When the keypad is locked, pressing any key will have no effect during standby (except holding down the button)� 1� Press and hold the button� The icon appears on the display and the keypad is locked� 2� Press and hold the button again to un-lock the keypad�... -
Page 19: Call-Id Function (Clip)
CALLER-ID FUNCTION (CLIP) The phone displays the telephone numbers of incoming calls� This function is only possible if you are subscribed to a telephone operator that provides this service� Contact your telephone provider for more information� When you receive a call, the numbers are saved in a call list� This list can hold 20 telephone numbers (each with a maximun of 23 digits)�... -
Page 20: Calling A Number From The Call List
5� You can delete the Call List by pressing the button� NOTE: On some networks with Caller ID, time and date will not be displayed. Calling a Number from the Call List 1� Press the button and then press the buttons to scroll through the Call List until the desired number is shown on the display�... -
Page 21: Add New Records To Phonebook Memory
12345678 After editing the Caller ID number, press the button again� Enter the memory location (00 to 19) where you want to store the number� Press the button again to confirm and go back to standby mode Add New Records to Phonebook memory You can store up to 20 phonebook records in the handsets�... -
Page 22: Review / Edit / Dial Stored Phonebook Records
The record is now saved into the Phonebook� Press the button to go back to standby mode� Repeat steps 1 to 5 to add another record� Review / Edit / Dial Stored Phonebook Records During standby mode, 1� Press the button�... -
Page 23: Register/De-Register A Handset
REGISTER/DE-REGISTER A HANDSET Register Handset to Base You can subscribe 5 handsets to 1 base unit� By default, each handset is subscribed as handset 1 on the base unit upon delivery (base unit 1)� You only need to subscribe the handset if: • The handset subscription has been removed from the base unit (e�g�, for re-initialization)�... -
Page 24: De-Register Handset From Base
Enter the base PIN code (0000)� If the PIN is wrong, the handset will restart searching for the base� When the handset is registered, it will show [HS] followed by the handset number� De-Register Handset from Base You can remove a handset from a base unit to allow another handset to be registered�... -
Page 25: Call Transfer & Intercom Between 2 Handsets
CALL TRANSFER & INTERCOM BETWEEN 2 HANDSETS (for C22DECT10 only) Call Transfer and Conference Call during an External Call During an external call, press the button followed by the number (1 to 5) of the other handset� HS-1 HS-X The other handset will start to ring: Method 1: 1�... -
Page 26: Interal Call (Intercom)
2� Press the button to end the call� Internal Call (Intercom) In standby press the button followed by the number (1 to 5) of the other handset� The other handset will start to ring� You can stop the ringing by pressing the button�... -
Page 27: Specification
SPECIFICATION Model C11DECT10 / C22DECT10 1881�792MHz ~ Frequency Range 1897�344MHz Channel bandwidth 1728KHz Operation Range Outdoor range 300m Operating Time Talk time 10 hours Temperature Range for 5ºC to 35ºC Operating RF output power 10mW Electrical Power average per channel Features and specifications are subject to change without prior notice�... -
Page 28: Safety First
SAFETY FIRST For your continued safety and to reduce the risk of injury or electric shock, please follow all the safety precautions listed below� • Read all instructions carefully before using the telephone and keep them for future reference� • Retain the manual�... - Page 29 can cause electric shock when the product is subsequently used� • During thunderstorms, avoid using telephones except cordless types� There may be a remote risk of an electric shock from lightning� • Do not use the telephone to report a gas leak, when in the vicinity of the leak�...
-
Page 30: Caution
CAUTION Installation • Never install a telephone wiring during a lightning storm� • Never install a telephone wall socket in wet locations unless it is specifically design for wet locations� • Never touch uninsulated telephone wires or terminals unless the telephone line has been disconnected at the network interface�... - Page 31 memo...
- Page 32 If you require a replacement for any of the items listed below, please quote their corresponding part numbers: Replacement Part Part Number for C11DECT10 and C22DECT10 Cordless Telephone 800+71001-82600-00 Base Unit 810+71001-82600-00 Power Adaptor 5E-AD060050B AAA Batteries GP45AAAHC Telephone Line Cord...
Need help?
Do you have a question about the C11DECT10 and is the answer not in the manual?
Questions and answers