
Summary of Contents for Agrint ARIETE
- Page 1 ORIGINAL USE AND MAINTENANCE INSTRUCTIONS ARIETE BIO-SHREDDER Ariete-e-06 Original use and maintenance instructions : ARIETE...
-
Page 2: Notes
NOTES This manual is an integral part of the machine. This manual is provided with the machine and the user should always have a copy with him. Aim of the manual This manual contains all useful information for a correct and safe use of the machine. Before starting to use this machine, the user should read this manual carefully. -
Page 3: Ec Conformity
EC CONFORMITY The ARIETE bio-shredders meet the security and safety requirements contained in the Machinery Directive 2006/42/CE. In order to demonstrate conformity with the above mentioned directives, the following harmonized standards have been consulted: UNI EN ISO 12100:2010; 13857:2008; 13683:2011. -
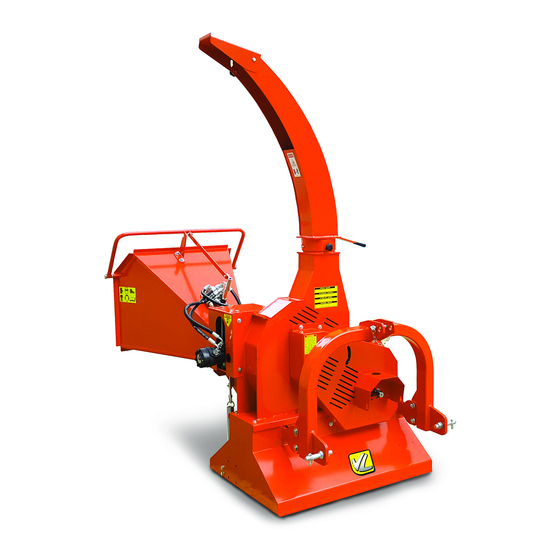
Page 4: Technical Characteristics
Version Max ø of cut Knives Power Peripheral speed Weight take-off of the rotor speed Inch n° STANDARD 25-50 44.5 ARIETE NO STRESS 25-50 44.5 Volume of the machine STANDARD NO STRESS 1155 1155 2220 2220 1290 1290 2165 2165... -
Page 5: Instructions For Using The Machine
INSTRUCTIONS FOR USING THE MACHINE The machine is designed for shredding plant material, leaves and natural pieces of wood of the dimensions indicated in the specific techniques. Never to introduce the following materials in the shredder: plastics, glass, rocks or metal. Before introducing the material in the charging hopper, make sure it does not contain foreign objects. -
Page 6: Safety Labels
SAFETY LABELS In this section, the safety labels stuck on the machine are reproduced and explained. 1. While working, always wear suitable protective clothes. 2. While working, always wear gloves. 3. While working, always wear hearing protection. 4. While working, always wear eye protection goggles. -
Page 7: The New Machine Assembly
THE NEW MACHINE ASSEMBLY 1. THE EXHAUST PIPE ASSEMBLY 1. Take the following things out of the box: the "MAH" machine, the "TS" exhaust pipe and the instructions manual. 2. Insert the "TS" exhaust pipe in the "3" gasket type union which is situated on the upper part of the machine. - Page 8 1. FOR CHECKING THE LENGTH OF THE PTO SHAFT 1. After having linked up the ARIETE to the third point, please check it is placed in a horizontal and central position in relation to the tractor using the adjustment devices.
-
Page 9: How To Shorten A Pto Shaft
4. Use a file to bevel the extremities of the tubes. 5. Clean and grease the two metallic tubes and insert the first part of the PTO shaft inside the other. 6. Set up the PTO shaft between the tractor and the ARIETE and check its length another time. -
Page 10: Feed Roll Speed Control
FEED ROLL SPEED CONTROL ONTROL LEVER The control device, to start up the feed roll, is composed by a command bar indicated with the letter "D". It can be engaged in three different positions: "0 Neutral position. "1" Activation of the feed roll which starts to move forward. "2"... -
Page 11: How To Use The Machine
HOW TO USE THE MACHINE 1. WARNING The machine is used to be used with a tractor equipped with a PTO 540 rotations/minute. 2. Hitch the machine with the hydraulic lift of the tractor. 3. Set up the PTO shaft between the tractor's PTO and the machine's PTO. Make sure that the two anti- rotation chain of the PTO shaft are secured respectively to the tractor and to the machine. -
Page 12: Maintenance Instructions
MAINTENANCE INSTRUCTIONS All the information concerning both the maintenance operations and their maturity dates are indicated in the “A” form. Failure to respect the deadlines might affect the proper functioning of the machine and may invalidate any warranty. “A” FORM AND SCHEDULED MAINTENANCE END OF FIRST AFTER... -
Page 13: Greasing
1. G REASING Within the deadlines indicated in the “A” form, grease the following points : “"A", "B", "C", "D", "E", "F", "G". All the greasing points indicated in the “A” form are provided with greaser HYDRAULIC FORM "A" UNI 7663. For greasing we suggest you to use exclusively NLGI 2 MULTIFUNCTIONAL-GREASE containing LITHIUM. - Page 14 3. O IL FILTER SUBSTITUTION a) To substitute the oil filter, please read the following instructions: 1. Couple the machine with the lift and raise it completely. 2. We suggest you to place a container under the filter in order to collect any waste oil leakage. 3.
-
Page 15: Knives Sharpening, Reversing Or Substitution
NIVES SHARPENING, REVERSING OR SUBSTITUTION a) If you want to check the conditions of both the rotor and knives, please read the following instructions: 1. Stop the machine. 2. Unscrew the bolts and swing the “CP” component. 3. Check the conditions of the four knives by rolling the rotor with your hand. -
Page 16: Counter-Knife Regulation And Reversing
OUNTER-KNIFE REGULATION AND REVERSING a) In order to regulate the counter-knife, please read the following instructions: 1. Unscrew the lock nuts number “2”. 2. Use your hand to roll the rotor until the “CT” knife moves closer to the “CC” counter-knife. 3. -
Page 17: Driving Belt Regulation And Replacement
RIVING BELT EGULATION AND REPLACEMENT. a) In order to regulate the driving belt: 1. Take apart the “F” protection case by unscrewing the ten “E” bolts. 2. Unscrew the “B” counternuts nuts and screw “A” nut in order to tighten belts or unscrew the “A” nut to loosen them. -
Page 18: Dysfunctions And Solutions
DYSFUNCTIONS AND SOLUTIONS DYSFUNCTIONS CAUSES AND SOLUTIONS -damaged knife – Check the knife and replace it if necessary. -damaged counter-knife - Check the counter-knife and replace it if necessary. Strange vibrations. -jammed machine – Clean the grinding chamber. - Wrong speed of the feed roller– use the regulator screw in order to raise/decrease the speed. -
Page 19: Transport
TRANSPORT When the machine is not used, it can be moved only if the drive unit is disconnected. <Important> : Move slowly trying to avoid street holes. <Note> : On the street, respect the new street code and attach the road signs on the posterior side of the machien. -
Page 20: Maintenance Paper
MAINTENANCE PAPER In this paper the user should note all the events that concern the machine (from the point of view of work and maintenance) in order to describe its state. DATE WORKING MAINTENANCE NOTES OPERATOR HOURS... - Page 21 SPARE PARTS LIST...
-
Page 22: Mechanisms
MECHANISMS... -
Page 23: Machine Structure
MACHINE STRUCTURE... -
Page 24: Hopper -Exhaust Tube - Third Point
HOPPER –EXHAUST TUBE – THIRD POINT... -
Page 25: Stress Hydraulic System
NO STRESS HYDRAULIC SYSTEM... -
Page 26: Table Of Contents
INDEX NOTES .................................... 2 EC CONFORMITY ................................. 3 TECHNICAL CHARACTERISTICS ..........................4 INSTRUCTIONS FOR USING THE MACHINE ......................5 SECURITY ..................................5 GENERALITIES................................. 5 LOCAL RULES .................................. 5 WARNING ..................................5 SAFETY LABELS ................................6 THE NEW MACHINE ASSEMBLY ..........................7 1.
Need help?
Do you have a question about the ARIETE and is the answer not in the manual?
Questions and answers