Table of Contents

Summary of Contents for SwanStone Swan STMK72-3636
- Page 1 Swanstone Shower Wall Kits and Panels www.swanstone.com m Product Warnings m Safety Guidelines m Kit Contents m Required Tools m Preparation Tips m Installation Procedure m Cleaning & Maintenance m Surface Repair m Warranty Information Form # 193-05-16...
-
Page 2: Safety Guidelines
Swanstone manuals. The installation of this product can of our product(s). The warnings and require using power tools. Do not use power tools without instructions in this installation guide adequate training. - Page 3 Sharp Edge Hazard fans. If adequate ventilation is not achievable or practical, use After cutting the edge of a Swanstone panel, it can be respiratory protective equipment. sharp. Wear protective gloves to prevent personal injury.
-
Page 4: General Information
Make sure all related circuit breakers are turned OFF. Test for live circuits or wiring inside any wall where installation of the STMK72-3636 Swanstone product requires cutting into a wall. STMK96-3636 STMK72-3662 Electrocution Hazard... - Page 5 This measurement cannot exceed the width of the Depending on the condition of the existing wall surface, Swanstone back panel. If the wall opening is too large, other additional silicone may be required to ensure contact between methods or two panels will be required to cover the wall.
-
Page 6: Installation Procedure
Wallboard Installation Masonite Note: If the Swanstone wall panels will be installed over an m Clean the wall surface to remove any dust, soap scum, or existing shower wall surface, proceed to the next section. - Page 7 For a finished appearance, install greenboard up to the front edge of the shower base UNLESS optional apron strips will be cut from Swanstone material and installed next to the front edge of the shower base. In that case, leave a 1/2” gap between the shower base and the greenboard.
- Page 8 Place the panel, finished side facing up, on a flat surface. Using a pencil, lightly mark the center of the back panel. Dust Hazard When cutting or drilling the Swanstone product, use a dust collection method which prevents dust particles from going into the air. Always work in a well- ventilated area.
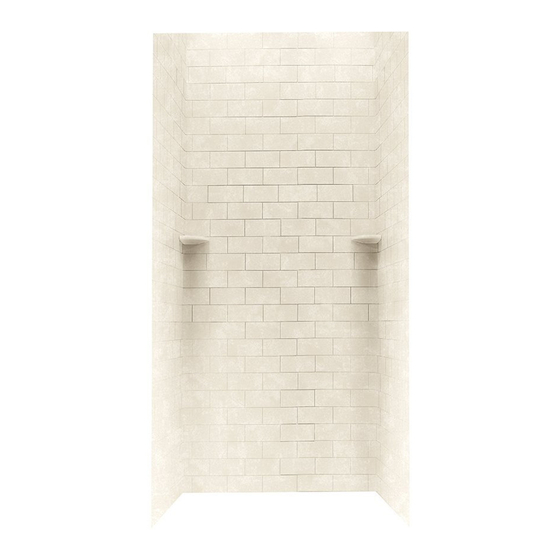
- Page 9 Flat Panel WARNING Dust Hazard When cutting or drilling the Swanstone product, use a dust Square Tile or Subway Tile Panel collection method which prevents dust particles from going into the air. Always work in a well-ventilated area. To keep the area well-ventilated, open windows and use exhaust fans.
- Page 10 WARNING Dust Hazard When cutting or drilling the Swanstone product, use a dust collection method which prevents dust particles from going into the air. Always work in a well-ventilated area. To keep the area well-ventilated, open windows and use exhaust fans.
-
Page 11: Panel Installation
Installation Procedure WARNING Panel Installation WARNING This process is not recommended for the do-it- yourself homeowner. Fumes Hazard The fumes from the silicone and solvents used Using hot melt glue in place of bracing requires application by the installer can be harmful if used in an by a qualified installer. - Page 12 Measure the distance from the top of the shower base to Attach the apron strips to the wall. the outside of the panel. Cut two pieces of the Swanstone material to fit in this area. Note: This illustration shows the recommended 1/2” gap between the wallboard edge and the front of the shower floor (helps prevent water damage due to wicking effect).
- Page 13 Place two braces against each left and right wall. For corner shower wall installation use the following illustrated bracing design. ATTENTION: Additional bracing may be required if the Swanstone brand panel does not make full contact to the wall it is adhered to. Attach this board to...
- Page 14 Installation Procedure Corner Soap Dish Installation Apply silicone to the edge of the soap dish. The soap dish is a corner mount design. The soap dishes can Note: Either clear or color matched silicone can be used for be stacked in one corner or placed in opposite corners. attaching the soap dish.
- Page 15 Installation Procedure Measure and cut the corner moldings to length. IMPORTANT NOTICE Do not use oil-based cleaners, such as mineral spirits, to clean the panels. The oil in the cleaner will prevent the panel from adhering properly to the wall. Apply a 1/8 to 1/4”...
-
Page 16: Care And Cleaning
Care and Cleaning Apply color-matched 100% silicone sealant to all of the inside seams, as shown. The Swanstone products are stain and abrasion resistant; however, the finish requires reasonable care. IMPORTANT NOTICE Because cleaning products change over time, always check the manufacturer’s instructions to make sure it is compatible... - Page 17 Warranty Warranty NOTES If a Swan product covered by this warranty is found to be defective in materials or workmanship, after inspection by an authorized Swan representative, we will repair, or at our option, exchange the product for a similar model. This warranty extends for a designated period of time, so long as it remains in use in its original place of installation.
- Page 18 Swan 800-325-7008...
- Page 20 Save these Installation Instructions for future reference. They provide important information on cleaning, maintenance, and surface repair of the Swanstone Wall Systems and Panels. Form # 193-05-16 www.swanstone.com...
Need help?
Do you have a question about the Swan STMK72-3636 and is the answer not in the manual?
Questions and answers