Table of Contents
Advertisement
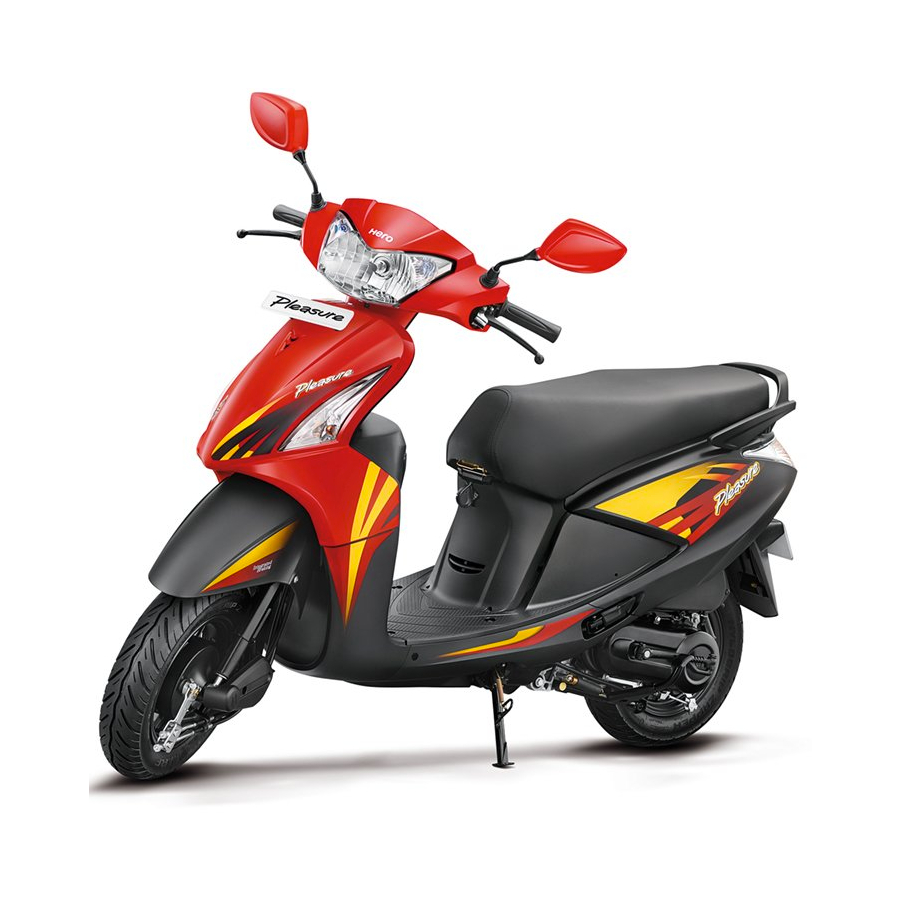
Thank you for selecting a
continued riding pleasure in the years ahead.
We, at
Hero MotoCorp
performance on a continual basis, as an intrinsic element of our corporate philosophy. To
achieve this we commit ourselves to continue product innovations to improve environment
compatibility and strengthen the green supply chain. We are also using non asbestos brake
shoes and engine gaskets which are environment friendly in nature.
This booklet is your guide to the basic operation and maintenance of your new
PLEASURE. Please take time to read it carefully. As with any fine machine,
Hero MotoCorp
proper care and maintenance is essential for trouble-free operation and optimum
performance.
Your Authorised Distributor and Dealer(s) of the Distributor ("Dealer") will be glad to provide
further information or assistance and is equipped to handle your future service needs.
Let us make this world a safer, healthier and more environment friendly place.
PREFACE
Hero MotoCorp
, are committed to demonstrate excellence in our environment
PLEASURE. We wish you many miles of
No: IBUD
Advertisement
Table of Contents

Related Manuals for HERO PLEASURE


Summary of Contents for HERO PLEASURE
- Page 1 This booklet is your guide to the basic operation and maintenance of your new PLEASURE. Please take time to read it carefully. As with any fine machine, Hero MotoCorp proper care and maintenance is essential for trouble-free operation and optimum performance.
- Page 2 AT THE TIME OF ITS PRINTING APPROVAL, AND THE ACCURACY OR CORRECTNESS OF THE SAME IS NOT UNDERTAKEN OR GUARANTEED. RESERVES THE RIGHT TO MAKE CHANGES IN ITS Hero MotoCorp Ltd CONTENTS AT ANY TIME WITHOUT NOTICE AND/OR INCURRING ANY OBLIGATION, WHATSOEVER. NO ONE IS ALLOWED TO REPRODUCE ANY...
-
Page 3: Table Of Contents
Removal from storage Ÿ Ÿ Center cover BASIC TROUBLESHOOTING Ÿ Front upper cover DELIVERY CERIFICATE Ÿ Rear view mirror HERO GENUINE PARTS Ÿ Headlamp case JOBS APPLICABLE TO PERIODIC SERVICES Ÿ Headlamp focus SERVICE RECORD SHEET Ÿ PRE-RIDE INSPECTION SERVICE ADVICE SHEET... -
Page 5: Vehicle Identification
Year of Month of Assembly Plant Serial Number Description Manufacturing Manufacturing Model: Pleasure Engine Variants Sheet metal wheel/Integrated braking Cast wheel/Integrated braking VIN and Engine No. may be required: 1. During registration of the vehicle. 2. For dealing with Legal & Insurance Departments. -
Page 6: Product Specification
PRODUCT SPECIFICATION ITEM SPECIFICATIONS Dimensions Overall length 1750 mm 705 mm Overall width Overall height 1115 mm Wheelbase 1240 mm Saddle height 760 mm Ground clearance 125 mm Weight Kerb weight 101 kg Capacities Engine oil 0.80 litre at disassembly and 0.70 litre at draining 0.12 litre at disassembly Transmission oil 0.10 litre at draining... - Page 7 PRODUCT SPECIFICATION ITEM SPECIFICATIONS Internal expanding shoe type (Dia. 130 mm) Front/Rear brake Drum type (Integrated braking) Transmission Primary reduction Variomatic (2.51-0.85) Final reduction 50/20x49/13 (9.423) Clutch system Dry, Automatic Centrifugal Clutch Electricals Battery 12V - 4Ah (ETZ-5) *MF Battery Alternator 110 W Starting System...
-
Page 8: Vehicle Safety
VEHICLE SAFETY IMPORTANT SAFETY INFORMATION Your vehicle can provide many years of service and pleasure if you take responsibility for your own safety and understand the Keep your vehicle in safe condition challenges you can meet on the road. There is... -
Page 9: Protective Apparel
PROTECTIVE APPAREL Sturdy boots with non-slip soles to help Ÿ protect your feet and ankles. For your safety, we strongly recommend that Leather gloves to keep your hands warm you always wear a helmet which should Ÿ and help prevent blisters, cuts, burns, and conform as per your country standards, in bruises. - Page 10 PROTECTIVE APPAREL Always wear HELMET Wear a face shield or goggles Wear bright or reflective clothing Wear gloves Shoes should be close fitting, low heels and offer ankle protection...
-
Page 11: Load Limits And Guidelines
However exceeding the weight limit or carrying an unbalanced load can seriously affect your vehicle's handling, braking and stability. Non accessories, Hero MotoCorp modifications, and poor maintenance can reduce your safety margin. The following pages give more specific information on loading, accessories and modifications. -
Page 12: Accessories And Modifications
Accessories emission standards. We strongly recommend that you use only genuine accessories that Hero MotoCorp have been specifically designed and tested for your vehicle. cannot test all Hero MotoCorp other accessories, you must be personally... - Page 13 Ÿ incompatible spares and accessories can upset or deteriorate your vehicle’s running condition. Genuine engine oil: Hero 4T Plus SAE 10W 30 SJ grade (JASO MA) engine oil Ÿ recommended by and make sure you change it every 6000 kms.
-
Page 14: Vehicle Views
VEHICLE VIEWS TOP VIEW (1) Choke knob (10) Side stand indicator (2) Horn switch (11) Hi-beam indicator (3) Turn signal switch (12) Turn signal indicator (4) Integrated brake lever (13) Fuel gauge (5) Parking lever (14) Front brake lever (6) Rear view mirror (15) Throttle grip (7) Dimmer switch (16) Starter switch... - Page 15 VEHICLE VIEWS LEFT SIDE VIEW (1) Side stand switch Tail/stop lamp (2) Side stand Rear grip (3) Main stand Boot lamp (4) Pillion step (10) Luggage hook (5) Kick starter pedal (11) Headlamp (6) Rear turn signal lamp *Accessories and features shown may not be part of standard fitment.
- Page 16 VEHICLE VIEWS RIGHT SIDE VIEW (1) Exhaust muffler Front turn signal lamp (2) Oil level dipstick Position lamp (3) Pillion step Center compartment (Inside) (4) Front inner box *Accessories and features shown may not be part of standard fitment.
-
Page 17: Parts Function
PARTS FUNCTION Instruments and indicators The indicators are in the speedometer panel above the headlamp. The functions are as below : Description Function Sl. No. Odometer Shows accumulated mileage Turn signal indicator Flashes when turn signal switch is operated Side stand indicator Light glows when the side stand is down Hi beam indicator Light glows when headlamp is in Hi beam Speedometer... -
Page 18: Brakes (Integrated Braking)
MAJOR COMPONENTS Measured at the tip of brake levers, free play (Information you need to operate this vehicle) should be maintained at 10-20 mm. Adjustment: Brakes (Integrated braking) Brakes are items of personal safety and should Right hand front brake cable (A) on “F” side always be maintained with proper adjustments. - Page 19 Make free play adjustment by turning the Ÿ Turn the second adjuster nut (6) until a gap Ÿ adjuster nut (8) in the brake arm (9). is created between joint (7) and the slot on Check the free play of integrated brake Ÿ...
-
Page 20: Fuel
If the same still persists, consult your Authorised Distributor/Dealer. Failure to do so is considered misuse, and damage caused by misuse is not covered under Hero MotoCorp warranty policy. (b) Petrol containing alcohol If you decide to use a petrol containing alcohol... -
Page 21: Tyres (Tubeless)
(methyl or wood alcohol) that does not To safely operate your vehicle, your tyres contain cosolvents and corrosion inhibitors must be of the proper type and size in good for methanol. condition with adequate tread and correctly Never use petrol containing more than 5% inflated for the load you are carrying. - Page 22 should also examine tyre treads & side walls punctures whenever a tyre is not fully inflated. for wear, damage & foreign objects. Always check air pressure when your tyres are Look for: "cold"-when the vehicle has been parked for at Bumps or bulges in the side of the tyre or least three hours.
- Page 23 (d) Tyre repair WARNING If a tyre is punctured or damaged, you should Using tyres that are excessively worn or replace it, not repair it. As mentioned below, a Ÿ improperly inflated can cause a crash in tyre that is repaired either temporarily or which you can be seriously hurt and killed.
-
Page 24: Ignition Switch
ESSENTIAL INDIVIDUAL COMPONENTS Ignition Switch The ignition switch (1) is on the right side below the steering. “ON” ( ) Position “OFF”( ) Position/ (1) Ignition switch Lock Open (2) Ignition key (3) Steering lock position “SEAT OPEN” (4) Seat open Position “LOCK”... -
Page 25: Handlebar Switches Control
HANDLEBAR SWITCHES CONTROL (3) Horn switch ( ) (a) Right handlebar controls Press the horn switch (3) to operate the horn. Ÿ (1) Starter switch ( ) The starter switch (1) is next to the throttle grip. When the starter switch is pressed, the starter motor cranks the engine with the front or integrated brake lever applied. -
Page 26: Seat Lock
Opening and closing the seat lock, see (page CAUTION 22). Do not try to turn the key to "LOCK" position MAXIMUM WEIGHT LIMIT: 10 kg while riding the vehicle, which may lead to loss Never exceed the maximum weight limit, of vehicle control. -
Page 27: Luggage Hook
Use of non-standard adaptor may cause damage to the mobile phones. Hero will not be responsible for MotoCorp damages caused due to use of non-standard adaptor. -
Page 28: Boot Lamp/Boot Lamp Switch
Always keep the mobile charging socket cap Ÿ closed after use to prevent dust or water entry during rains/water wash. Do not direct water jet towards the socket Ÿ even with cap closed to avoid any short circuit, always dry the area using a dry cloth or moisture free compressed air before use. - Page 29 down (Ignition switch “ON”), an indicator lamp glows in the speedometer panel. (1) Screws (2) Body cover Remove screws/washers (3) from the center Ÿ (1) Side stand indicator compartment. Remove the bolts (4). A side stand switch (2) is provided on the side Ÿ...
-
Page 30: Body Cover
Remove the screws/washers (3) from Ÿ the rear side of the body cover. (5) Boot lamp connector (6) Center compartment Installation Installation can be done in the reverse order of (3) Screws removal. Remove the screws/washers (4) from Ÿ NOTE the center compartment. -
Page 31: Center Cover
right side body cover. NOTE Remove screws (2) from center cover. Ÿ Park the vehicle on its main stand when servicing Remove the center cover (3). Ÿ the vehicle with the center compartment removed. Installation Installation is in the reverse order of removal. Front upper cover (Removal) Remove screws/washers (1) from the Ÿ... -
Page 32: Rear View Mirror
Loosen the lock nut (2) until it will no Disconnect the left and right turn signal Ÿ Ÿ longer turn. lamp wiring connector(3) from the front Loosen the rear view mirror (3) and remove it. upper cover (4). Ÿ Installation Install the rear view mirror until it will Ÿ... -
Page 33: Headlamp Focus
(2) Screws (1) Bolt (A) Up (B) Down Disconnect the headlamp connector (5), Park the vehicle on main stand on a Ÿ Ÿ position lamp connector (6) and remove level ground in front of a wall. the headlamp case. Loosen the bolt (1) and move the Ÿ... -
Page 34: Anti-Theft Tips
Engine oil level-Add engine oil if required Use an additional anti-theft device of good Ÿ Ÿ quality. (page 46 ). Check for leaks. Never park your vehicle in an isolated area. Fuel level-Fill fuel tank when necessary Ÿ Ÿ Park as far as possible in a designated (page 16). - Page 35 Do not use the electric starter for more than 5 Turn the ignition switch (3) to "ON". Ÿ seconds at a time. Release the starter switch for approximately 10 seconds before pressing it again. CAUTION Do not attempt to start the engine and run the vehicle without a battery.
-
Page 36: Running In
Continue warming up the engine until it runs or it may result in loss of control. Ÿ smoothly and responds to the throttle, when Stand on the left side of the vehicle Ÿ the choke knob is at “OFF” position (B). and push it forward off the main stand Warm engine gripping below the seat using the right... - Page 37 (1) Integrated brake lever (2) Parking lever To accelerate, open the throttle (3) Ÿ gradually, the vehicle will move forward. Do not "BLIP" the throttle (open and close rapidly) as the vehicle will move forward suddenly, causing possible loss of control and loss of fuel economy.
- Page 38 When slowing down the vehicle, Ÿ coordination of the throttle (3), integrated brake (4) and front brake (5) is most important. Since the vehicle is equipped with an integrated braking, by pressing the brake lever provided on the left side of the handlebar would ensure both front and rear brakes applied simultaneously.
- Page 39 When approaching a corner or turn, After completing the turn, open the Ÿ Ÿ close the throttle (3) fully, and slow down throttle gradually to accelerate the the vehicle by applying integrated brake vehicle. (4). (3) Throttle 0 0 0 0 2 km/h (4) Integrated brake...
- Page 40 Avoid continuous use of the brakes, which When descending a steep gradient, Ÿ may result in overheating and reduction of close throttle (3) fully and apply integrated braking efficiency. brake (4) to slow down the vehicle. CLOSE 0 0 0 0 2 km/h (3) Throttle (4) Integrated brake...
-
Page 41: Parking
When riding on wet or loose surfaces, be HOW TO USE MAIN STAND Ÿ cautious. When riding in wet or rainy conditions or on loose surfaces, the ability to manoeuver and stop will be reduced. For your safety: Ÿ Exercise extreme caution when braking, Ÿ... -
Page 42: Tool Kit
If your vehicle is still warm from recent TOOL KIT operation, give time for the engine and The tool kit (1) is located in the center exhaust system to cool down. compartment (2). We recommend avoiding the use of high Some roadside repairs, minor adjustments pressure water spray. -
Page 43: Maintenance
After cleaning, rinse the vehicle Ÿ thoroughly with plenty of clean water. Strong detergent residue can corrode alloy parts. Dry the vehicle with pressurized air, start Ÿ the engine and let it run for several minutes. Braking efficiency may be temporarily Ÿ... -
Page 44: Safety Precautions
Do not run the engine unless instructed professionals. Wheel removal should normally to do so. be handled only by a skilled Hero MotoCorp Read the instructions before you begin and technician or other qualified mechanic; Ÿ make sure you have the tools and skills instructions are included in this manual only to required. - Page 45 Remember that your Authorised Distributor/ Dealer knows your vehicle best and is fully equipped to maintain and repair it. To ensure the best quality and reliability, use only genuine parts for Hero MotoCorp repair and replacement.
-
Page 46: Maintenance Schedule
Maintenance work should be performed in accordance with standards and specifications of by properly trained and equipped Hero MotoCorp technicians. Your Authorised Distributor/Dealer meets all of these requirements. To be serviced by your Authorised Distributor/Dealer unless the owner has the relevant tools, technical information and is technically qualified. - Page 47 MAINTENANCE SCHEDULE Dear Customer, We would strongly recommend the following schedule, to keep your vehicle in perfect running condition and healthy environment. vehicle subjected to severe use or ridden in dusty area will require more frequent servicing. SERVICE DAYS 1st 60 Next 90 Next 90 Next 90...
- Page 48 SERVICE ITEMS DAYS 1st 60 Next 90 Next 90 Next 90 Next 90 Next 90 Next 90 Next 90 Next 90 Next 90 Next 90 500- 3000- 6000- 9000- 12000- 15000- 18000- 21000- 24000- 27000- 30000- KMS. Note-1 3500 6500 9500 12500 15500...
-
Page 49: Air Cleaner Element
Air cleaner element Remove the air cleaner element (4) Ÿ Refer to the safety precautions (page 40). from housing (5). The air cleaner element is of Dry Paper Pleated type, it should be serviced at regular intervals (page 42). Service more frequently when riding in unusually wet or dusty areas. -
Page 50: Drain Tube
Install the air cleaner element. Engine oil Ÿ Install the removed parts in the reverse Use only Hero Genuine Engine Oil. Ÿ BRAND : Hero 4T plus order of removal. GRADE : SAE 10W 30 SJ Grade CAUTION (JASO MA). -
Page 51: Engine Oil Replacement/Oil Strainer Cleaning
Remove the oil strainer screen cap (2). Ÿ (1) UPPER level mark (2) LOWER level mark (3) Oil level dipstick (2) Oil strainer screen cap Engine oil replacement/Oil strainer The spring (3) and oil strainer screen (4) cleaning Ÿ will come out when the oil strainer screen Change the engine oil with the engine at cap is removed. -
Page 52: Spark Plug
Install the oil strainer screen, spring and oil Spark plug Ÿ strainer screen cap. Install the drain plug. Refer to the safety precautions (page 40). Fill crankcase with the recommended grade Recommended spark plug: Ÿ of oil: Champion-PRZ 9 HC (Federal Mogul) At draining: 0.70 litre WARNING At engine disassembly: 0.80 litre... -
Page 53: Idle Speed
Adjust idle speed by adjusting the throttle Ÿ stop screw by inserting a suitable screw 0.7-0.8 mm driver (1) from the opening provided in the floor panel as shown. Idle stop screw is visible from the Ÿ carburetor maintenance window (2) provided in the center compartment (3 ). -
Page 54: Battery
battery is a Maintenance free (sealed) type. Integrated brake If your battery seems weak and/or electrolyte is leaking (causing hard starting or other electrical troubles), contact your Authorised Distributor/Dealer. NOTE This symbol on the battery means that this product must not be treated as household waste. -
Page 55: Fuse Replacement
tendency to discharge rapidly if any additional Remove the battery (5). Ÿ electrical accessories are fitted on your vehicle. Battery installation Battery storage Reinstall in the reverse order of removal. Be If in case your vehicle is not used for more Ÿ... -
Page 56: Side Stand
Side stand Check the side stand for proper function. Check the spring (1) for damage or loss of Ÿ tension and the side stand assembly for free movement. Check whether the side stand indicator (2) Ÿ glows when the side stand is down. If the side stand is up, the side stand Ÿ... -
Page 57: Bulb Replacement
operate as described in steps 2 or 3, please visit your Authorised Distributor/Dealer. CAUTION Ensure that adequate care should be taken while cleaning the side stand switch. Bulb replacement Refer to the Safety Precautions (page 40). The bulb becomes very hot while the lamp is “ON”, and remains hot for a while after it is (1) Headlamp connector (2) Dust cover... - Page 58 (1) Rear turn signal lamp bulb (1) Bolts Remove the bulb (2) by turning it to Install a new bulb in the reverse order of Ÿ Ÿ counter-clockwise direction. removal. Front turn signal bulb Remove the front upper cover (page 27). Ÿ...
-
Page 59: Removing Road Salt
POLISHING OF VEHICLE hand siphon or an equivalent method. After washing your vehicle, wax all painted Spray the inside of the tank with an aerosol surfaces (except matte painted surfaces) using rust-inhibiting oil. a commercially available polish/quality liquid Reinstall the fuel filler cap on the tank. Ÿ... -
Page 60: Removal From Storage
Remove the battery. Store in an area Ÿ protected from freezing temperatures and direct sunlight. Charge the battery once a month. Wash and dry the vehicle. Wax all Ÿ painted surfaces. Coat chrome plated parts with rust inhibiting oil. Ÿ Inflate the tyres to their recommended Ÿ... - Page 61 BASIC TROUBLESHOOTING 1. STARTING TROUBLE - ENGINE DOES NOT START A. Fuel System Check fuel in fuel tank Refill No fuel Rectify Check fuel lines Leakage/air lock Consult Authorised Distributor/Dealer B. Electric Starter Not Working Replace fuse (ref. Page 51) Check fuse Fused Inspect battery...
- Page 62 BASIC TROUBLESHOOTING 3. POOR PICK UP Spark plug loose in cylinder head Tighten the spark plug Loose Clean & Refit Check air cleaner Clogged Check brake binding Readjust free play of integrated brake lever Improper Adjustment Check tyre inflation pressure Correct tyre pressure Under inflated Consult Authorised Distributor/Dealer...
-
Page 63: Delivery Cerificate
Hero MotoCorp Ltd. DELIVERY CERTIFICATE IBUC No.: DEALER CODE PLEASURE I certify having taken delivery of one Hero MotoCorp vehicle bearing the following particulars:- Engine No. VIN No. Colour/Model Key No. Allotment No. Date of Sale Customer’s Name I have been explained by the dealer about correct and safe driving habits, warranty terms and conditions, service schedules and maintenance tips. - Page 64 Hero MotoCorp Ltd. Alongwith the scooter I have also received the following:- 1. Owner’s Manual 2. 2 Nos. Keys 3. 1 Set of tools (for details see below) 4. Standard Accessories Make 5. Battery Sr. No. 6. Tyre Front Make Sr.
- Page 65 Hero MotoCorp Ltd. DELIVERY CERTIFICATE IBUD No.: DEALER CODE PLEASURE I certify having taken delivery of one Hero MotoCorp vehicle bearing the following particulars:- Engine No. VIN No. Colour/Model Key No. Allotment No. Date of Sale Customer’s Name I have been explained by the dealer about correct and safe driving habits, warranty terms and conditions, service schedules and maintenance tips.
- Page 66 Hero MotoCorp Ltd. Alongwith the scooter I have also received the following:- 1. Owner’s Manual 2. 2 Nos. Keys 3. 1 Set of tools (for details see below) 4. Standard Accessories Make 5. Battery Sr. No. 6. Tyre Front Make Sr.
- Page 67 WHAT ARE THE BENEFITS OF Hero MotoCorp GENUINE SPARE PARTS ? Assures long life Ÿ Ensures economy for a long time Ÿ Safety of vehicle and rider Ÿ Peace of mind Ÿ Value for money Ÿ Assured quality Ÿ CONSEQUENTIAL DAMAGES ON USING NON-GENUINE PARTS Poor performance Ÿ...
- Page 68 CONSEQUENTIAL DAMAGES ON USING NON-GENUINE PARTS Frequent stalling of engine Ÿ Higher emission level Ÿ Spark Plug Poor engine performance Ÿ Affects fuel efficiency Ÿ Poor b raking effeciency Ÿ Brake Pads/Shoes Rider safety - an issue Ÿ Discs/Drum wear out, resulting in subsequent repair cost Ÿ...
-
Page 69: Jobs Applicable To Periodic Services
Hero MotoCorp Ltd. JOBS APPLICABLE TO PERIODIC SERVICES Wash the vehicle, blow dry with air at every service. Ÿ Inspect fuel line at every service. Ÿ Inspect throttle free play and operation at every service, adjust if necessary. Ÿ Inspect and adjust carburetor if necessary in every service. -
Page 70: Service Record Sheet
SERVICE RECORD SHEET To be Filled in by Supervisor Engine Oil Authorised Free/Paid Job Card Km. Range Top-up/ Distributor/Dealer Date Reading Service Replace (Sig. & Stamp) 500 - 750 3000 - 3500 6000 - 6500 9000 - 9500 12000 - 12500 15000 - 15500 18000 - 18500 VIII... - Page 71 SERVICE RECORD SHEET To be Filled in by Supervisor Engine Oil Authorised Free/Paid Job Card Km. Range Distributor/Dealer Top-up/ Date Reading Service Replace (Sig. & Stamp) XVIII 51000 - 51500 54000 - 54500 57000 - 57500 60000 - 60500 XXII 63000 - 63500 XXIII 66000 - 66500...
-
Page 72: Ownership Record And Data
Hero MotoCorp Ltd. OWNERSHIP RECORD AND DATA NAME__________________________________________________________________________ ADDRESS______________________________________________________________________ MODEL_______________________________ REGN. NO. ______________________________ ENGINE NO.__________________________VIN NO.__________________________________ DATE OF PURCHASE____________________KM. READING _________________________ AUTHORISED DISTRIBUTOR/DEALER NAME_________________________________ ADDRESS______________________________________________________________________ _________________________________________________________________________________ BATTERY MAKE_______________________ SERIAL NO._____________________________ AUTHORISED DISTRIBUTOR/DEALER STAMP AND SIGNATURE...
Need help?
Do you have a question about the PLEASURE and is the answer not in the manual?
Questions and answers