Advertisement
Quick Links
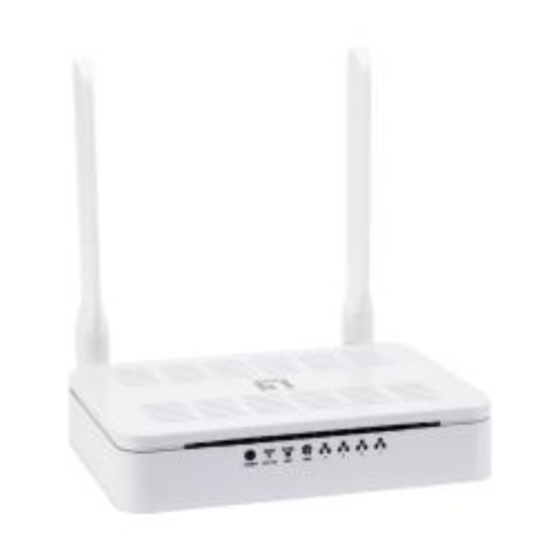
Xsense XRouter Aero (WSR-5000)
Quick Start Guide
INTRODUCTION
Congratulations on purchasing the Xsense XRouter Aero, the 4-port
Internet Sharing Wireless Router. Welcome to the
Macsense/Xsense Product Family.
The XRouter Aero is essentially three products in one. A high-speed
Switch to share files and printers at 10/100Mbps speeds. A
broadband Router to share your Internet access with your entire
network. And an wireless Access Point to roam cable-free
through-out the office or home.
This Quick Start Guide will walk you through the setup of the
computer and Router so you'll be surfing the Net in no time.
BEFORE YOU START
Package Contents:
One XRouter Aero unit. (Model Number WSR-5000)
One Stacking Bracket.
One Power Adapter.
One User Manual and Registration Card.
One Category-5 UTP Ethernet cable with RJ-45 connectors.
Setup Requirements:
ISP account with DSL/Cable Modem Broadband Internet
connection
10Mbps or 10/100Mbps Ethernet connection to support TCP/IP
Windows 95/98/Me/NT4/2000 or that of later versions
Mac OS 7.5.3 or later versions
Netscape Navigator 4.7 or Microsoft Internet Explorer 5.0, or
later versions of the web browsers.
Before you start, you should know if your connection is Dynamic,
Static, or PPPoE. If you are new to the broadband connection, you
need to request the following essential info from you ISP. If you
already have a broadband connection in place, most of these info
can be found in the TCP/IP control panel of the computer that is
presently connected to the DSL/Cable modem. You should take
down these values before continuing.
1.
Fixed IP Address (if Static)
2.
Subnet Mask (if Static)
3.
Default Gateway (if Static)
4.
DNS (domain name server) 1 and 2 (preferred)
5.
Username and Password (if PPPoE)
6.
Hostname (optional)
HARDWARE SETUP
Important Note: For initial setup of XRouter Aero, complete steps
with only one computer. Then connect additional computers after
verifying connectivity. Copy your ISP settings for quick reference and
safe guarding for future setup and configuration needs.
1.
Before connecting the XRouter Aero, verify that your existing
Internet connection is working properly. If not, resolve this
issue with your ISP.
2.
Connect the modem to the XRouter WAN port using a CAT-5
standard Ethernet cable. The WAN Link LED is solid green
when a proper connection is made.
3.
Connect one computer to an XRouter LAN port such as port
#1. Ensure the LAN Link LED lights up. See User Manual for
meaning of LEDs.
4.
Connect the power supply to the XRouter.
Diagram of XRouter Aero back panel showing correct connections.
TCP/IP SETUP
Windows 95/98/ME TCP/IP Configuration
1.
Double-click the Control Panel icon in My Computer.
2.
Double-click the Network icon. The network interface card
(installed on your computer) appears along with the network
protocol on the Configuration list.
3.
Double-click TCP/IP protocol on the list for your NIC card. If
TCP/IP does not appear, install TCP/IP according to the User
Manual.
4.
After double-clicking the installed TCP/IP protocol, click the
TCP/IP Properties window. To automatically assign computer's
TCP/IP, the XRouter Aero's DHCP server must perform the
following functions:
a.
Click the IP Address tab from the TCP/IP Properties
window.
b.
Select the item Obtain IP address automatically to
allow the built-in DHCP server of the XRouter Aero to
assign an IP address.
c.
Click OK and Restart to allow the settings to take effect.
Mac OS TCP/IP Configuration
1.
Open the TCP/IP control panel from the Apple manual.
2.
In the Connect via menu select the Ethernet interface installed
on your computer.
3.
In the Configure pull-down menu, select Using DHCP Server
to allow the built-in DHCP server of the XRouter Aero to assign
an IP address.
4.
Close the TCP/IP window and save the changes.
CONFIG XROUTER AERO
To access the web-based config pages of the XRouter Aero:
1.
Launch your web browser.
5.
In the URL field, type the XRouter Aero's default IP address
(192.168.1.1) and hit Enter/Return on the keyboard. There
must be no Proxy settings configured in your browser
preferences.
6.
The Username and Password window will then appear. Leave
the Username field blank and type "admin" (small case) as the
default password for the
XRouter Aero. If it does not
appear, check your cable
connections and TCP/IP
settings. Also, see the
Troubleshooting Section.
7.
Click OK. The One Page
Setup web page should now appear.
8.
According to the type of broadband connection that you have
(dynamic, static, or PPPoE), go to the appropriate section
below.
DYNAMIC SETUP
The XRouter Aero is setup for a dynamic connection by default,
meaning your ISP will provide XRouter Aero the entire TCP/IP it
requires. However, it is suggested to obtain the proper DNS
addresses from your ISP and enter them both in the One Page
Setup page of the XRouter and in the TCP/IP control panel of the
computer.
DNS addresses are important because before you can connect to a
URL (www.yahoo.com), DNS Servers must resolve the URL address
to an IP address that routers can work with on the Internet. Inputting
these values into both the XRouter and each computer can help
speed up the lookup process.
XRouter DNS Configuration
1.
Connect to the One Page Setup screen.
2.
Enter your DNS addresses into the DNS 1, 2 and 3 fields.
Leave field 3 blank if you only have two DNS numbers.
3.
Click "Apply" to save changes.
Advertisement

Related Manuals for Macsense WSR-5000

Summary of Contents for Macsense WSR-5000
- Page 1 Router so you’ll be surfing the Net in no time. BEFORE YOU START Package Contents: Diagram of XRouter Aero back panel showing correct connections. One XRouter Aero unit. (Model Number WSR-5000) One Stacking Bracket. TCP/IP SETUP One Power Adapter.
- Page 2 Xsense Connectivity, Inc. Can’t connect to XRouter Aero via web browser. Enter the Public Subnet Mask provided by your ISP. Dba Macsense Connectivity In the Default Gateway IP Address field, enter the information Verify that the IP address “192.168.1.1” has been correctly 3350 Scott Blvd.
Need help?
Do you have a question about the WSR-5000 and is the answer not in the manual?
Questions and answers