
Summary of Contents for ArcOne AIRPLUS
- Page 1 USER INSTRUCTION MANUAL Powered Air Purifying Respirator 85 Independence Drive, Taunton, MA 02780 TEL: (508)-884-9600 • TOLL FREE: (800) 223-4685 FAX: (508) 884-9666 AP01-UI Rev E...
- Page 2 ® Definition of Safety Signal Words per ANSI Z535.4 W RNING Indicates a potentially hazardous situation which, if not avoided, could result in death or serious injury. C UTION Indicates a potentially hazardous situation which, if not avoided, may result in minor or moderate injury. It may also be used to alert against unsafe practices.
-
Page 3: Table Of Contents
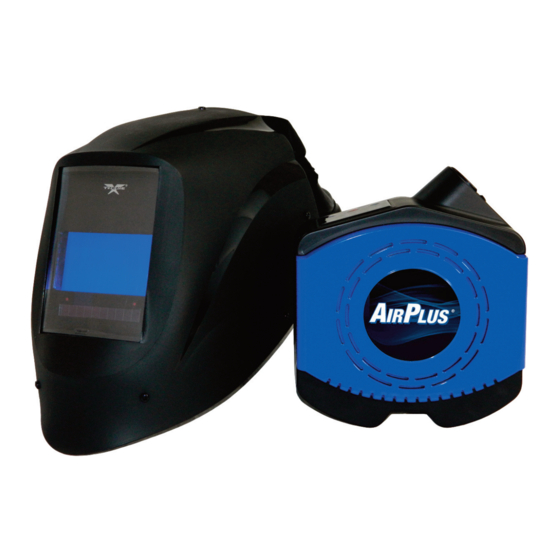
P PR TABLE OF CONTENTS 1.0 General Information 1.1 Introduction 1.2 Operating Principles 1.3 Respirator Approvals and Limitations 1.4 Helmet and Welding Filter Approvals and Limitations 2.0 System Use 2.1 Preparation for Safe Use 2.2 Battery 2.3 Filters 2.4 Blower 2.5 Airflow Test 2.6 Headtops 2.7 Waist Belt... - Page 4 ® AIRFLOW DIAGRAM A Complete A System Includes: ® ® • Welding Helmet Headtop with Face Seal • A Choice of Auto-Darkening Welding Filters • One (1) HE Particulate Filter • Blower Unit • 7.4V Lithium-Ion Battery and Charger • Breathing Tube with Flame Retardant Cover •...
-
Page 5: General Information
P PR 1.0 General Information 1.1 Introduction Thank you for your purchase of the A Powered Air Purifying Respirator (PAPR) ® ® system. Available with the system is the complete A family of electronic Auto-Darkening ® Filters (lenses). See the enclosed Respirator Approval Label for a complete list of lens assemblies. -
Page 6: Respirator Approvals And Limitations
® 1.3 Respirator Approvals and Limitations The A PAPR system as described in this instruction manual has been ® ® approved by NIOSH (National Institute for Occupational Safety and Health) to the following standard: NIOSH 42 CFR Part 84 (USA, See Enclosed Approvals). Special User Instructions 1. -
Page 7: System Use
® use have been satisfied. Refer to Section 1.3 and Approval Labels (enclosed). Risk of Explosion! Use only the AirPlus Charger to recharge your Battery. Do not charge battery in temperatures less than 32°F (0C) or greater than 104F (40C). -
Page 8: Filters
® Battery Installation: 1. Line up the edges as shown (Fig. 2). 2. Slide the battery into the blower. 3. Make sure there is an audible click as the battery locks into the blower. BLOWER BATTERY EDGES (LINE UP BOTH SIDES) BLOWER EDGES (LINE UP BOTH SIDES) BATTERY... -
Page 9: Blower
P PR Filter Installation: 1. Open the filter cover (Fig. 4). 2. Remove the old filter (if installed) with a slight twisting motion as you pull it away from blower. 3. Install the new filter onto the blower using the same rotating motion as you push (Fig. 5). 4. -
Page 10: Airflow Test
® 2.5 Airflow Test 1. Connect one end of the Breathing Tube to the Blower Unit. 2. Connect the Airflow Indicator to the free end of the Breathing Tube (detach from Airduct, if applicable) (Fig. 8 and 9). 3. Turn on the Blower Unit and set the fan speed to the lowest airflow setting (Section 2.4). 4. - Page 11 P PR 2.6.2 Eagle Flip Front Welding Helmet ® 1. Install and lock the breathing tube onto the airduct of the headtop (Fig. 11). 2. Turn on the blower unit and check the air flow through the airduct. Adjust the air flow valve to control the amount of air at the top of the airduct and sides of the helmet: a.
- Page 12 ® Eagle Internal Flow Direction Regulation ® Figure 13b Figure 13a Figure 14b Figure 14a -11-...
-
Page 13: Waist Belt
P PR 2.7 Waist Belt 1. Clip Waist Belt with blower onto your back and the Breathing Tube pointing upwards (Fig.15). 2. Adjust free end of belt strap to tighten or loosen. 2.8 Pre-Operational Inspection Check the following before donning your A ®... -
Page 14: Wearing (Donning) Papr
® OSHA 1910.134 does not require fit testing for loose-fitting face- pieces, however, excessive facial hair may cause an incomplete seal. When in doubt remove excessive facial hair where it interferes with the seal between the users face and the face seal. Failure to properly connect the Breathing Tube to the Headtop Assembly and confirm airflow through system to the Breathing Zone could lead to contaminant exposure resulting in serious... - Page 15 P PR 2.11 Troubleshooting Problem Possible Cause(s) Solution Blower unit off Turn blower unit on Remove obstruction/Check for Blocked Breathing Tube holes Blocked Airduct or Blower Remove obstruction Leak in Airduct or Replace defective Airduct Breathing Tube and/or Breathing Tube Reduced / No Airflow Filter clogged...
-
Page 16: Inspection, Maintenance And Storage
® 3.0 Inspection, Maintenance and Storage 3.1 Record Keeping All components should be checked daily when used regularly. Regardless of the usage, each respirator system requires a documented inspection and replacement program. A trained and competent person with full knowledge of respiratory equipment should carry this out. Records should be maintained throughout the life of the equipment. -
Page 17: Inspection
P PR Do not clean the HE filter by any means including forced air. Doing so will damage the filter and void the Blower Unit warranty. Change the HE filter after 40 hours of use or when proper airflow cannot be maintained. Do not allow contaminants to enter into the breathing tube or blower unit. -
Page 18: Replacement
® 3.4 Storage PAPR system, it should be thoroughly dry. Do not keep 1. Before storing the A ® ® used filter in the same enclosed storage space as new filters. 2. Store the system in a clean area, away from moisture, heat and direct sunlight. Storage temperatures 32°F-104°F (0°C-40°C and <75% Relative Humidity). -
Page 19: Breathing Tube
P PR 4.4 Breathing Tube Removal: 1. Turn the Breathing Tube connector counter clockwise and pull out of the Blower. 2. Turn the Breathing Tube connector clockwise and pull out of the Headtop. Installation: refer to Section 2.4 (Fig 5). Knob 4.5 Face Seal (not shown) -
Page 20: Waist Belt
® 4.6 Waist Belt Removal: 1. Remove the Waist Belt from the clip. 2. Unthread the Waist Belt Strap from the Blower. Installation: 1. Thread the Waist Belt Strap through the side slots on the Blower (Fig. 22). 2. Thread the Waist Belt Strap through the belt loops (Fig. 23). 3. -
Page 21: Customer Information
P PR 5.0 Customer Information Auto-Darkening Lens: See the A Auto-Darkening Filters User Instruction Manual for lens specifications and for ® specific replace parts that are not included in this manual. 5.1 Replacement Parts and Accessories To order replacement parts or accessories, use the part numbers and descriptions listed below. PAPR system parts and accessories will void the NIOSH Failure to use only A ®... -
Page 22: Technical Specifications
® 5.2 Technical Specifications Blower Unit: Type: Flow Control Rotor Speed: 6,000-10,000 rpm Rotor: Brushless Noise Level: ≈ 65 dBA Air Supply: minimum of 6 cubic feet (170 liters) / min Case: Impact-proof ABS Belt Plate: Fiber Glass reinforced polyamide Filter Cartridge: Single plug-in type Weight: 1.4 lbs (0.63 kg) Dimensions: 6.9 in x 4.2 in x 7.5 in (174 mm x 107 mm x 191 mm) -
Page 23: Warranty And Technical Service Information
P PR 5.3 Warranty and Technical Service Information warrants the A PAPR System for one (1) year from the date of purchase ® ® against all manufacturing defects resulting from materials or workmanship, excluding the auto-darkening lens. Refer to the Auto-Darkening Welding Filter manual for warranty information regarding welding filters. - Page 24 ® A.C.E. I IS A IVISION OF NTERNATIONAL OMPANY ® 85 Independence Drive, Taunton, MA 02780 TEL: (508)-884-9600 • TOLL FREE: (800) 223-4685 • FAX: (508) 884-9666 Please visit our website and register product at: www.arc1weldsafe.com...
Need help?
Do you have a question about the AIRPLUS and is the answer not in the manual?
Questions and answers