
Summary of Contents for Concept LED Lights V-PIX Vision Bar
- Page 1 V-PIX™ Vision Bar LED Pixel Bar Light User Manual KEEP THIS MANUAL FOR FURTURE NEEDS...
-
Page 2: Technology Parameter
1. Unpacking Thank you for choosing our Vision Bar. For your own safety please read this manual before installing the device. This manual covers the important information on installation and applications. Please install and operate the fixture with following instructions. Meanwhile, please keep this manual for future needs. The LED pixel bar light is made of a new type of high temperature strength of engineering Glass with aluminum casing. -
Page 3: Safety Instructions
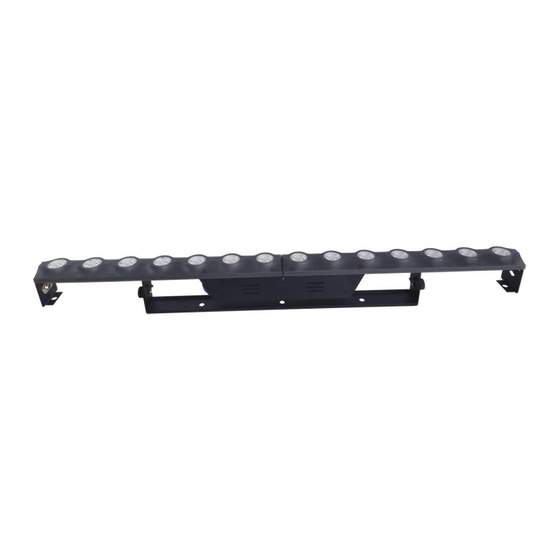
LED Life: 100,000hrs Control Mode: DMX512, Master/Slave, Auto, Sound active DMX Channels: 6/8/12/60CH Feature: Each LED can be controlled alone, Color Chase effect IP Rate: IP20 Power connector: PowerCon in/Out Working Position: Any safe working position Size: 1000 * 70 * 100mm Net Weight: 2.66Kg 3. - Page 4 Make sure the power cord is never crimped or damaged by sharp edges. If this occurs, replacement of the cable must be done by an authorized dealer. Always disconnect from the mains when the device is hot in use or before cleaning it. Only handle the power cord by the plug.
-
Page 5: Mounting And Installation
Make sure the lens’ are in good condition. It’s recommended to replace the units if there are any damages or severe scratch. Make sure the fixture is operated by qualified personnel who knows the fixture before using Keep the original packages for if any second shipment is needed. Don’t try to change the fixtures without any instruction by the manufacturer or the appointed repairing agencies. - Page 6 improper installation can result in injury. Be sure to complete all rigging and installation procedures before connecting the main power cord to the appropriate wall outlet. Clamp Mounting: The Pixel Bar Light provides a unique mounting bracket assembly that integrates the bottom of the base and the safety cable rigging point in one unit. For additional safety be sure to attach at least one properly rated safety cable to the fixture using one of the safety cable rigging point integrated in the base assembly.
-
Page 7: Menu Instruction
the last fixture in the chain. Please see illustrations below. 6. Menu Instruction Press “MENU” to browse the different function, press “ENTER” to Next Menu (Sub-Menu) Press “UP” or “DOWN” to choose the desire function and Press “ENTER” to confirm. Press “MENU” to return back last menu. MENU Value Function... -
Page 8: Dmx Channels
Sp 1-9 Auto Running Speed select 1-9 Colo Co 1-15 Color choose Red 0-255 Gree 0-255 Manu Manual mode Blue 0-255 Whit 0-255 dISP DISP Display reverse dSIP Version Number DMX Channels: 6Channels Channel Value Function 0-255 Red Dimmer 0-100% 0-255 Green Dimmer 0-100% 0-255... - Page 9 21-24 Color chase 4 .... 227-247 Color chase 59 248-255 Sound controlled strobe 0-255 Speed control slow-fast 8Channels Channel Value Function 0-255 Dimmer 0-100% 0-255 Strobe 0-255 Red Dimmer 0-100% 0-255 Green Dimmer 0-100% 0-255 Blue Dimmer 0-100% 0-255 Warm White Dimmer 0-100% Color Chase 000-007...
- Page 10 12Channels Channel Value Function 0-255 Dimmer 0-100% 0-255 Strobe 0-255 Part 1Red Dimmer 0-100% 0-255 Part 1 Green Dimmer 0-100% 0-255 Part 1 Blue Dimmer 0-100% 0-255 Part 1 Warm White Dimmer 0-100% 0-255 Part 2 Red Dimmer 0-100% 0-255 Part 2 Green Dimmer 0-100% 0-255 Part 2 Blue Dimmer 0-100%...
- Page 11 0-255 Speed control slow-fast 60Channels Channel Value Function 0-255 Dimmer 0-100% 0-255 Strobe 0-255 Group 1 Red Dimmer 0-100% 0-255 Group 1 Green Dimmer 0-100% 0-255 Group 1 Blue Dimmer 0-100% 0-255 Warm White 1 Dimmer 0-100% 0-255 Group 14 Red Dimmer 0-100% 0-255 Group 14 Green Dimmer 0-100% 0-255...
-
Page 12: Troubleshooting
0-255 Speed control slow-fast 8. Troubleshooting Following are a few common problems that may occur during operation. Here are some suggestions for easy troubleshooting: A. The unit does not work, no light and the fax does not work 1. Check the connection of power and main fuse 2. -
Page 13: Maintenance And Cleaning
D. No response to the sound 1. Make sure the unit does not receive DMX signal 2. Check microphone to see if it is good by tapping the microphone. 9. Maintenance and Cleaning The following points have to be considered during the inspection: 1) All screws for installing the devices or parts of the device have to be tightly connected and must not be corroded 2) There must not be any deformations on the housing, color lenses, fixations and... - Page 14 from overheating. We recommend a frequent cleaning of the device. Please use a moist, lint-free cloth. Never use alcohol or solvents. There are no serviceable parts inside the device. Please refer to the instructions under “Installation Instructions”. Should you need any spare parts, please order genuine parts from your local dealer.
Need help?
Do you have a question about the V-PIX Vision Bar and is the answer not in the manual?
Questions and answers