Table of Contents
Advertisement
Quick Links
Advertisement
Table of Contents

Summary of Contents for Herma LP Morgan Dipper
- Page 1 LP Morgan dipper user manual www.lpmorgan.com.au | www.herma.com.au...
- Page 3 LP Morgan Dipper User’s Manual www.lpmorgan.com.au | www.herma.com.au...
- Page 4 © 2002-2006 Herma Technologies. All rights reserved. Reproduction in any manner whatsoever without permission of Herma Technologies is strictly forbidden. Trademarks used in this text: Herma, the Herma Logo, Dipper, LP Morgan and LP Morgan logo are registered trademarks of Herma Technologies.
-
Page 5: Table Of Contents
Table of contents Important information Maintenance & Troubleshooting Precaution Troubleshooting/FAQ To the owner Unpacking Appendix Part Names and Dimensions Accessories Warranty Information Installation Mechanical Installation Ceiling opening Ceiling Space Ceiling type - Suspended ceiling Ceiling type - Trussed ceiling Electrical Installation Wiring Diagram Projector Installation Cable Management... -
Page 6: Precaution
Precautions ATTENTION: Please read all of these instructions before you operate your Dipper for the first time. Save these instructions for further reference. For your own protection and prolonged operation of your Dipper, be sure to read the following precautions carefully before use. Never operate the Dipper while the projector is still powered! On Safety On Cleaning... -
Page 7: To The Owner
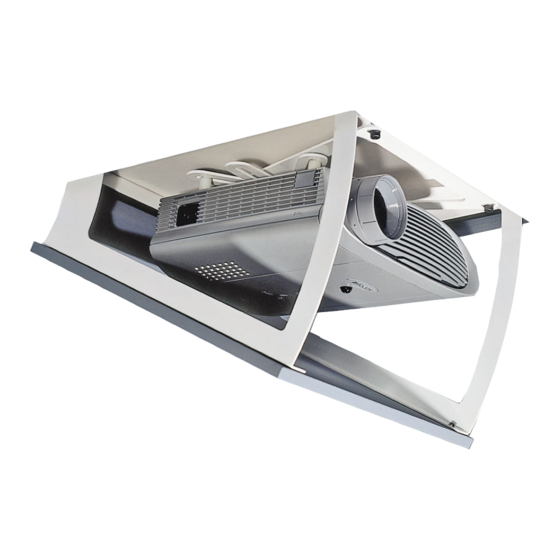
To the owner Congratulations on purchasing an LP Morgan Dipper. This innovative projector mounting system is a novel and secure way to mount your projector out of sight when not in use, giving you maximum enjoyment and a truly cinematic experience. -
Page 8: Unpacking
Unpacking the Dipper When unpacking the Dipper, please handle all parts with care. Do not destroy the inner box when unpacking, as it is the dustcover for this unit! 8 | installation instructions... - Page 9 1. Dipper Unit 2. Control Unit, Protective Enclosure 3. LP Morgan Skyhook Projector Mount System (including mounting bolts and springs) 4. 24V Power Supply 5. Ceiling Face Plate 6. Ceiling Trim 7. Wall Switch and Architrave Mount 8. Cardboard Dustcover 9.Spring, Bolts Washers installation instructions | 9...
-
Page 10: Part Names And Dimensions
Part Names and Dimensions Make consideration of the maintenance of the Dipper when installing it. Wherever possible, allow access to the ceiling cavity other than through the Dipper’s hole - so that you can access the projector if the power supply fails! Side View Front Rear... - Page 11 Top View, Closed Position Dipper Front Overall Rear Overall Mounting mounting Length mounting Width hole Width Size hole (C1) (C2) hole (C3) (D1) (D2) Medium 6500 Large installation instructions | 11...
- Page 12 Front View, closed position Dipper Overall Face Panel Size Width (D1) Width (D3) Medium Large 12 | installation instructions...
- Page 13 Front 3D View 1. Motor 2. Pivot Frame 3. Main Frame 4. Skyhook Plate 5. Mounting Tabs 6. Face Panel installation instructions | 13...
-
Page 14: Mechanical Installation
Mechanical Installation The first crucial step, like any projector installation, is to determine where to put the Dipper in the ceiling. The Dipper should be installed so that the projector lens is centered horizontally to the screen, and the distance from the screen depends on the projector’s throw distance. -
Page 15: Ceiling Opening
Ceiling Opening The Dipper comes with a 12mm undercoated MDF face panel and an aluminium ceiling trim. We recommend that you paint this panel before fixing the Dipper in the ceiling. In the case of a non-plasterboard ceiling, you may choose to fabricate your own ceiling panel (eg from the same timber/material as the ceiling itself) to match. -
Page 16: Ceiling Space
Ceiling Space - Standard Dipper The following diagrams show the position of the ceiling cutout in relation to the Dipper frame, and the space required above the ceiling. Size Length Width Height Front Gap Rear Gap Medium Dipper Large Dipper 16 | installation instructions... - Page 17 Ceiling Fastening - Suspended Ceiling For suspended ceilings you can suspend the Dipper itself through the four mounting holes using threaded rod. Threaded Rod and Nuts You can use the nuts to adjust the height of the Dipper once installed, so you can get it exactly flush with the ceiling. installation instructions | 17...
-
Page 18: Ceiling Type - Suspended Ceiling
Ceiling Fastening - Trussed Ceiling For some ceilings, you will need to construct a support structure for the Dipper to rest in - this can be as simple as two appropriately spaced bearers at the right height. See the previous pages for the relevant dimensions. Screwed Straight into Bearers Allow yourself some way to easily adjust the height of the Dipper once installed, so you can get it exactly flush with the ceiling. -
Page 19: Ceiling Type - Trussed Ceiling
Face Plate Installation Front Spring M4 Washer M4 CS Bolt Stick Pad Once the Dipper frame is install you should attached the face panel. We recomend you paint the face panel to match the room before installing it. 1. Insert 4 x countersunk bolts, washers and springs as shown through face panel from the underside. -
Page 20: Electrical Installation
You do not need to be a qualified electrician to wire the Dipper, as all circuiting is 24V, however Herma will not accept responsibility for damage incurred by faulty or incorrect wiring. The power supply and motor are pre-wired, so all you need to do is attach relay or motor cable and switch as shown in the following diagram. -
Page 21: Wiring Diagram
Wiring Diagram Electrical Installation Do Not, under any circumstances, connect 240 VAC to any of these terminals! 24V Positive 24V Negative Switch Down Motor Blue (Not used Motor Brown in standard Switch Common configuration) Switch Up installation instructions | 21... -
Page 22: Projector Installation
Projector installation The Dipper uses the LP Morgan Skyhook Projector Mount System. The parts kit contains: 4 x long skyhook arms 2 x short skyhook arms. 4 x M4, 4 x M5 & 4 x M6 mounting bolts 4 x springs Determine which size mounting bolts suit your projector, and set others aside. - Page 23 Projector Installation Connect Skyhook to Projector. Fit the springs between the arms and the projector, and tighten the mounting bolts so that the projector is parallel to the triangular plate. Move the position of the triangular plate over the centre of the projector, with the edge with the 2 holes towards the front.
-
Page 24: Cable Management
Projector Installation First ensure that the Dipper is operating correctly, and that the projector cables are properly secured. Open the Dipper and insert the triangular projector plate into the slot in the rear of the Dipper. Attach it at the front using the supplied M6 bolts and springs. -
Page 25: Maintenance & Troubleshooting
21 for a wiring diagram). If the unit does not move, but you hear a “clicking” sound then the motor may be damaged. Contact Herma for advice. If you have been repeatedly operating the Dipper, the motor may have reached a thermal cutout and won’t operate. -
Page 26: Accessories
Accessories The following Dipper accessories are also avilable from LP Morgan. Contact your local retailer for pricing information. Triggering From Projector: HER20HD12V: 12 volt trigger unit for projectors with a 12 volt trigger output. • Often used also with LPM43SCR12V: Screen 12V Trigger LPM48HDSCRTRIG: Trigger Unit for Projectors without a 12 Volt Trigger... -
Page 27: Warranty Information
Customers must fill out the online warranty form, or the warranty card included with the product and post it back to Herma at the reply paid address shown on the back cover in order to qualify for the manufacturer’s warranty. - Page 28 If we can be of any further help, please contact us. Factory 4a, 6 Albert Street Preston Vic 3072 Phone: +61 3 9480 6233 Fax: +61 3 9480 6533 Email: info@herma.com.au Web: www.herma.com.au | www.lpmorgan.com.au...
- Page 29 Specifications for LP Morgan Dipper/Flipper HEX codes DIPPER/ FLIPPER REMOTE HECS CODES The complete table of codes (in HECS) is (HERMA PRODUCT CODE HER20HDIRKIT) OPEN 1 0x42 OPEN 16 0x48 OPEN 31 0x17 OPEN 46 0x59 CLOSE 1 0x22 CLOSE 16...