Advertisement
Quick Links
Keep this user's manual for handy reference.
Bill of Contents
1.
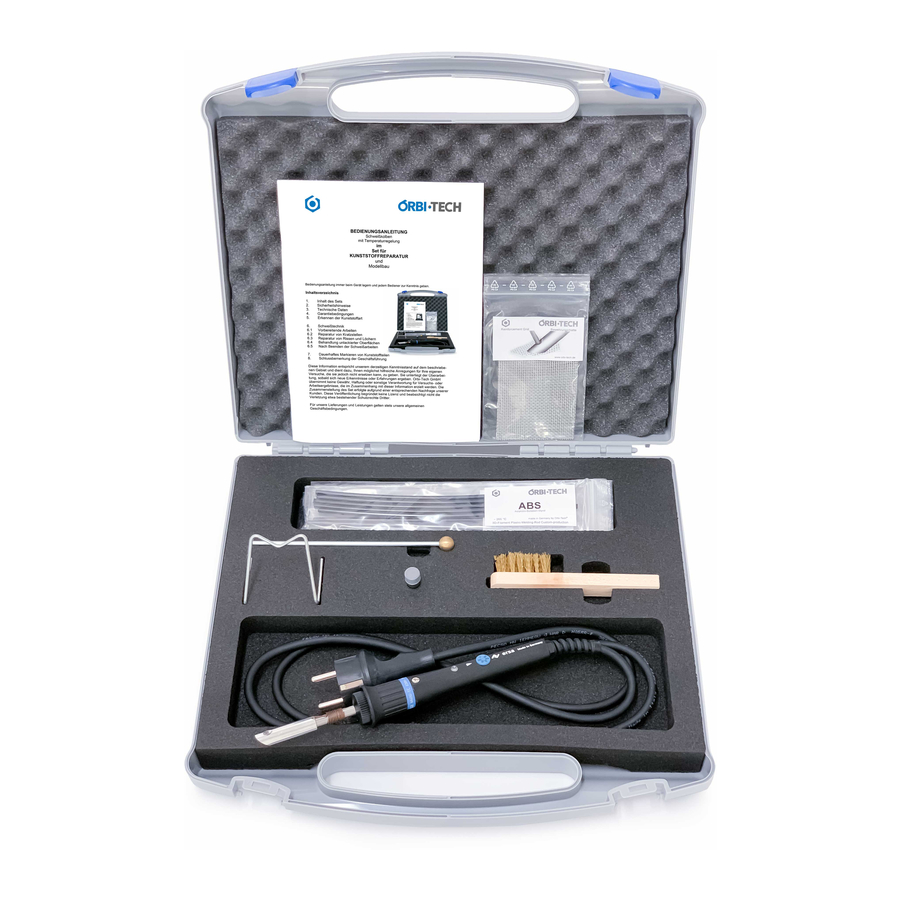
Set Contents
2.
Safety advice
3.
Technical details
4.
Terms of guarantee
5.
Identifying plastic types
6.
Welding techniques
6.1
Weld preparation
6.2
Scratch repair
6.3
Crack and hole repair
6.4
Surface finishing of unpainted items
6.5
Post welding
7.
Permanent marking and labelling of Plastic parts
8.
A word from the directors
The information provided represents our current expertise and is provided as practical
guidelines; however our suggestions cannot replace hands-on practical knowledge and
experience. All the information we have supplied is subject to revisions according to
newer developments and results.
Orbi-Tech GmbH does not grant warranty, liability and responsibility for the results of
any experiments or work carried out related to this information. The contents of this
welding set are the result of the demands of our customers. This publication does not
constitute or imply any licenses and does not intend the violation of any eventual
intellectual property rights of third parties.
Our general terms and conditions apply to all services and supply provided.
OPERATING MANUAL
Temperature controlled
welding iron kit
for
PLASTIC REPAIR
Prototyping and
modelling
Advertisement

Summary of Contents for Orbi-Tech T-80
- Page 1 All the information we have supplied is subject to revisions according to newer developments and results. Orbi-Tech GmbH does not grant warranty, liability and responsibility for the results of any experiments or work carried out related to this information. The contents of this welding set are the result of the demands of our customers.
- Page 2 Congratulations..on purchasing your new plastic repair system. The new welding procedure introduces new possibilities in repair techniques; Especially for PE and PP parts that are hard or even impossible to fix using adhesives. In a lot of cases, there is no need to dismantle the part for repair.
- Page 3 Leave the iron to cool off naturally on its stand. The appliance should only be dismantled by authorised dealers. Unplug and stop using and take back to your dealer immediately in case of: T-80 not functioning properly Missing or damaged parts, especially exposed wires Blown fuse or main fuse...
- Page 4 The T-80 is equipped with a temperature regulator, keeping the temperature of the welding tip constant. For technical details please refer to the enclosed spec sheets. Safety advice has to be observed at all times. Do not use your T-80 in explosive or corrosive places and keep away from humidity.
- Page 5 4. Terms of Guarantee All T-80’s are sold guaranteed free from defects in material and manufacture, according to legal obligations. This guarantee is limited to replacement and exchange of defective parts only. Damage of fragile parts is excluded from the guarantee. Claims arising from damages to material other than the T-80 are excluded.
- Page 6 Ski running surface Automobiles: PP, PP-EPDM Bumpers of European and Japanese make Ford bumpers Bumpers of US American makes Body parts, Dashboards PUR or PP Fender, Grate, Grill Water tank Door gasket Motorcycles: Fuel tanks, mud-guards on trail bikes Fairings on road bikes PA6, ABS Cowlings and instrument facia ASA, ABS...
- Page 7 Use the following table as reference to help you identifying most common plastics used in automobiles and motorbikes ( for your casual information only): Grill Bumper Outter parts Inner parts Alfa Romeo PP, PUR Audi Cadillac Chevrolet PA, PC Chrysler Citroen Daihatsu Fiat...
- Page 8 6. Welding techniques Always check if the T-80 is in good working condition before connecting it to the mains. Observe safety instructions. Then choose the desired temperature and plug in the mains plug. Overview of some plastic types and their maximum working temperature...
- Page 9 Hold the welding iron like a pencil. Use only very light pressure. Using a lot of force might damage the T-80 and does not do the job: the material has to be sufficiently heated to melt. Insert welding rod, wait until it has melted.
- Page 10 4. Insert welding rod and melt. Attention: Welding rod gets hot 5. Remove remaining plastic in hole with supplied cleaning stick Naturally, the repaired part has to be finish sanded. For further processing of bare plastics: see corresponding chapter. Painting can be done after welding (according to the plastic type (where necessary, after primer treatment).
- Page 11 6.4 Surface finishing of unpainted items With the tip of the T-80 you can finish slight scratches and repaired surfaces and left unpainted. Make sure you use a clean, smooth welding tip without scratches (see...
- Page 12 Tidy up the cleaning rod. Attention: Cleaning rod might get hot as well! Leave the T-80 to cool off naturally on the supplied stand. Do not cool off with water!!! Put the appliance back in the case once it is cooled off completely.
- Page 13 Dear Customers, we wish you the best of luck and results with your plastic welding experiments and works with the T-80. We believe that this appliance opens up nearly unlimited new opportunities in processing and repairing plastic materials and products.
Need help?
Do you have a question about the T-80 and is the answer not in the manual?
Questions and answers