Table of Contents
Advertisement
Quick Links
Save this manual for
future reference
Conservez ce manuel pour
toute référence future
Sírvase guardar este
manual para consultarlo
en el futuro
wolfcraft
OWNER'S
MANUAL
MANUEL
D'UTILISATION
MANUAL DEL
USUARIO
MODEL NO. 4525
MODÉLE N° 4525
N° DE MODELO 4525
Page 7:
Français et espagnol
Frances y Español
CAUTION:
Read, understand and
follow ALL instructions
before using this Drill
Guide.
ATTENTION:
Lisez, comprenez et
suivez TOUTES les
instructions avant d'utiliser
ce guide de perceuse.
PRECAUCIÓN:
Lea, comprenda y siga
TODAS las instrucciones
de seguridad antes de
usar esta Guía de
Taladrar.
®
Power tool NOT included.
Outil électrique non inclus.
No se incluye la herramienta eléctrica.
wolfcraft
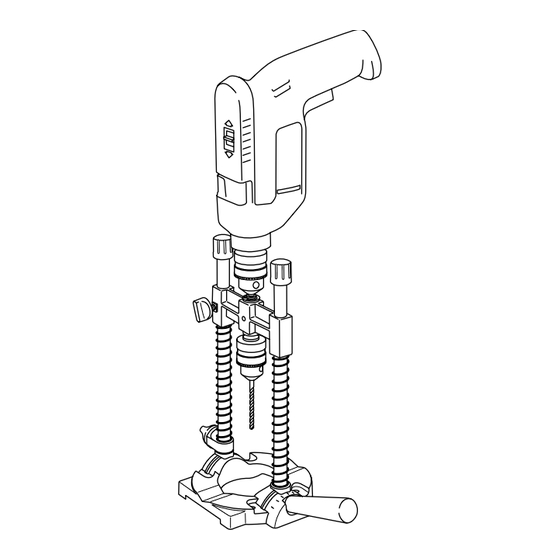
DRILL GUIDE
GUIDE DE PERCEUSE
GUÍA DE TALADRAR
OWNER'S MANUAL
GUIDE DE L'UTILISATEUR
MANUAL DEL USUARIO
46441
®
RTD10000193AA
Advertisement
Table of Contents

Summary of Contents for Wolfcraft 4525
- Page 1 ® wolfcraft OWNER’S MANUAL MANUEL D'UTILISATION MANUAL DEL USUARIO MODEL NO. 4525 MODÉLE N° 4525 N° DE MODELO 4525 Page 7: Français et espagnol Frances y Español CAUTION: Read, understand and follow ALL instructions before using this Drill Guide. ATTENTION:...
-
Page 2: General Safety Instructions For Power Tools
Wear protective hair covering to contain long hair. Roll long sleeves above the elbow. ADDITIONAL SAFETY INSTRUCTIONS FOR wolfcraft 1. ALWAYS USE EYE PROTECTION The operation of any power tool can result in for- eign objects being thrown into the eyes, which can result in severe eye damage. -
Page 3: Unpacking And Checking Contents
It provides you with better control for a better finished result. You can use your wolfcraft Drill Guide any- where you need a drill—even in masonry or concrete using the proper bit. Assembling Your Drill... -
Page 4: Operating Instructions
Attaching and Removing Your Drill Before using, attach your drill to shaft using a chuck key. (See Figure 2.) When completing a drilling project, remove drill from the drill guide. Figure 2 Operating Instructions Do not use Drill Guide as a router. The base plate must be secured when drilling round stock and holes. - Page 5 Angle Drilling Loosen caps on both guide bars (See Figure 5) and rotate guide bars to align the index mark on both bar holders to the desired angle (See Figure 6) reference marks on the base plate. Tighten caps and drill the hole with the Drill Guide flush with the work piece.
-
Page 6: Repair Parts
Workbench Mounting Only - for Edge Sanding 1. Use a hole saw to cut a hole no larger than 2 1/4" in the top of your workbench. 2. Center the Drill Guide base around the hole on the underside of the bench. Push rubber stopper pieces out. - Page 7 Portez des lunettes de sécurité (conformes aux normes ANSI Z87.1) en toutes circonstances. Utilisez aussi un CONSIGNES DE SECURITE SUPPLEMENTAIRES POUR LE GUIDE DE PERCEUSE wolfcraft 1. UTILISEZ TOUJOURS DES LUNETTES DE PROTECTION Le fonctionnement des outils électriques risque de pro- jeter des corps étrangers dans les yeux et de provoquer...
-
Page 8: Instrucciones Generales De Seguridad Para Herramientas Eléctricas
Use gafas de seguridad (conforme a la norma ANSI Z87.1) en todo momento. Si se trata de trabajos de INSTRUCCIONES DE SEGURIDAD ADICIONALES PARA LA GUÍA DE TALADRAR wolfcraft 1. UTILICE SIEMPRE PROTECCIÓN OCULAR El manejo de cualquier herramienta eléctrica puede resultar en materias extrañas que pueden introducirse... - Page 9 Il assure un meilleur con- trôle et un meilleur travail fini. Vous pouvez utiliser le guide de perceuse wolfcraft partout où vous avez besoin d'une perceuse—même dans des ouvrages en maçonnerie ou en béton, en utilisant la mèche appropriée.
- Page 10 Fixation et dépose de la perceuse Avant l'utilisation, fixez la perceuse à l'axe à l'aide d'une clavette de mandrin (voir Figure 2.) Lorsque le travail de perçage est terminé, démontez la perceuse du guide de perceuse. Cómo acoplar y desacoplar el taladro Antes de efectuar el trabajo, acople el taladro al eje utilizando la llave del mandril (véase la Figura 2).
- Page 11 Perçage d'angle Desserrez les chapeaux des deux glissières (voir Figure 5) et tournez les glissières pour aligner le repère des deux porte-barres à l'angle désiré (voir Figure 6) avec les repères de la plaque de base. Serrez les bouchons et percez le trou avec le guide de perceuse au niveau de la pièce à...
- Page 12 116620052 117720017 OWNER’S GUIDE DE MANUAL L’UTILISATEUR MODEL NO. MODÉLE N° 4525 4525 wolfcraft Inc., Itasca, IL 60143 U.S.A. DESCRIPCIÓN CANTIDAD Capucha de vástago Anillo retención Arandela Buje liso Tornillo manual M6 x 16 Barra transversal Mandril Tornillo cabeza embutida 1 Barra guía...


Need help?
Do you have a question about the 4525 and is the answer not in the manual?
Questions and answers