Table of Contents
Advertisement
Quick Links
...............................................................................................................................................................................................
.....................................................................................................................................................................................
.....................................................................................................................................................................................
.............................................................................................................................................................................................
.............................................................................................................................................................................................................
.......................................................................................................................................................................................
........................................................................................................................................................................................................
............................................................................................................................................................................................
...............................................................................................................................................................................
.......................................................................................................................................................
...........................................................................................................................................
............................................................................................................................................................
................................................................................................................................................................
..................................................................................................................................................
..........................................................................................................................................................................
...............................................................................................................................................
.....................................................................................................................................................................
...........................................................................................................................................
........................................................................................................................................
....................................................................................................................................................................
......................................................................................................................................................................
......................................................................................................................................................
...........................................................................................................................................................................
...........................................................................................................................................................................
...........................................................................................................................................................................
...........................................................................................................................................................................
................................................................................................................................................................................
Indice
......................................................................................................................
.......................................................................................................................
1
3
6
12
16
21
23
23
28
33
39
42
52
52
53
53
55
55
61
68
71
72
74
74
76
79
81
83
83
Advertisement
Table of Contents

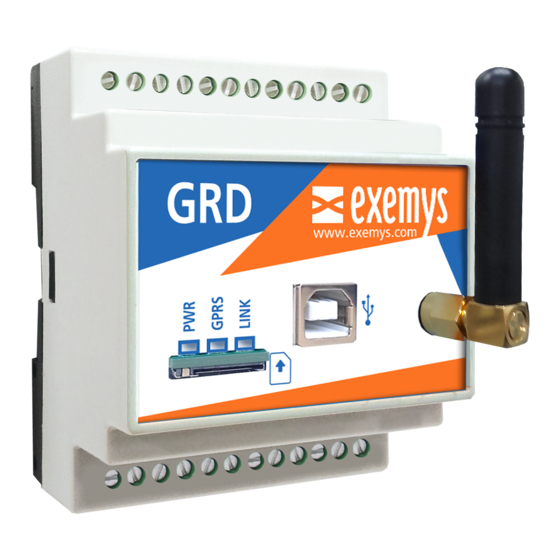
Summary of Contents for exemys GRD-MQ Series
-
Page 1: Table Of Contents
Indice Introduction ....................................... GRD Instalation ..................................... GRD Configurator ....................................GSM & GPRS Connection ............................... GRD-MQ to Broker Connection ............................Serial Port Configuration ................................Inputs/Outputs ..................................... Physical Inputs/Outputs ................................Features of power supply and inputs/outputs ........................Embedded MODBUS master Configuration ........................Channels ...................................... -
Page 2: Introduction
The GRD can also be used to do a local control over its inputs/outputs using the script programming feature. Nota: Exemys does not provide the MQTT broker For this type of solution the following procedure must be followed: Have an MQTT broker available Install the GRD. - Page 3 GRD-MQ User Manual Introduction parameters locally or remotely. Enable the SIM card and configure the APN of your telephone network Establish a connection between the GRD-MQ and the broker Configure the inputs/outputs in the GRD according to their use: Physical inputs/outputs External Modbus inputs/outputs.
-
Page 4: Grd Instalation
GRD-MQ User Manual GRD Instalation MQ models share the electrical specifications with XF models GRD Models – Installation Selection table Depending on the application you will be able to choose from the following models: Mobile Power Model Serial port Modbus Digital Digital Analog... - Page 5 You must know the data to access the GPRS/3G network of the telephone operator corresponding to the SIM card (APN, user, password). These data are preloaded in the GRD for Movistar Argentina, Telecom Personal Argentina and Claro Argentina. If you use another operator please contact support@exemys.com. 4 / 84...
- Page 6 GRD-MQ User Manual GRD Instalation If the PIN (security code) of the SIM Card is activated you must enter it into the GRD when requested. How to place the SIM card in the GRD Place the SIM inside the GRD as shown in the figure or press it to remove Do not insert o remove the SIM card while the GRD is powered on GRD1620-XF-3G / GRD3621-XF-3G / GRD3625-XF-3G...
-
Page 7: Grd Configurator
Wait for the installation program to copy all necessary files onto the hard disk, and press “Finish” to end the installation process. Once installed you will see in the Programs menu a folder called Exemys. Inside the folder you will find another folder called GRDconfig ; this folder contains the GRDconfig and Uninstall icons. - Page 8 GRD-MQ User Manual GRD Configurator Configuration of the USB port Once the software is installed you won’t have to configure any parameter of the USB port since this port recognizes automatically the COM in which the GRD is connected. You can only connect up two GRDs to the PC at the same time.
- Page 9 You will always have to read the GRD parameters to be able to modify the parameters or for monitoring purposes. If the Configurator finds an unknown model it will not enable any of the screens. Download the latest GRDconfig release from here: http://www.exemys.com/GRDconfig 8 / 84...
- Page 10 GRD-MQ User Manual GRD Configurator Sending parameters to the GRD If you want to send to the GRD any change in the configuration press the “Send Configuration” button, please note that to the right of the button we have a combo that when displayed allows us to send the standard configuration plus the change of GSM band in case of necessity, this is because this parameter is not sent by default.
- Page 11 GRD-MQ User Manual GRD Configurator Once we enter monitoring the following screen will be displayed, in which we will be able to see the values of the input/output channels, the time, quantity of accumulated Historicals, the SIM in use and the states of connection of the equipment.
- Page 12 GRD-MQ User Manual GRD Configurator We then configure the parameters with “File -> Save As” or with the icon to load them later when the GRD is connected. Once the configuration is saved, we can open it and load to multiple GRDs entering “File -> Open” or with the icon.
-
Page 13: Gsm & Gprs Connection
GRD-MQ User Manual GSM & GPRS Connection GSM and GPRS services configuration GSM Service Enabling SIM / GSM We first have to verify that the SIM has been selected and that it is within the corresponding GSM band. This is done in the following tab: GSM/GPRS -> General Configuration. Configuring the PIN on the SIM card If you place a SIM card with and activated PIN (security code), it must be configured in the GRD in order to have access. - Page 14 GRD-MQ User Manual GSM & GPRS Connection When the new configuration is applied, the GRD will try to unblock the SIM Card with the entered PIN. If this is the correct one, the registration process will be initiated. To verify if the SIM card that has been placed is blocked or if the configured PIN is correct, check the SIM status in the monitoring option.
- Page 15 GRD-MQ User Manual GSM & GPRS Connection Configuring the cell phone operator The following step is the correct configuration of the GPRS service. For this, you have to tell the equipment the corresponding operator of the installed SIM card or the APN parameters, user and password.
- Page 16 GRD-MQ User Manual GSM & GPRS Connection The GPRS parameters can be saved so they won’t have to be entered every time the GRD is used with the same cell phone operator. To do this you have to go to “Software Configuration -> Properties”. A window will be displayed on which we will be able to enter a name to recognize the configuration, APN, user and password.
-
Page 17: Grd-Mq To Broker Connection
GRD-MQ User Manual GRD-MQ to Broker Connection Connection between GRD-MQ and the broker Configuration of the GRD-MQ to broker connection Communication with the broker uses a TCP/GPRS connection. To be able to establish the connection it is necessary to: Place the antenna correctly and ensure GPRS coverage. Place the SIM card, and, if necessary configure PIN. - Page 18 GRD-MQ User Manual GRD-MQ to Broker Connection CA certificate only: You must upload the CA certificate for validation Self signed certificates: You must upload CA certificate, client certificate and client key For GRD-MQ to be able to use "CA certificate only" and "Self signed certificates" the GRDs clock must be setted properly.
- Page 19 GRD-MQ User Manual GRD-MQ to Broker Connection SMS password This password can be used to protect remote SMS configuration Monitoring the GRD-MQ to broker connection Monitoring the connection in the GRD-MQ To verify whether the entered configuration into the GRD-MQ is the correct one we have the possibility of monitoring the status of the connections and the signal.
- Page 20 GRD-MQ User Manual GRD-MQ to Broker Connection Selected but not resent: In models with SIM detection it indicates that the SIM is not placed. Pin Required: This message appears when a SIM card requires a PIN. PIN Error: This message shows that the PIN entered is incorrect. If a PIN is entered incorrectly 3 consecutive times, the SIM card will block.
- Page 21 GRD-MQ User Manual GRD-MQ to Broker Connection In general, each one has a specific motive although it depends on the connection on the server side for the indication to be correct, even so, any of the these 3 errors indicate a problem in the connection.
-
Page 22: Serial Port Configuration
GRD-MQ User Manual Serial Port Configuration Serial Port Modes Embedded "Modbus Master" (for I/O extension) Embedded "Modbus Slave" (to read I/Os from an external Modbus master) "Remote" mode Data parsing from "Scripts" Serial Port Configuration In GRD with two serial ports you will be able to configure them individually. Notice that the two serial ports cannot be configured on the same mode. - Page 23 GRD-MQ User Manual Serial Port Configuration Flow control: Allows automatic control of communication traffic according to the network availability. It is generally used for massive data transfer to avoid loss of information. Stop bits: Allows to define the number of stop bits. Time window and End character In the "Remote"...
-
Page 24: Inputs/Outputs
GRD-MQ User Manual Physical Inputs/Outputs Physical Inputs/Outputs Depending on the model, the GRD/cLAN can have or not physical inputs/outputs. We will now see the types of inputs/outputs that we can have and which parameters we can configure of each one. It is important to point out that this configuration is applicable only to physical inputs and not to inputs from the Modbus queries. - Page 25 GRD-MQ User Manual Physical Inputs/Outputs The value of the anti-debounce can be configured between 1 and 250 ms. On devices with more than 8 digital inputs, inputs higher than 8 will have an anti-debounce time fixed at 250 ms. The counting divisor can take a value between 1 and 1000. On the cLAN2205-XF, cLAN2205-MQ, GRD3621-XF-3G, GRD3621-MQ-3G, GRD3625-XF-3G and GRD3625-MQ-3G you must configure wether a IO terminal will work as an input or as an output Take special care not to apply direct voltage to a terminal configured as an output and in ON state.
- Page 26 GRD-MQ User Manual Physical Inputs/Outputs Analog inputs 25 / 84...
- Page 27 GRD-MQ User Manual Physical Inputs/Outputs In the configuration of analog inputs we can select the operational mode depending on the GRD/cLAN model, this refers to whether we are going to measure voltage or current and its resolution. The analog inputs can be configured as follows: 26 / 84...
- Page 28 GRD-MQ User Manual Physical Inputs/Outputs To use AI1 in PT100 mode you must also set internal jumpers on the GRD-3301-XF, GRD-3621-XF-3G and the GRD-3621- MQ-3G Voltage: 0 to 1V with 3 decimal digits 0 to 1V with 4 decimal digits 0 to 10V with 2 decimal digits 0 to 10V with 3 decimal digits Current:...
-
Page 29: Features Of Power Supply And Inputs/Outputs
GRD-MQ User Manual Features of power supply and inputs/outputs For GRD-3G only Power supply and inputs / outputs Below you will find the minimum and maximum admissible values of digital inputs and outputs as well as analog voltage and current inputs, and also GRD consumption and power supply. Power supply Parameter Condition... - Page 30 GRD-MQ User Manual Features of power supply and inputs/outputs Input impedance KΩ Count frequency We now show two examples of how to connect an input, directly from the same source feeding the equipment and from an external source where we can clearly see that they must share the common Terminal.
- Page 31 GRD-MQ User Manual Features of power supply and inputs/outputs Digital outputs to actuate a Relay When the digital output is used to actuate a relay coil a protection diode must be added to the connection to avoid damage to the output of the equipment. This must be connected in reverse, that is the anode to the output terminal of the equipment and the cathode to the positive terminal feeding the relay.
- Page 32 GRD-MQ User Manual Features of power supply and inputs/outputs Current inputs (4-20mA) Parameter Value Units Full scale Precision 10 / 1 Shunt resistance Ω The following two examples show the connection of a 4 – 20 mA sensor sharing the power supply with the equipment for passive sensors or for active sensors with independent power supply.
- Page 33 GRD-MQ User Manual Features of power supply and inputs/outputs 2020-09-28 32 / 84...
-
Page 34: Embedded Modbus Master Configuration
GRD-MQ User Manual Embedded MODBUS master Configuration For GRD-3G, GRD-MQ, cLAN-MQ and cLAN-XF V2.0 + Embedded Modbus master (Input/Output extension) Depending on the GRD/cLAN model, it can have an internal Modbus master, which will allow you to increase the number of inputs/outputs of the device. We will now see the configuration and utilization. This master will let you load a maximum of 100 Modbus queries to which will be able to configure certain parameters. - Page 35 GRD-MQ User Manual Embedded MODBUS master Configuration Transmission mode It refers to the Modbus protocol to be used, being RTU or ASCII. 34 / 84...
- Page 36 GRD-MQ User Manual Embedded MODBUS master Configuration Time between polls This is the time the equipment will wait before sending a query after having received the response to another query. Timeout This is the time the GRD/cLAN waits for the arrival of a response from the slave. Retry The retries are the number of times that the master will send the query if we don’t have a valid response, before considering the value of the query as 0, while the quantity of retries is not met, the master will...
- Page 37 GRD-MQ User Manual Embedded MODBUS master Configuration If we click on “Add” a screen will be displayed in which we will be able to configure all the parameters of the query Slave ID It is the address of the slave we wish to query. Command Here we can configure the type of register to be queried: INPUT REGISTER...
- Page 38 GRD-MQ User Manual Embedded MODBUS master Configuration INPUT STATUS HOLDING REGISTER INPUT REGISTER Address In this parameter we load the address of the query, the value can be between 1 – 65536. Length With this parameter we will be able to define the number of registers we want to query, this length can be 1 or 2 according to the type of query.
- Page 39 GRD-MQ User Manual Embedded MODBUS master Configuration Coil Status I or O Holding BIT WORD 0 to 15 I or O Register INTEGER AN or PI INTEGER SIGNED AN or PI INTEGER 32 BITS AN or PI SIGNED FLOAT 32 BITS AN or PI INTEGER 64 BITS FLOAT 64 BITS...
-
Page 40: Channels
GRD-MQ User Manual Channels Channels Channels are the media through which information about inputs/outputs of the MW (or broker) equipment are sent or received. These channels can be linked to physical entry points of the equipment like MODBUS queries according to their compatibility with the channel. - Page 41 GRD-MQ User Manual Channels After selecting the desired channel and among any of the 4 you’ll have the option to add or remove, it is important to point out that within each channel only inputs and outputs compatible with that channel will appear.
- Page 42 GRD-MQ User Manual Channels To erase a channel you only have to click on the “Del” button of the channel previously selected. Since firmware GRD-3G 1.9+ and cLAN 2.8+ and new channel source called "Mem" is added This source is linked to a 100 position volatile memori that can be read and wrote from the script using read_io 305 and write_io 305 The signal level can be configured as analog channel source in GRD-XF-2G with firmware 4.0.0 or higher.
-
Page 43: Reports And Historical Records
GRD-MQ User Manual Reports and Historical records Reports and Historical records - MQTT publish There are 2 types of information that the GRD-MQ/cLAN-MQ can send. On one side, we have the reports that contain the real values of inputs and outputs updated according to the criteria configured in the device. - Page 44 GRD-MQ User Manual Reports and Historical records Payload format - Format wildcards Used both for reports an historical records %n Channel type (I, O, AN, PI) %i I/O channel number %v I/O channel value in numeric format %b /O channel value in boolean format (true - false) For historical records only %t Seconds since 1970 %d Day...
- Page 45 GRD-MQ User Manual Reports and Historical records the first time it is connected, it sends a message with all configured reports. Digital inputs channels reports: The following figure shows the configuration screen of the digital inputs reports: Report by change If a report by change of a digital input cannel is enabled, a change of value will generate a message that will be sent to the broker.
- Page 46 GRD-MQ User Manual Reports and Historical records Report by change The report by change is enabled in the channels we want to be updated in the broker every time that the signal changes The "percentage" report will report if the input changes a percentage from full scale. The full scale value will depend on the input type.
- Page 47 GRD-MQ User Manual Reports and Historical records Pulse inputs channels reports: The pulse channels have 2 types of reports. On one side the reports by performed count and on the other the temporary report. Report by count In the counts number report the device sends a message to the broker each time the desired input counts a number of pulses from the last report of this channel, by counts or by time.
- Page 48 GRD-MQ User Manual Reports and Historical records the event took place. The GRD and the cLAN have the capability of storing up to 100000 events in off-line mode. Para acceder a la pantalla de configuración de históricos debe ir en el Configurador al menú “Channels” allí...
- Page 49 GRD-MQ User Manual Reports and Historical records By alarm This criterion defines an operational band through a maximum and minimum. When the analog input exceeds the maximum value a Historical is generated by maximum, when the analog input is lower than the minimum a Historical by minimum is generated and when the analog input passes from a maximum value or from a minimum value to a normal value between both a Historical by normal value is generated.
- Page 50 GRD-MQ User Manual Reports and Historical records It is not possible to configure a value of hysteresis greater than the difference between the maximum and minimum, and also a maximum smaller than a minimum. We can also associate a digital output channel to the alarm event by maximum and another one of alarm by minimum, this means that when the analog input in the maximum range will activate an output and in the minimum another one.
- Page 51 GRD-MQ User Manual Reports and Historical records Pulse input channels historical records The pulse channels can also generate Historicals in a specific time that can be configured the same way as in the other channels, as it is shown in the following figure. We can also decide if once the Historical is generated, we want the counter reset to 0 or not.
- Page 52 GRD-MQ User Manual Reports and Historical records This operation can take a considerable time. Configuring time The time can be updated on the monitoring screen by clicking on the “Sync” button. The time is synchronized with the PC time to which is connected. It is important to disable the Windows option “...
-
Page 53: Remote Serial Port
GRD-MQ User Manual Remote Serial Port over MQTT Remote serial port using MQTT This procedure will allow you to send and receive data to and from the serial port (RS232/RS485) using publish and subscribe. You must configure the serial ports publish and subscribe topics and the format the payload will have Payload format %b Binary data as received. -
Page 54: Remote Configuration
GRD-MQ User Manual Remote configuration over MQTT GRD-MQ y cLAN-MQ remote configuration This devices can be configured remotely using a MQTT broker to gain acceso the the device. You have to configure a configuration topic to publish and receive (subscribe) the configuration. The GRDconfig software will use the same topic to configure the device. - Page 55 GRD-MQ User Manual Remote configuration over MQTT And type the ClientID of the device you want to configure. Once the link is established use the "Monitor", "Get Configuration" and "Send Configuration" buttons. MQTT connection parameters (and GPRS on GRD) can't be modified remotely 2020-11-19 54 / 84...
-
Page 56: Sms
GRD-MQ User Manual SMS Monitoring and Configuration SMS - Monitoring and Configuration for GRD-MQ The status and configuration of GRD-MQ equipment can be verified using SMS. It is also possible to modify the configuration with the same system. The SMS commands supported by the GRDs are detailed below. Every time that the equipment recognizes the command as valid it will respond with another message to the telephone number that sent it. - Page 57 GRD-MQ User Manual SMS Monitoring and Configuration STATE o ? Returns the status of GRDs communications Note: This command does not require a password. Returns the current configuration Command Description LIST Returns the basic equipment configuration, the model and serial number.
- Page 58 GRD-MQ User Manual SMS Monitoring and Configuration If the configuration was successful the GRD-MQ will respond “GPRS OK”. Command Description GPRSOFF [password] Disable GPRS service If the configuration was successful the GRD-MQ will respond “GPRSOFF OK”. Modify the MQTT connection configuration With this command you can change the URL or IP address and the connection port to the broker.
- Page 59 GRD-MQ User Manual SMS Monitoring and Configuration MQTTPSSX pssx pssx MQTT password continuation Disconnecting the GRD Command Description DISC [password] This command disconnects the GRD-MQ from the broker preventing a reconnection until the connection is reconfigured. Modifying the password Command Description PASSW newpassword [password] Modifies the password used by the GRDs for SMS and the...
- Page 60 GRD-MQ User Manual SMS Monitoring and Configuration GETI Reads all I channels (Max. 50 channels in on SMS). Digital Outputs: Command Description GETO [O channel] * Reads channel O. (Read note*) GETO [first O channel]…[last Read several O channels O channel] GETO Reads all O channels (Max.
- Page 61 GRD-MQ User Manual SMS Monitoring and Configuration State can be "ON" or "OFF" Command Description SETAN [AN channel] [value] The AN channel will be set to "value" Only applies to analog channels mapped to script variables or Modbus queries Command Description SETPI [P channel] [value] The P channel will be set to "value"...
-
Page 62: Sms Alarms
GRD-MQ User Manual SMS Alarms SMS alarms GRDs w/SMS can send SMS alarms to the configured recipients when and analog inputs goes out of range or a digital input changes. You will find the tab "SMS" enabled on the GRD Config software when working with these GRDs. Enabling SMS alarms You need to enable which channel will send and SMS alarms. - Page 63 GRD-MQ User Manual SMS Alarms On analog inputs channels you must enable the SMS by alarm option Limits should be configured later depending on the SMS scaling Phone Book To access it go to the SMS tab and then to press the "Phone Book" icon. 62 / 84...
- Page 64 GRD-MQ User Manual SMS Alarms To create a new entry press the "Add" button. This window will be displayed. The "Name" is only used as a reference. SMS selection After enabling the channels that will send SMS you can configured the text and scaling of each one. Goto to the SMS tab and press the "Message Configuration"...
- Page 65 GRD-MQ User Manual SMS Alarms The enable the SMSs alarm you will use. You can enable single events per channel. As an example, you can send an SMS only when input 3 goes on but not when it goes off. You can add up to 50 SMSs.
- Page 66 GRD-MQ User Manual SMS Alarms To modify the you must double click the corresponding line. Editing the SMS text You can select here which recipient will receive this particular SMS. The maximum text length is 60 characters. Using &t, &v and &i you can add the date, value and channel number to the SMS text.
- Page 67 GRD-MQ User Manual SMS Alarms This scaling will only be applied to the SMS of that analog channel. Analog input scaling If you press the "AN - Scale & Config Alarm" button this window will be shown On the top part (Scaling) you can select which scale type will be applied fo this input, how many decimal digits will be used and the A &...
- Page 68 GRD-MQ User Manual SMS Alarms On the botton part (Alarm Limits) you can re define the "Historical By Alarm" limits but using the scaled values. Editing the scaling will affect all the SMS related to the same analog channel. 2019-11-28 67 / 84...
-
Page 69: Grd's Modbus Slave
GRD-MQ User Manual GRD's Modbus Slave For GRD-3G only GRD Modbus Slave GRD's serial port can be configured in Modbus slave mode. This mode will allow you to read and write all GRD channels (physical, Modbus or script) To use the Modbus slave configure one serial port in "Modbus Slave" mode Modbus slave configuration Go to the “Modbus”... - Page 70 GRD-MQ User Manual GRD's Modbus Slave Serial mode It refers to the Modbus protocol to be used, being RTU or ASCII. 69 / 84...
- Page 71 GRD-MQ User Manual GRD's Modbus Slave Slave ID The GRD will answer when it receives a Modbus query to this Modbus slave ID Exceptions If enabled the GRD will answer with an exception to a query sent with an invalid command, address range or value.
-
Page 72: Scripts - Introduction
GRD-MQ User Manual Scripts - Introduction Script Programming Description The GRD/cLAN with script programming support allows you to run user written scripts on the device, making it more powerful and flexible. The GRD/cLAN will continue working normally while the script is running. Script Features •... -
Page 73: Scripts - Publish/Subscribe
GRD-MQ User Manual Scripts - Publish/Subscribe MQTT publish/suscript from Script Script programming can be used to get data from subscribed topics of publish extra topics. Please go to the script programming manual for more information. Script - Suscription You can subscribe to up to 10 topics The use read_io 1000 to get the messages on the script read_io 1000,b,0;... - Page 74 GRD-MQ User Manual Scripts - Publish/Subscribe 2020-11-20 73 / 84...
-
Page 75: Models
GRD-MQ User Manual GRD1620-MQ-3G GRD1620-XF-3G / GRD1620-MQ-3G Hardware features SIMs: 1 USB: 1 (For configuration) 2G, 2.5G (GSM GPRS/EDGE - 850/900/1800/1900MHz) and 3G (UMTS WCDMA / 800MHZ- B19, 850MHz-B5/B6, 900MHz-B8, 1900MHz-B2, 2100MHz-B1) - Automatic switch between American and European Bands Serial ports: 2 (one RS232, one RS485) Power supply requirements: 10 to 30 Vdc Dimensions: 70 x 90 x 65 mm... - Page 76 GRD-MQ User Manual GRD1620-MQ-3G Wiring – Terminal Blocks 2020-10-05 75 / 84...
-
Page 77: Grd3621-Mq-3G
GRD-MQ User Manual GRD3621-MQ-3G GRD3621-XF-3G / GRD3621-MQ-3G Hardware features SIMs: 1 USB: 1 (For configuration) 2G, 2.5G (GSM GPRS/EDGE - 850/900/1800/1900MHz) and 3G (UMTS WCDMA / 800MHZ- B19, 850MHz-B5/B6, 900MHz-B8, 1900MHz-B2, 2100MHz-B1) - Automatic switch between American and European Bands Digital Inputs/Outputs: 4 Configurable As inputs: voltage activated (They can count pulses of up to 45 Hz) As outputs: open collector type... - Page 78 GRD-MQ User Manual GRD3621-MQ-3G Wiring – Terminal Blocks Wiring - Internal jumpers for AI1 AI1 input can be configured to measure current, voltage or temperature using a PT100 sensor It must be configured on the configuration software and with two internal jumpers. To measure current or voltage set both jumpers to the VI position.
- Page 79 GRD-MQ User Manual GRD3621-MQ-3G 2020-10-05 78 / 84...
-
Page 80: Grd3625-Mq-3G
GRD-MQ User Manual GRD3625-MQ-3G GRD3625-XF-3G / GRD3625-MQ-3G Hardware features SIMs: 1 USB: 1 (For configuration) 2G, 2.5G (GSM GPRS/EDGE - 850/900/1800/1900MHz) and 3G (UMTS WCDMA / 800MHZ- B19, 850MHz-B5/B6, 900MHz-B8, 1900MHz-B2, 2100MHz-B1) - Automatic switch between American and European Bands Serial ports: 2 (one RS232, one RS485) Digital Inputs/Outputs: 6 Configurable As inputs: voltage activated (They can count pulses of up to 45 Hz) - Page 81 GRD-MQ User Manual GRD3625-MQ-3G board for its connections. Port B is an RS485 port is of the 2-wire type (TRB+ and TRB-) and has a terminal board for its connections. Wiring – Terminal Blocks 2020-10-05 80 / 84...
-
Page 82: Grd3534-Mq-3G
GRD-MQ User Manual GRD3534-MQ-3G GRD3534-XF-3G / GRD3534-MQ-3G Hardware features SIMs: 1 USB: 1 (For configuration) 2G, 2.5G (GSM GPRS/EDGE - 850/900/1800/1900MHz) and 3G (UMTS WCDMA / 800MHZ- B19, 850MHz-B5/B6, 900MHz-B8, 1900MHz-B2, 2100MHz-B1) - Automatic switch between American and European Bands Serial ports: 2 (Both are RS232 and RS485) Digital Inputs : 16 voltage activated (8 of them can count pulses of up to 1 Khz) Analog Inputs: 8 configurable as 0-1V / 0-10V / 4-20mA... - Page 83 GRD-MQ User Manual GRD3534-MQ-3G Wiring – Terminal Blocks 2020-10-05 82 / 84...
-
Page 84: Appendices
GRD-MQ User Manual Troubleshooting Signal, SMS, GPRS and broker link Troubleshooting The GRD does not respond to SMS messages. If “GRD Config” shows a very low signal level “Ex: -113dB” or SIM status shows “LOW SIGNAL”). The GRD has no signal. Verify: That the antenna is correctly connected. - Page 85 In any case verify: That the established broker connection was made to the correct IP address and port (through SMS with the ‘state’ command). For more information on troubleshooting problems please contact support@exemys.com 2020-09-28 84 / 84...
Need help?
Do you have a question about the GRD-MQ Series and is the answer not in the manual?
Questions and answers