
Summary of Contents for AIC WAIKATO Expresso 72560
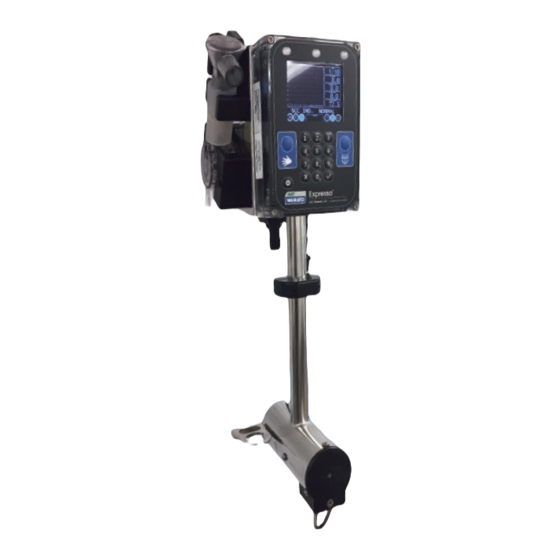
- Page 1 Expresso Tie Stall 1 © 2012 Agricultural Instruments Corporation (AIC) 608.526.6882...
-
Page 2: Table Of Contents
Expresso Tie Stall Table Of Contents Introduction…………………….…………………………………………………………………………………..3 Technical Specifications …………………………………..…………………………………………………4 Power Supply Specifications…………………………………………………………………………………….5 Power Supply Installation……………...…………………………………………………………………………6 Hardware Installation……………………………………………………………………………………………..8 Power Supply and Stall Cock Wiring……………………………………………………………………………9 Expresso Tie Stall Control Layout…….………………………………………………………………………10 Internal and External Wire Connections……………………………………………………………………..11 External Wire Schematic………………………………………………………………………………………..12 Milking Support Cable System………………………………………………………………………………..13 Break away Clip and Spring Clip……………………………………………………………………………..14 Hose Hook up…………………………………………………………………………………………………..15 Detacher Set up and Switch Operation……………………………………………………………………….16... - Page 3 Expresso Tie Stall A message from AIC AIC Waikato LLC (AIC) would like to thank you for purchasing your new Tie Stall Detacher™ and accessories. The instrument you purchased will be valuable dairy herd management tool for years to come The Expresso Tie Stall Detacher™...
-
Page 4: Technical Specifications
Expresso Tie Stall Technical Specifications Physical Specifications Control Box Case: Impact-resistant Polysulfone with scratch-resistant Lexan™ front label. Size 4.5” x 6.5” x 2.0”, Weight less than 16 ounces (454 grams). FlowCell: Approved P-1700 Polysulfone materials and 304 stainless steel sensing probes. Shape is a modified elbow, approximately 3”... -
Page 5: Power Supply Specifications
Expresso Tie Stall Power Supply Specifications The 72560 Expresso is made to work with 24 VDC power. The PCB output is near the same as the power supply input. To properly function, the power to the detacher must be within the operating range of the 24VDC + or –... -
Page 6: Power Supply Installation
Expresso Tie Stall Power Supply Installation *******USE A UTILITY ROOM OR ANOTHER DRY LOCATION******* The power supply must be NOTICE located in a well ventilated, dry, clean environment . Be sure input ground to LPS is connected per local codes. Very Important: 1. - Page 7 Expresso Tie Stall Power Supply Installation 7 © 2012 Agricultural Instruments Corporation (AIC) 608.526.6882...
-
Page 8: Hardware Installation
Expresso Tie Stall Hardware Installation Mounting the Power Supplies The power supply offered by AIC for Never work in the Tie Stall applications is a switching CAUTION power supply with power supply that has a 120 VAC outlet live incoming power. plug. -
Page 9: Power Supply And Stall Cock Wiring
Expresso Tie Stall Power Supply and Stall Cock Wiring ******Power supply located in a Utility Room or another Clean Dry Location****** PN. 72540 20 Amp 24 VDC Power Supply connected to 120 Volt AC. **DO NOT EVER BYPASS THE BREAKER; THIS WILL VOID WARRANTY Positive and negative wires from power supply to barn. - Page 10 Expresso Tie Stall Control Layout After installation is complete verify there is adequate voltage at the furthest distance from the power supply by installing and powering the detachers then checking the voltage. The voltage should be within the specified operating range. When milking is occurring verify that the current is the same on both output legs of the power supply.
-
Page 11: Internal And External Wire Connections
Expresso Tie Stall Internal and External Wire Connections Expresso PCB #90010250 4 Pin Terminal 1. Not Used 2. Not Used 3. Orange to Jog Switch 4. Yellow to Jog Switch Wifi Module Socket 9 Pin Terminal 1. Black To Pulsator Front 2. -
Page 12: External Wire Schematic
Expresso Tie Stall External Wire Schematic Expresso PCB PN 90010250 BLACK Output to Pulsator BROWN BROWN Not Used BLACK BLUE ORANGE Remote Switch Connection BLACK YELLOW Output to Milk Line SO Valve BLACK GREEN Output to Motor Harness WHITE WHITE To Flow Cell/ BLACK Sensor... -
Page 13: Milking Support Cable System
Expresso Tie Stall Milking Support Cable System The 72560™ has a hook on the top to hang the detacher during milking. For proper milking unit positioning and retraction location, the detacher needs to be positioned beside the cow approxi- mately six inches behind the cow’s front shoulder (See the following illustration). If the detacher is hung from the pipeline or structure toward the head of the cow, the detacher rope may not be long enough and/or the claw may hit the floor during retraction. -
Page 14: Break Away Clip And Spring Clip
Expresso Tie Stall Break Away Clip & Spring Clip The break-away clip helps to protect the detacher if a cow gets her foot caught on the milking unit or rope by releasing and separating the claw from the detacher. 1. Attach the break-away clip to the spring snap. 2. -
Page 15: Hose Hook Up
Expresso Tie Stall Hose Hook-Up It is essential the hoses be hooked up correctly ******** ******** Side View of 72560 Tie Stall Detacher Milk Hose Inlet from Milking Unit/Claw to 70026 Flow Cell Sensor Milk Hose Exit to Pipe Line Pulsator Vac. -
Page 16: Detacher Set Up And Switch Operation
Expresso Tie Stall Detacher Set up & Switch Operation There is a key pad in the decal of the front cover of the EXPRESSO. The key pad has switches numbered 0-9, two large operating switches pictorially labeled with a hand by the left (manual/wash) switch and an udder w/milker unit by the right (attach/detach) switch and three actuator switches labeled with a check mark, X and gear/browser icon. -
Page 17: Switch Operation
Expresso Tie Stall Switch Operation Browser Switch: AFTER THE BROWSER SWITCH IS PRESSED — DISPLAYED ON THE SCREEN SERIAL NUMBER, STALL NUMBER SOFTWARE VERSION NUMBER 1. REVIEW DATA 2. CHANGE SETTINGS 3. WRITE TO DATA CARD 4. ERASE MEMORY 5. RESET MAINTENANCE 6. - Page 18 Expresso Tie Stall Switch Operation BROWSER/GEAR SWITCH After Pressed 1. REVIEW DATA—After choosing 1 on numeric switch pad, review data, the Expresso will provide a summary of all the cow milking’s stored then when pressing “next:” will display each individual cow milking stored.
- Page 19 Expresso Tie Stall Detacher Control Set Up Factory Setting Range Increments Effects of Adjustment Settings Page 1 Language Multiple English Choose Language Displayed EXPRESSO Units will ask for an ID ID Enable Yes/No number when starting milking Units of Measure LB/F or Kg/C LB/F Change from Imperial to Metric...
- Page 20 Expresso Tie Stall Detacher Control Set Up Factory Settings Range Increments Effects of Adjustment Settings Page 2 This delay allows for soft take-off. The 0 to 10 EXPRESSO control shuts the vacuum off Retract Delay .2 seconds 1.6 second seconds the claw and then activates the retraction cylinder in the time this delay is set.
- Page 21 Expresso Tie Stall Detacher Control Set Up Factory Function Range Increments Effects of Adjustments Settings Page 3 Zero shut’s off the Kick-Off feature any number turns on. Increase to Kick Off Detect Time 0 to 5 Seconds OFF/0 make kick-off less sensitive, decrease to make more sensitive.
-
Page 22: Control Set Up
Expresso Tie Stall Control Set Up Factory Function Range Increments Effects of Adjustments Settings Page 4 Use CT Logic Yes/No The number of cow milk temperatures that are averaged. CTLogic Average 4,8 or 16 The average is considered the normal milk temperature. The deviation degree is the amount the milk temperature must CTLogic Deviation... - Page 23 Expresso Tie Stall Control Set Up Factory Function Range Increments Effects of Adjustment Settings Page 5 Low Line Parlor Type High Line Set-up to match milk pipeline type. High Line Reverses polarity to Vacuum Shut-off shifting Invert SO Relay Yes/No valve.
- Page 24 Expresso Tie Stall Control Set Up Factory Function Range Increments Effects of Adjustments Settings Page 6 Zero disables the prep timer. The timer starts when the detacher milk (right) switch is pressed. The EXPRESSO display shows a count down 0 to 180 Prep Time 5 seconds OFF/0N...
- Page 25 Network Speed LEG or ADV Legacy Used for Parlor 485 network only Default or Color Scheme Default Default = AIC Waikato—Legacy = Old AIC Legacy Legacy/ Legacy = Normal Milking Screen— Perfect Display Style Legacy Perfect Milking = Advanced Flow Rates...
-
Page 26: Setup Definitions
Expresso Tie Stall Setup Definitions Page 1 Languages Allows you to choose the language you which the control to display. ID Enable Moving ID enable to yes makes the 72560 units ask for a cow ID number when the right switch is pressed to start milking. - Page 27 Expresso Tie Stall Setup Definitions Page 2 Retract Delay (soft take off) The retract delay allows the vacuum in the claw to bleed off (diminish) before retracting the rope or chain. This reduces the pulling force on the teats when removing the cups. Retract delay is adjustable (see controls set up table) Pull Time The pull time is the amount of time the printed circuit board (PCB) sends a retract signal to...
- Page 28 Expresso Tie Stall Setup Definitions Page 3 Kick off Detect Time If the value in this feature is zero Kick off is turned off. When a value is put in place, the value is put in place, the value in seconds is the amount of time the temperature drop must be with-in before it is considered a kick off.
- Page 29 Expresso Tie Stall Setup Definitions Page 4 CT Logic (Critical Temperature Logic) YES/NO CT Logic is one of two modes the Expresso Detacher Control can be put into to sense milk temperature. If switched to “YES”, CT Logic provides a means of establishing a normal milk temperature in the herd by averaging a set number of milk temperatures.
- Page 30 Expresso Tie Stall Setup Definitions Page 4 continued Calibrate Temperature Milk Temperature Offset Milk Temperature Offset allows the operator to calibrate the EXPRESSO Control’s temperature reading. There are two reasons or for adjusting the temperature calibration 1. To adjust all the EXPRESSO controls to record the same temperature, be sure all the flow cells in the barn are the same temperature.
- Page 31 Expresso Tie Stall Setup Definitions Page 5 Parlor Type/Milking System Type The milking system type helps to improve accuracy with the two different parlor types: low line or high line. If the milk meter is down on the curb or below the cow’s udder, choose low line. If the milk meter is above the cow’s udder, choose high line.
- Page 32 Expresso Tie Stall Setup Definitions Page 6 Attach/Prep Timer When set to zero this function is disabled. To set-up a attach time enter the attach/prep time function and with the right switch scroll to the desired attach time. When established the EXPRESSO provides a count down to attach.
- Page 33 Expresso Tie Stall Setup Definitions Page 7 AIC Waikato Model When selecting the correct model number and selecting factory defaults “Yes” and enter the detacher will automatically change to the model’s factory defaults. Factory Defaults Factory default settings are for the typical installation. By choosing the “Yes” in the menu, the Detacher Control will revert back to all the factory settings as selected by the model number.
- Page 34 Expresso Tie Stall Perfect Milking Display Screen Milking Time Milk Yield in 2 min Milk Yield Total Prep Ratio % first 2 min Milk Flow Curve Average Milk Flow Peak Milk Flow Low Flow < 2.2 lb. min Low/Low Flow < Detach Temperature Group Number Cow Number...
-
Page 35: Milking Display Screen Layout
Expresso Tie Stall Milking Display Screen Layout Milking Time Milk Flow Curve Milk Yield Average Milk Flow Peak Milk Flow Milk Temperature SCC Indication Six Indicator Signals on the Bottom of Screen A = Automatic or Pulsation output Cow Group Output Indicators M = Manual Milking Indicators F = Front,... -
Page 36: Expresso Switch Pad Layout
Expresso Tie Stall Expresso Switch Pad Layout There are switches embedded in the decal on the front cover of the Expresso control. Two are pictorially labeled with a hand for manual (left switch) and udder w/milking unit for milking (right switch). Unless cow numbers are being added or cows are sorted, these two switches are normally the only switches used during milking. - Page 37 Expresso Tie Stall Startup Procedures CAUTION Installation Test The following steps are to be preformed by the dealer prior to the first milking. When using the Control 72560 Detacher or stand-a-lone, the following will test the general operation of all valves, cylinders, motors and controls.
-
Page 38: Switch And Light Operation
Expresso Tie Stall Switch and Light Operation During Milking: To milk the cow in the automatic sensing mode. Press the right switch to milk in automatic sensing mode. Milk the cow. If, Detacher equipped, milker unit will be detached after the end of milk delay. If not detacher equipped the end of milking lights will flash after the milk flow drops below the end of milk flow rate and after the end of milk delay is expired the lights will be on continually. - Page 39 Expresso Tie Stall Milking and Wash How to Milk with Detacher Modules Press the right ATTACH/DETACH switch. The detacher will release the claw and open the vacuum to the claw. The NO Milk LEDs will be flashing to indicate the absence of milk flow. Pull out enough rope so that the claw can be attached to the cow.
- Page 40 Expresso Tie Stall Milk Yield Calibration and End of Milking Take- Off Settings Very Important: End-of-Milking and Milk Yield Calibration End of milking take-off setting—immediately after the system is started, during the first milking it is important to determine the appropriate end of milking setting for the dairy. Do so accordingly. End-of-Milking Take-Off (EOM): The end of milking detach flow rate and delay setting determine how long or short the cows are being milked.
-
Page 41: Milking Data
Expresso Tie Stall Reviewing Milking Data Lifetime Attachments Lifetime hours of operation Total milk i.e. total milk of ATTACH COUNT = 141 the milkings in memory, maximum of 60 milkings Vac On Time Number of the last current Milkings: Maximum of 60 TOTAL 703 LB milking Average production per... - Page 42 Expresso Tie Stall Review Milking Data “Perfect Milking” Screen 1 Milking Time Milk Yield in 2 min Milk Yield Total Prep Ratio % first 2 min Milk Flow Curve Average Milk Flow Peak Milk Flow Low Flow < 2.2 lb. min Low/Low Flow <...
- Page 43 Expresso Tie Stall Review Previous Milking Data Screen 2 Time Average Change % Yield Average Change % Yield in 2 min. Ave. Change% Average Flow Ave. Change % Peak Flow Ave. Change % Low Flow Ave. % Change % SCREEN 2 Individual Cow Data The Expresso Control stores two Screens of data for each individual milking.
- Page 44 Expresso Tie Stall Review Milking Data “Legacy Screen” To continue to review the data press NEXT. The control will then display the individual cow milking data, starting with the last cow milked. Two screens of data is created for each cow. Cow Data Display (see Screen 1”...
- Page 45 Expresso Tie Stall Wireless Downloading of Cow Milking Data The Expressos when equipped with a wireless downloading modules will transfer the data to the Tracker Air when the Expresso is switched into the wash mode, The Ex- presso Control erases it’s memory after downloading it’s data. Expresso’s When switched to Wash Mode, the Expresso’s Transfer their Data wire-...
- Page 46 Expresso Tie Stall Installing, wifi module, initializing and address- ing Expresso PCB The Expresso Detacher Controls can be equipped with a wifi module, which com- municates wirelessly with the Tracker Air. Install the wireless module and set-up the Expresso PCB as follows: Wifi Module Expresso PCB 1.
-
Page 47: Download Data
Expresso Tie Stall Downloaded Data If the data in the Expresso Memory is transferred to the Tracker Air it is filed by date on a spread sheet with columns identified as follows: ID = Identification Number present if entered prior to milking. Seq = Sequence number is automatically assigned, as a means of separating the data. -
Page 48: Control Enclosure Assembly
Expresso Tie Stall Control Enclosure Assembly (Notice) For various reasons the 72560 Stall Control enclosure may need to be opened. The enclosure is made from a tough plastic however with all plastic enclosures correct assembly is required to keep the integrity of the enclosure. Therefore, after taking the enclosure apart, reassemble the enclosure as described in the following: - Be sure the gasket is properly in place. - Page 49 Expresso Tie Stall Maintenance Regular Checks The pulsator must be checked regularly for proper operation. Pulsator filters if present should be kept clean. If a pulsator malfunctions or pulls an excessive amount of milk or dirt into it. Do not continue to use the unit.
- Page 50 Expresso Tie Stall Yearly Maintenance 72560 Detacher AIC provides this unit to accommodate different styles of pulsators (Diaphragm • and Direct acting. Therefore it is necessary to follow the service instructions required for the style of pulsator in use. If other brands of pulsator is being used flow the manufacturer’s service recommendations.
-
Page 51: Diaphragm Pulsator Maintenance
Expresso Tie Stall Diaphragm Pulsator Maintenance Weekly, inspect clean and replace the filters as needed. • Replace the silicone gasket washers and diaphragm at intervals of 2000 hours of • operation. If the pulsator graphs are not within operating range, have the pulsator serviced by an •... - Page 52 Expresso Tie Stall Filter Cleaning and Replacement 31560 Retainer 21560 Pulsator Inlet Filter 22560 Cover Filter The Cover Filter and Inlet Filters should be checked weekly and kept clean. Service will depend on the environment. To change the filter take, remove the pulsator by turning it counter clockwise.
-
Page 53: Pulsator Specifications And Servicing
Expresso Tie Stall Pulsator Specifications and Servicing #20560 Diaphragm Pulsator Solenoid Valves: Specifications: Input power Nominal 24 VDC regulated power. — Current Draw— 20mA at 24 VDC Solenoid Coil Resistance— 1.1K to 1.2Kohms Servicing the Diaphragm Style Pulsator: (Solenoid Replacement) The pulsator solenoid valves have a low current draw (20mA), enabling relatively small power supplies to be used. - Page 54 Expresso Tie Stall Pulsator Service 1. The silicone gasket, washers and diaphragm should be replaced every 2000 hours of operation. 2. To do so dissemble the pulsator by removing the top cover top cover then take the six screws out. 3.
-
Page 55: Trouble Shooting
Expresso Tie Stall Trouble Shooting Symptom Probable Cause Remedy Meter fails to register Clean Probes using same Dirty Sensing Probes milk procedures as pipeline cleaning. Check the Claw for either too much Air Meter Reads High or Insufficient Claw Air admission or not enough. - Page 56 Expresso Tie Stall Electronic Control PC Board Removal and Replacement TURNED OFF Make sure power to the detacher is Using a 9/64” (4mm ) Allen wrench, loosen the four control box screws holding the front switch cover assembly. Pull the switch cover assembly off the enclosure case back and unplug the ribbon connector to the PCB.
-
Page 57: Mlso Valve Assembly Diaphragm Removal And Replacement
Expresso Tie Stall MLSO Valve Assembly Diaphragm Removal and Replacement Remove the milk line shutoff valve from the detacher by loosening MLSO valve mounting bracket screws and removing the brackets. Pull the MLSO and sensor out of the sensor mounting bracket. Remove the 4 screws from the MLSO cover. - Page 58 Expresso Tie Stall Troubleshooting for Sensing Circuit w/Milk Flow Simulator 70027– Flow Cell Sensor 70019–Cow Simulator 70026 - Flow Cell w/ MLSO Step One Insert Cow Simulator into inflow end of Flow Cell. Step Two Align pins in Flow Cell with matching holes in the Cow Simulator.
-
Page 59: Motor Housing
Expresso Tie Stall Motor Housing Disassembly Front Side with Motor Housing Back Side with Jog Switch End Cap Mounting Screws Motor Mounting Screw Ball Hook Assembly Motor Housing Disassembly 1. Remove the 4 mounting screws in the cap. 2. Remove the 2 mounting screws for the motor mount. - Page 60 Expresso Tie Stall Motor Parts 1. # 51020 SS Ball Catch Assembly 6. # 31009 SS Spool w/ Center Shaft 7. # 31004 Front End Cap 2. # 50165 SS Milking Unit Spring Clip 8. # 31005 Back End Cap 3.
- Page 61 Expresso Tie Stall Replacing 72560 Motor After Lower unit Motor 1 & 5 Housing is Disassembled 1. Remove the spool using the correct allen wrench. (3/32”) 2. Remove the (4) motor mounting screws (#1 Phillips screw driver). 3. Pull the Motor out of the Motor Holder Plate;...
-
Page 62: Jog Switch Replacement
Expresso Tie Stall Jog Switch Replacement Front Side Back Side with Motor with Motor Housing Jog Switch Back Side with Motor Jog Switch #31005 Back End Cap #51002 Hose Guide & Mt. Screw (1) # 20088 Jog Switch 1. Remove Hose Guide Mounting Screw (#2 Phillips Screw Driver) 2. -
Page 63: Warranty
Expresso Tie Stall Warranty Agricultural Instruments Corporation (“AIC”) Milking Equipment and/or related AIC parts are warranted by AIC for a period of one year from the date of installation against defects in materials and workmanship when installed, serviced and operated in accordance with the AIC’s written instructions, subject to the exclusions and limitations set forth below. -
Page 64: Spare Parts Electronics/Misc
Expresso Tie Stall Spare Parts - Electronics/Misc 30320 - Expresso Control 10250 - PCB MS34 Box Front Cover Expresso (w/display) (72560) 32308 - Case Back (72560) 29154 - Male 2Pin Power Cord (Out the hose; standard 5ft) 30351 - Dielectric Grease 30500 - Ball for Detacher Rope This Dielectric Grease is corrosion resistant... - Page 65 Expresso Tie Stall Spare Parts - Misc 51002 - 560 Hose Guide 28020 - Retract Motor Only 54088 - Piezo Switch 10036 - Protective Fuse for 560 31005 - Back End Motor Cap 31004 - 560 Front End Motor Cap 52560 - Motor Holder 31009 - Compak Plus Spool 20504 - 24VDC Solenoid...
-
Page 66: Power Supply
Expresso Tie Stall Spare Parts - Power Supply The 20-AMP UL Certified Power Supply comes complete with enclosure, incoming and outgoing breakers. For easy installation, it comes with a 6 ft. 120 VAC plug in power cable. Very Important: Never overload the power supply and always follow all local and national electric codes. - Page 67 Expresso Tie Stall Spare Parts - Flow Cell & MLSO 70026 - Flow Cell w/16” sensor cable w/ 70027 - Flow Cell w/16” Milk Line Shut Off sensor cable 31007 - Milk Line Shut Off Holder Bracket 30560 - Flow Cell Holder (sold individually) 70122 - Milk Line Shut Off (MSLO) Valve w/90°...
- Page 68 Expresso Tie Stall Spare Parts - Hangers, Side & Claw Hooks 50565 - Round 51010 - Square 51021 - Narrow 51022 - DeLaval Hanger Hanger Trolley Hanger Trolley Hanger 52085 - Side S Hook 50024 - Square Side Hook 52080 - Hose Hook 50318 - DeLaval Side Hook 50568 - SS Claw Hook 50317 - J Side Hook...
-
Page 69: Pulsator
Expresso Tie Stall Spare Parts - Pulsator 20560 - Diaphragm Pulsator 20527 - Diaphragm Pulsator Adaptor 31560 - Retainer 21560 - Inlet Filter 22560 - Cover Filter for Pulsator 31003 - Pulsator Block 31010 - DeLaval Pulsator Block 31016 - Boumatic Pulsator Block 20580 - Diaphragm Pulsator Repair Kit 51026 - Pulsator Cover 29150 - Pulsator Inline Filter... - Page 70 Expresso Tie Stall Spare Parts - Stall Cocks Included w/ Stall Cock Adaptor is the Siamese Hose and Wire 70081 - DeLaval Stall Cock Adaptor 70082 - Boumatic Stall Cock Adaptor 70089 - Universal Stall Cock Adaptor 70098 - Westfalia Stall Cock Adaptor 70088 - Surge One Touch Kit The 70088 Surge One Touch conversion kit is used to convert the Surge One Touch pulsator to a...
-
Page 71: Fast Connect
Expresso Tie Stall Spare Parts - Fast Connect The Fast Connect combines both milk and vacuum hose connections to improve efficiency and to save labor. Made of high density nylon composite, it prevents air leaks and a ensures a positive contact for good quality milking over the long run.
Need help?
Do you have a question about the Expresso 72560 and is the answer not in the manual?
Questions and answers