Table of Contents
Advertisement
Quick Links
Advertisement
Table of Contents

Related Manuals for Seagull REC2

Summary of Contents for Seagull REC2
- Page 1 Seagull #REC2 User Manual Product: Seagull #REC2 Released: 2020-04-24 FW: 1.0...
-
Page 2: Table Of Contents
GENERAL INFORMATION ......................................3 CONFIGURING #REC2 ........................................ 4 GENERAL ............................................4 SETTINGS AND VALUES TABLE ....................................4 #REC2 CHANNEL VALUE TABLE ....................................5 FLIGHT CONTROLLER / TRANSMITTER INTEGRATION .............................. 6 TRANSMITTER ..........................................6 PIXHAWK / PIXRACER / ARDUPILOT BASED FC ................................6 MISSION PLANNER ......................................... -
Page 3: General Information
- where utmost control is required of your camera. #REC2 has integrated circuitry to allow power supply to the camera through USB interface – which is extremely useful for all sorts of usage scenarios! (*only for cameras that support power supply via USB interface) There is a possibility of integrating camera shutter feedback for photo Timelapse function –... -
Page 4: Configuring #Rec2
CONFIGURING #REC2 GENERAL #REC2 can be configured by “Seagull-REC2-Config.exe” that can be downloaded via the following link: https://www.seagulluav.com/software/Seagull-REC2-Config.exe Seagull #REC2 Configurator example photo In order to adjust settings, make sure that #REC2 is connected to the camera and that the camera is powered on. -
Page 5: Rec2 Channel Value Table
#REC2 CHANNEL VALUE TABLE Setting up and using #REC2 is very simple. It can be controlled via transmitter or flight controller. Below you will find a table that illustrates #REC functions, which channels they are allocated to and the values for engaging the functions. -
Page 6: Flight Controller / Transmitter Integration
Please note that none of the Ardupilot based flight controllers output power through the rails - therefore #REC2 needs a power supply. To achieve this, it is recommended to utilize an external BEC of 5V to ensure proper functionality for #REC2 or any other accessories. -
Page 7: Mission Planner
MISSION PLANNER If you wish to trigger Seagull #REC2 from a Flight Controller, setting it up in Mission Planner is also straight forward. Start Mission Planner and follow the steps below: Click on INITIAL SETUP >> OPTIONAL HARDWARE >> CAMERA GIMBAL "SHUTTER"... -
Page 8: Dji Flight Controllers / A3
#REC2 can be controller via DJI A3 flight controller. It is very easy to setup automated flight photo capturing via DJI Assistant 2 software. For controlling more features of #REC2 an expansion kit is required, since by default it is not possible to utilize other F ports and bind them to the channels of LB transmitters. -
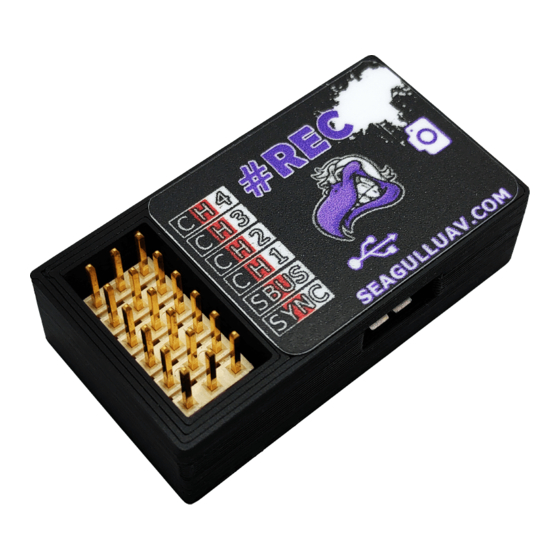
Page 9: Port / Pin Definitions
(only to be used with #SYNC2 or other hardware meant to interface with the port) TROUBLESHOOTING To determine the current state of Seagull #REC2 - simply read the output of the LED and reference it to the table below: “2” REC2 ACTION...