Table of Contents
Advertisement
Quick Links
Bedienungsanleitung
User Manual
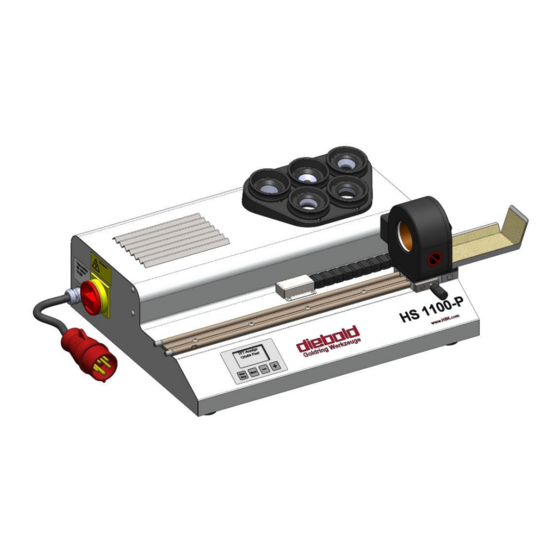
Horizontal-Schrumpfgerät
Horizontal Shrinking Device
HS 1100-P
Helmut Diebold GmbH & Co.
An der Sägmühle 4
D-72417 Jungingen (Germany)
Tel.: + 49 (0)7477-871-0 Fax: + 49 (0)7477-871-30
E-Mail: diebold@hsk.com
BA_79-329_0_D+E.docx
Copyright © Diebold 2017-04 Ersteller: kh
Seite 1 von 60
Advertisement
Table of Contents

Related Manuals for DIEBOLD HS 1100-P

Summary of Contents for DIEBOLD HS 1100-P
- Page 1 User Manual Horizontal-Schrumpfgerät Horizontal Shrinking Device HS 1100-P Helmut Diebold GmbH & Co. An der Sägmühle 4 D-72417 Jungingen (Germany) Tel.: + 49 (0)7477-871-0 Fax: + 49 (0)7477-871-30 E-Mail: diebold@hsk.com BA_79-329_0_D+E.docx Copyright © Diebold 2017-04 Ersteller: kh Seite 1 von 60...
- Page 2 This manual is property of Helmut Diebold GmbH & Co. Goldring Werkzeugfabrik and may not be copied without the approval of Diebold. Changes Helmut Diebold GmbH & Co. reserves the right to modify the specifications of this device to reflect technical advances. Warranty All Diebold devices are warranted to be free from manufacturing and / or material defect.
-
Page 3: Table Of Contents
16.5. Hazards from electromagnetic radiation ............. 37 17. General information about ThermoGrip ® Shrink technology ......38 17.1. Micro processor controlled Induction generator HS 1100-P ......38 17.2. Advantages of ThermoGrip ® Shrink technology at a glance: ...... 38 17.3. Quality of the tools and chucks ..............39 17.3.1. - Page 4 24.1. Repair process ................... 54 25. EC Declaration of Conformity ................55 26. 5 Finger-Safety-Glove ..................56 26.1. Instructions for use ..................56 26.2. EC Declaration of Product Conformity ............57 BA_79-329_0_D+E.docx Copyright © Diebold 2017-04 Ersteller: kh Seite 6 von 60...
-
Page 5: English
This user manual contains all information necessary for proper use of the unit. The contents correspond to the stage of construction of the Horizontal Shrinking Device HS 1100-P at the time of preparation of this manual. Due to continuous development and customization, design and specifications are subject to change. -
Page 6: Symbols And Pictograms
Are marked by the symbol and provide instructions for the stated activity. The result of the activity can be stated as explanation. Change coil Example: Set shrinking time Remove tool BA_79-329_0_D+E.docx Copyright © Diebold 2017-04 Ersteller: kh Seite 34 von 60... -
Page 7: General Safety Instructions
The unit may only be operated as specified for and under good working conditions. This unit is designed and programmed for the use of Diebold “ThermoGrip” chucks. When other shrink chuck forms and designs are used, problems may occur, because shrink parameters are set for Diebold shrink chuck contours. -
Page 8: Hazards From Electric Components
When shrinking tools in and out, always wear the supplied gloves for protection from burns and cuts. Remove all metallic objects from the environment of the inductive coil!. During operation, remove all jewelry and keep hands clear of coil. BA_79-329_0_D+E.docx Copyright © Diebold 2017-04 Ersteller: kh Seite 36 von 60... -
Page 9: Avoid Overheating "Thermogrip" Chucks
Do not run any other units into the vicinity of the unit to avoid electrical interference. If you have a cardiac pacemaker, please consult the manufacturer or your doctor. In certain cases, interference is possible. BA_79-329_0_D+E.docx Copyright © Diebold 2017-04 Ersteller: kh Seite 37 von 60... -
Page 10: General Information About Thermogrip ® Shrink Technology
Only shrink using clean tools in cleaned chucks! 17.1. Micro processor controlled Induction generator HS 1100-P With the help of special coils, only the specific clamping area of the chuck is heated. This means it is possible to shrink out carbide tools as well as tools with the same temperature expansion behavior as the tool holder (e.g. -
Page 11: Quality Of The Tools And Chucks
≥ 6 mm Carbide or HSS 17.3.2. Shrink fit chuck holes must be smooth must be free of oil and grease must have the necessary quality of tolerance BA_79-329_0_D+E.docx Copyright © Diebold 2017-04 Ersteller: kh Seite 39 von 60... -
Page 12: Initial Set-Up Of The Hs 1100-P
Connect the power cord to the power supply. Make sure that the main power switch while the unit is off. Through the operation of the main switch, the device is now ready for operation. The LC display will show "Diebold". 18.2. -
Page 13: Operating The Hs 1100-P
Always use the gloves supplied with the unit. ATTENTION! To prevent damage to the device, the induction coil should never be moved relative to the chuck during the shrinking process. BA_79-329_0_D+E.docx Copyright © Diebold 2017-04 Ersteller: kh Seite 41 von 60... -
Page 14: Lcd-Messages
IGBT error has occurred If error messages continue even after switching the unit off and back on, please contact the manufacturer. (Observe the cool down of the generator!) BA_79-329_0_D+E.docx Copyright © Diebold 2017-04 Ersteller: kh Seite 42 von 60... -
Page 15: Shrinking With Parameters
Start the shrinking process with the “Start/Stop“ button At the end of the shrink cycle, shrink or un-shrink the tool BA_79-329_0_D+E.docx Copyright © Diebold 2017-04 Ersteller: kh Seite 43 von 60... -
Page 16: Shrinking Without Parameters With Indicating The Power Level
Set the induction coil in the position over the heat shrink tool so that the shrink chuck is in contact with the ferrite interchangeable disc Press and hold the “Start/Stop“ button until shrink or un-shrinking the tool BA_79-329_0_D+E.docx Copyright © Diebold 2017-04 Ersteller: kh Seite 44 von 60... -
Page 17: Changing Standard Parameters
Select the required time with the ”+“ and ”–“ button and confirm by pressing the ”Menü“ button Parameter is successfully stored ATTENTION! The shrink fit chucks can be damaged by overheating through changing the default parameters. BA_79-329_0_D+E.docx Copyright © Diebold 2017-04 Ersteller: kh Seite 45 von 60... -
Page 18: Reset To Factory Settings
Confirm by pressing the ”Menü“ button when released, the display shows: Turning off and turning back on the unit with the main switch The factory settings are being restored BA_79-329_0_D+E.docx Copyright © Diebold 2017-04 Ersteller: kh Seite 46 von 60... -
Page 19: Handling Tool Holders
Shrink fit chucks with HSK taper are inserted into the tool holder and the clamp handle is swung down. By this means the shrink fit chuck is clamped by an internal cam. BA_79-329_0_D+E.docx Copyright © Diebold 2017-04 Ersteller: kh Seite 47 von 60... -
Page 20: Tool Holder Sk / Bt 30 To Sk / Bt 50
The shrink fit chucks are clamped in the universal Adaptor by adjusting the jaws with the control handle. In the jaws there are different entry and contact surfaces available to clamp diameters of Ø12 to Ø100. BA_79-329_0_D+E.docx Copyright © Diebold 2017-04 Ersteller: kh Seite 48 von 60... -
Page 21: Operation Of The Length Setting Unit (Optional)
For large shafts first heat the shrink chuck then insert the cutter, swivel the dial gauge and set the cutting tip against the dial plate or slide cutter with dial plate in position. BA_79-329_0_D+E.docx Copyright © Diebold 2017-04 Ersteller: kh Seite 49 von 60... -
Page 22: Appendix
480 V. This merely requires a fuse to be exchanged on the large generator board in the equipment housing. ATTENTION! Always disconnect power before do this! (Disconnect the mains plug!) 22.2. Block diagram BA_79-329_0_D+E.docx Copyright © Diebold 2017-04 Ersteller: kh Seite 50 von 60... -
Page 23: Wiring Diagram
Horizontal-Schrumpfgerät Horizontal Shrinking Device HS 1100-P 22.3. Wiring diagram BA_79-329_0_D+E.docx Copyright © Diebold 2017-04 Ersteller: kh Seite 51 von 60... -
Page 24: Scope Of Delivery And Accessories
Tool Adaptor HSK-80 79.325.080 Tool Adaptor HSK-100 79.325.100 Tool Adaptor SK/BT 30 79.325.130 Tool Adaptor SK/BT 40 79.325.140 Tool Adaptor SK/BT 50 79.325.150 Universal Adaptor 79.325.U (Clamping range Ø12 - Ø100) BA_79-329_0_D+E.docx Copyright © Diebold 2017-04 Ersteller: kh Seite 52 von 60... -
Page 25: Length Setting Unit
Description Item-No. Picture Chiller Unit FKS 04 automatic 79.400 Chiller Unit FKS 04 manual 79.401 Coolant Additive 79.220.001.HF Filling quantity: 1000 ml System Cleaner 79.220.002 Filling quantity: 5000 ml BA_79-329_0_D+E.docx Copyright © Diebold 2017-04 Ersteller: kh Seite 53 von 60... -
Page 26: Cleaning And Maintenance
Horizontal Shrinking Device HS 1100HS 1100-P. For special applications and for repairs or modifications not described in this manual, please contact Helmut Diebold GmbH & Co. In case of problems or questions, please have the serial number and the software version ready. -
Page 27: Ec Declaration Of Conformity
Within the meaning of the EC Machinery Directive 2006 / 42 / EC Helmut Diebold GmbH & Co. KG hereby declare that, on the basis of its concept and construction and the model we have launched, the following named machine complies with the relevant health and safety requirements of the EU Machinery Directive. -
Page 28: Finger-Safety-Glove
Horizontal-Schrumpfgerät Horizontal Shrinking Device HS 1100-P 5 Finger-Safety-Glove 26.1. Instructions for use BA_79-329_0_D+E.docx Copyright © Diebold 2017-04 Ersteller: kh Seite 56 von 60... -
Page 29: Ec Declaration Of Product Conformity
Horizontal-Schrumpfgerät Horizontal Shrinking Device HS 1100-P 26.2. EC Declaration of Product Conformity BA_79-329_0_D+E.docx Copyright © Diebold 2017-04 Ersteller: kh Seite 57 von 60... - Page 30 Horizontal-Schrumpfgerät Horizontal Shrinking Device HS 1100-P BA_79-329_0_D+E.docx Copyright © Diebold 2017-04 Ersteller: kh Seite 58 von 60...
- Page 31 Horizontal-Schrumpfgerät Horizontal Shrinking Device HS 1100-P Notizen / Notes BA_79-329_0_D+E.docx Copyright © Diebold 2017-04 Ersteller: kh Seite 59 von 60...
- Page 32 Helmut Diebold GmbH & Co. Goldring Werkzeugfabrik An der Sägmühle 4 D-72417 Jungingen (Germany) Tel.: + 49 (0) 74 77-871-0 Fax: + 49 (0) 74 77-871-30 Web: www.hsk.com Mail: diebold@hsk.com BA_79-329_0_D+E.docx Copyright © Diebold 2017-04 Ersteller: kh Seite 60 von 60...
Need help?
Do you have a question about the HS 1100-P and is the answer not in the manual?
Questions and answers