
Related Manuals for Visual Productions CUETY


Summary of Contents for Visual Productions CUETY
- Page 1 C UE T Y MA N UAL © V I S U A L P R O D U C T I O N S B V W W W . V I S U A L P R O D U C T I O N S . N L...
- Page 2 Revision History Revision Date Author(s) Description 31.03.2015 Initial version. 07.01.2019 Added revision history. Updated web- site addresses. Updated showfile and personality file location. Clarified sub- fixtures not being supported in Per- sonalities chapter. Clarified wheel lim- itation. Added Minimal requirements chapter.
-
Page 3: Table Of Contents
Contents 1 Introduction 2 Protocols 3 Quickstart 4 Setting up 5 Cuety App 6 Remote App 7 Personalities 8 vManager 9 Minimum Requirements Appendices A API... - Page 4 ©2020 Visual Productions BV. All rights reserved. No parts of this work may be reproduced in any form or by any means - graphic, electronic, or mechanical, including photocopying, recording, taping, or infor- mation storage and retrieval systems - without the written permission of the publisher.
- Page 5 Declaration of Conformity We, manufacturer Visual Productions BV, herby declare under sole responsibility, that the following devices: LPU-1 LPU-2 Is in conformity with the following EC Directives, including all amendments: EMC Directive 2004/108/EG And the following harmonized standards have been applied:...
-
Page 6: Introduction
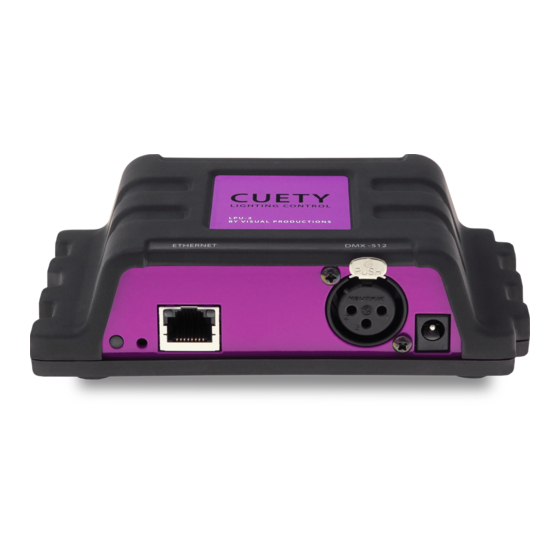
System The Cuety system consists of the LPU hardware and the Cuety App. This App is available on iOS and Android, as well as Windows, macOS and Ubuntu Linux. - Page 7 Hardware The LPU hardware device is the brain of your Cuety system. This box takes care of all the calculation of DMX levels, cue timing and FX engine. Therefore, all the information about the patch and cues are stored in this device. In a way, the Apps are just ’user interface’.
- Page 8 LPU-2. Apps The main App is the Cuety App, designed for tablets. This App allows you to create a patch (the list of fixtures you are controlling), program cues and FX and operate the playbacks like a live lighting console.
- Page 9 In some situations you might not need the ability to modify all the details of your light show; sometimes you just want a simple way of choosing between the pre-programmed cues. In this case you can use the Remote App, designed for phones.
- Page 10 Windows, macOS and Ubuntu Linux. These releases can be downloaded from http://www.visualproductions.nl/downloads/ (figure 1.4). Please bear in mind that the Cuety app is designed for a tablet; the portrait view requires a screen with a minimum of 1080 pixels in height.
- Page 11 Figure 1.5: LPU box contents Versions At the time of writing this manual the Cuety App was at version 1.14, the Cuety Remote App was at version 1.09 and the LPU firmware at version 1.25. Further Help We have prepared you several instruction videos on our YouTube channel (fig- ure 1.6) at http://youtube.com/c/visualproductionsbvhaarlem.
- Page 12 Figure 1.6: YouTube channel If you have further questions then please consult the online forum at http:// forum.visualproductions.nl/forum/ for more technical support. See figure 1.7.
- Page 13 Figure 1.7: Forum...
-
Page 14: Protocols
Chapter 2 Protocols The LPU-1 and LPU-2 support the output of DMX via the 3-pole XLR connec- tor on the device. Art-Net and sACN output can also be enabled to transmit the DMX data over the network. The following chapter will explain what these three protocols are. - Page 15 Figure 2.1: DMX example How many channels a lighting fixture uses will always depend on the manufac- turer/model. Often a light can have different operating modes. For example, a simple RGB light can have a 3-channel mode where it uses 3 channels for red, green and blue.
- Page 16 sACN The streaming Architecture of Control Networks (sACN) protocol uses a method of transporting DMX-512 information over TCP/IP networks. The protocol is specified in the ANSI E1.31-2009 standard. The sACN protocol supports multi-cast in order to take efficient use of the network’s bandwidth.
-
Page 17: Quickstart
This chapter offers you a brief step-by-step instructions on how to get your Cuety system up and running. All steps are explained in further detail in the subsequent chapters. In this Quick Start example we are using a simple 3- channel RGB fixture that is set to start-address 1. - Page 18 We assume you have an iPad that is already connected to your network. Start your Cuety app on your iPad and go to the OPTIONS screen. Select the LPU from the list. There now should be a green LED in the Cuety GUI (right next to the OPTIONS button).
- Page 19 5. Edit Exit the PATCH screen, you are now back in the main playback screen. Press the EDIT button and then select a playback cell. This opens the EDIT screen. Select the fixture and set some RGB values in the ’programmer’...
-
Page 20: Setting Up
Chapter 4 Setting up This chapter discusses how to set up the LPU. Mounting The device can be placed desktop or it can be DIN Rail mounted. The device is prepared for DIN Rail mounting by using the ’DIN rail holder TSH 35’ from Bopla (Product no. - Page 21 The LPU’s Ethernet port is auto-sensing so it does not matter whether you use a cross or straight cable. When running Cuety on a desktop OS (Windows, macOS, Ubuntu) you can also consider making a wired network by omitting the access point (Figure 4.4b).
- Page 22 When using static IP addresses you have to make sure that all equipment on your network have unique IP addresses. You can also change the IP settings from inside the Cuety App. 4.4.2 Reset By pressing the reset button on the device (Figure 4.5) for 3 seconds or more, you will reconfigure the unit to the factory default IP address and sub-net mask.
-
Page 23: Cuety App
Chapter 5 Cuety App The Cuety App is the main tool to program your light-show and to operate it live. Please note that you first need to connect to a LPU hardware before you can create a patch or record cues. - Page 24 Art-Net & sACN You can also enable the Art-Net and/or sACN protocols. These protocols are not required for normal use of the Cuety system. The protocols will allow you for instance to connect to a 3D visualizer for rendering your lighting rig.
- Page 25 • Ubuntu linux: Go to the options menu by pressing the OPTIONS but- ton. Then press the folder button to open a file window, showing the appropriate folder. • Android: Device/Internal storage/Visual Productions/Programmer/App data/ Read-only A show file can be made read-only as in figure 5.3.
- Page 26 After successfully connecting to the hardware the logical next step would be to create a patch. A patch is a configuration in which you tell the Cuety which DMX fixtures you are using. Cuety supports a maximum of 64 fixtures. These fixtures can be of many different types and brands.
- Page 27 fixtures. Then you need to make sure that the same addresses are set in the patch of Cuety. Please refer to the fixture’s documentation on how to set it on the actual fixture. In Cuety, you select one or more fixture cells and press the ’address’...
- Page 28 The way how to add a fixture with multiple dimmer channels in Cuety is to add several ’Generic - Dimmer 01x’ fixtures. You can control multiple-pixel lights by adding several ’Generic – RGB 01x’ fixtures.
- Page 29 (that means to stop it) you can either press the playback button for longer than one second, or first enable the ’Release’ button at the top and then choose a playback button. To release all playbacks in the system press the ’Release’ button longer than one second.
- Page 30 5.3.3 Blackout The blackout function can be enabled by clicking on the ’Visual Productions’ logo in the main screen. The purple icon will blink in red to indicate the blackout is active, see figure 5.7.
- Page 31 You can also use multiple cues to create a ’chase’ for example for a disco party. To build a chase you just make a cue for each step of the chase and tell Cuety to run through the cues automatically.
- Page 32 this playback. A newly added cue is still empty. Pressing the ’Remove’ button for longer than one second will remove all cues. Once you select a cue (it will indicate in blue) you can alter its properties by using the ’Rename’, ’Condition’, ’Delay’...
- Page 33 Use the ’Clear’ button to remove values from the Programmer. When you have certain fixtures selected and hit ’Clear’ then only the values of those fixtures are reset. When the fixtures have no values set any more or no fixtures are selected when you hit Clear then all values of all fixtures inside the Programmer are cleared.
-
Page 34: Remote App
Chapter 6 Remote App The Cuety Remote App (figure 6.1) is a small tool for remote controlling the LPU device. The Remote App does not allow you to edit the settings inside the controller. It is assumed that you would have already programmed the contents of the LPU by using the Cuety App. - Page 35 The Remote App allows you to trigger playback buttons. Figure 6.2: Settings To connect to a LPU device open the settings page (figure 6.2) and choose your device from the list.
- Page 36 Cuelux The Remote App can also be used to control the Cuelux lighting control system from Visual Productions. Cuelux is a DMX control system larger and more powerful than Cuety. More information about Cuelux can be found at http: //www.visualproductions.nl/cuelux/...
-
Page 37: Personalities
fixture you wish to control does not yet exist in our library. If you like to add a new personality file to Cuety then you can request via our fo- rum at http://forum.visualproductions.nl/forum/. Please make sure you mention that the personality is required for Cuety and include (a link to) the fixture’s manual. - Page 38 -Android: Device/Internal storage/Visual Productions/Programmer/App data/ • Shut down and restart the Cuety app Now you can select the personality from the top of the listing in Cuety’s patch menu. Custom manufacturers in the patch library are surrounded by square brackets like [this].
-
Page 39: Vmanager
firmware for your LPU device. Figure 8.1: vManager Please note that vManager has more features that are dedicated to other equip- ment from Visual Productions such as the CueCore and IoCore. Some buttons... - Page 40 will be disabled while working with a LPU device because they do not apply to this piece of hardware. Blink You can set the device’s LED to blink fast for identifying a particular unit amongst multiple devices. The blinking is enabled by double-clicking on a device in the ’Devices’...
-
Page 41: Minimum Requirements
This chapter discusses the minimum system requirements for running Cuety. Mobile devices For Cuety the minimum screen size is 7 inch, with a resolution of at least 768x1024. Alternatively, Cuety Remote can be used for devices that don’t fit the minimum requirements of Cuety. -
Page 42: Appendices
Appendices... -
Page 43: A Api
Appendix A The following functionality is only supported by the LPU-2, not by the LPU-1. Figure A.1: Kiosc Kiosc The LPU-2 can be controlled through the OSC and UDP protocols. There are various apps available for this purpose. We recommend using Visual Produc- tions’... - Page 44 OSC (Open Sound Control) is a protocol for communicating between computers, software and various multi-media type devices. OSC uses the network to send and receive messages, it can contain MIDI and custom information. The LPU-2 uses port 8000 for receiving the OSC messages. OSC is also integrated in the CueCore, IoCore and B-Station from Visual Pro- ductions.
- Page 45 This command mimmics the button in the Cuety interface. It can be short- pressed for Go+ and long-pressed for Release. It expects a 1 first, and then 0. The time between these commands determine wheter it is a long-press or a short-press.
- Page 46 0 / 1 blackout=1 This command mimmics the button in the Cuety interface. It can be short- pressed for Go+ and long-pressed for Release. It expects a =1 first, and then =0. The time between these commands determine wheter it is a long-press or...
- Page 47 A.3.1 UDP & TCP Feedback The following commands are used for feedback. For more information about feedback send by the LPU-2, see A.5 ”Receiving API Feedback” Description String Parameter Range Example Playback intensity pb playback index /in pb01/in=100 Playback speed pb playback index /sp pb01/sp=10 Playback button...
- Page 48 0 / 1 http://192.168.1.10/ajax/blackout=1 This command mimmics the button in the Cuety interface. It can be short- pressed for Go+ and long-pressed for Release. It expects a =1 first, and then =0. The time between these commands determine wheter it is a long-press or...
- Page 49 Receiving API Feedback The LPU-2 is capable of sending messages back to the external control system when communicating via OSC or UDP. As soon as the LPU-2 receives a com- mand via OSC or UDP it will store the IP and port of the external system in a list.
- Page 50 Index Address, 27 Invert Pan/Tilt, 28 Android, 9 iOS, 9 API, 43 Kensington, 20 App Store, 9 Kiosc, 43 Art-Net, 15, 24 Auto-sensing, 21 Lock, 24 Loop, 30 Background, 30 LPU-1, 7 Blackout, 30 LPU-2, 7 Blink, 40 Bounce, 30 Memory, 7 Box contents, 10 Network, 21...
- Page 51 Sub-Fixtures, 28 Swap, 29 TCP, 45 Toggle, 30 Tutorials, 11 UDP, 45 vBuilder, 37 Versions, 11 Virtual Dimmer, 28 vManager, 39 web-interface, 8 YouTube channel, 11...
Need help?
Do you have a question about the CUETY and is the answer not in the manual?
Questions and answers