Table of Contents
Advertisement
Advertisement
Table of Contents

Summary of Contents for Tunai BUTTON
- Page 1 TUNAI BUTTON BLUETOOTH REMOTE CONTROL Instruction Manual...
-
Page 2: Warranty
IMPORTANT NOTE 1. TUNAI BUTTON is built with IPX5 graded material and is resistant to a sustained, low-pressure water jet spray. However, it is not 100% waterproof. Please do note put Button in the water as the warranty does not cover the water damages caused by improper use of the product. -
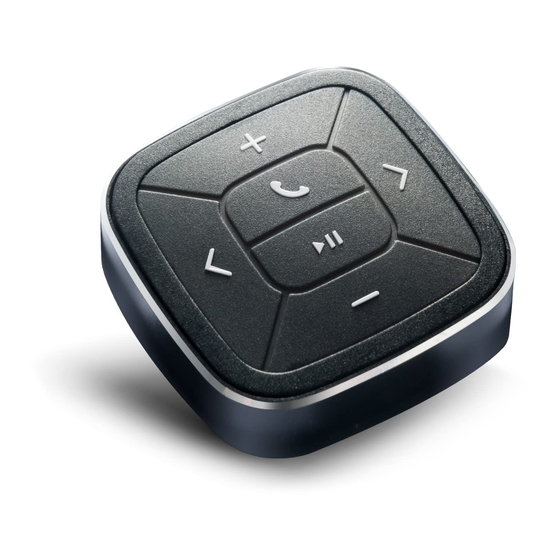
Page 3: Front Side
Decrease volume ⚫ Mute ⚫ Note: This is a general overview of the TUNAI BUTTON. There is detailed information regarding different functions for iOS and Android further in this documentation. BACK SIDE Note: Only iPhones with physical home button will need to switch the mode (see details in the iOS section). - Page 4 Fast Rapid Flash Incoming calls (iOS only) Note: TUNAI BUTTON is only able to pair with one device at a time, and Button will only attempt to reconnect to the last device it was paired with. INSTALL TUNAI BUTTON TO YOUR CAR 1.
- Page 5 Place TUNAI BUTTON on the docking. The magnet design helps TUNAI BUTTON to stay on the docking when driving but is also easy to remove from the docking and to use as camera shutter. INSTALL TUNAI BUTTON TO YOUR BIKE 1.
-
Page 6: Change Battery
BATTERY 1. TUNAI BUTTON uses a standard CR2032 battery. 2. TUNAI BUTTON can operate up to 3 years with a standard CR2032 battery. This is based on 2 hours connection and 10 key press per day. CHANGE BATTERY 1.Remove the screw on back of TUNAI BUTTON Note: TUNAI BUTTON does not ship with a screw. -
Page 7: Pairing With Multiple Devices
Press any key and TUNAI BUTTON will search and reconnect with the paired device. Note: TUNAI BUTTON is only able to pair with one device at a time, and Button will only attempt to reconnect to the last device it was paired with. - Page 8 5, 5S, 6, 6S, 7, 7S, 8, 8S Users (With Physical Home Button) In order to trigger Siri, iPhone owners with devices from iPhone 5 to iPhone 8 (with physical home button) will have to switch from Mode A to Mode B. Mode A is the default mode shipped.
- Page 9 3. Remove the battery。 4. Switching the mode. Key Description for iPhone 5,5S,6,6S,7,7S,8,8S Users Function Mode A Short Press: Volume Up /Camera Shutter (When using Mode B camera) Short Press: Volume Down/Camera Shutter (When Mode A using camera) Mode B Long Press: Mute Mode A Short Press: Next Track...
- Page 10 X, XR, XS,11, 11 Pro etc. Users (Without the Physical Home Button) The users with the iPhone without the physical home button will be able to trigger Siri in both Mode A and Mode B, therefore, there is no need to switch to Mode B to trigger Siri.
- Page 11 USING TUNAI BUTTON WITH ANDROID There is no difference between using Mode A and Mode B for Android users. (Mode A is the default shipped mode). Key Description for Android Users Key Function Short Press: Volume Up / Camera Shutter (When using camera)
- Page 12 Note 9, the original control for answering the call is to press the “+” key and to reject call is to press the “Power” key. If you wish to use TUNAI BUTTON to control Samsung Note 9, you will need to reassign the key differently.
Need help?
Do you have a question about the BUTTON and is the answer not in the manual?
Questions and answers