Table of Contents
Advertisement
Quick Links
Advertisement
Table of Contents

Summary of Contents for Teswell 4CH 960H
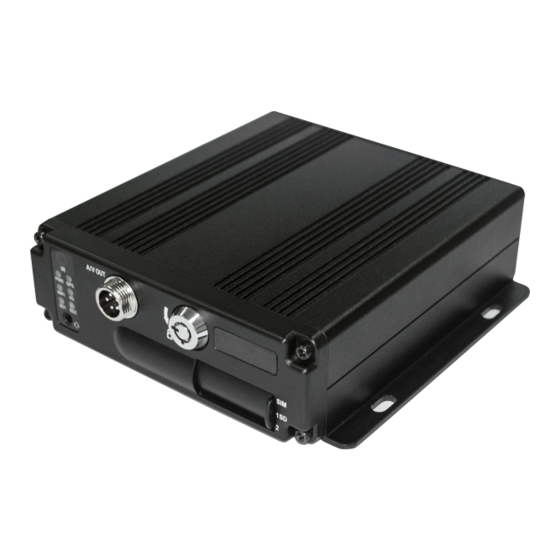
- Page 1 Mini Car Digital SD Card Recorder User Manual...
- Page 2 Before installing and using, be sure to read the Manual, then you will properly use and protect your machine. The first part of the statement concerns the matters to be attention to before installing and using. Attention To protect your rights, before using and installing, please carefully read the contents of the ...
-
Page 3: Table Of Contents
Contents Product Overview............................... 3 Basic functions................................3 Audio/Video Compression Format........................3 Audio/video recording mode..........................3 Image quality when monitoring, recording, playback..................3 Total Resources..............................4 Audio video synchronous recording......................... 4 Access detection..............................5 Signal loss alarming function..........................5 Alarm linkage..............................5 Alarm pre-recording............................5... -
Page 4: Product Overview
Domain binding setting........................... 45 1 Product Overview The four-channel embedded digital SD card video recorder is designed for car safety. It uses embedded processor and embedded operating system, combined with video / audio compression / decompression, GPS, car recorder, and the capacity SD card storage technology to confirm the high intelligence and high stability. -
Page 5: Total Resources
Support 6 channels 960H (960*576) simultaneous recording, total 150fps. Support 6 channels 960H (960*576) simultaneous playback, total 150fps. 2CH 720P&4CH 960H: Support 2 channels 720P (1280*720) and 4 channels 960H (960*576) simultaneous recording, total 150fps. Support 2 channels 720P (1280*720) and 4 channels 960H (960*576) simultaneous playback, ... -
Page 6: Access Detection
Access detection When after open motion detecting video recording equipment in camera detects movement, the monitoring area can start recording, trigger the alarm, warning area size, location, number, area and alert in sensitivity or removal of alert, and other functions, can be set up. -
Page 7: Self-Test The Status And Self-Recovery
Self-test the status and self-recovery 2.12 When in working status, the “RUN” indicator will constantly flashes and check the device. Recovery will take no more than 3 minutes when device crashes. 2.13 Front-end device control and multi-channel monitor and switch The DVR can control PTZ cameras through default protocols (RS-485, PELCO-D, 9600 baud ... -
Page 8: Features
3 Features 3.1 Operating system Embedded Linux operating system, high stable, free from virus. English/Chinese menu switchable. Graphical user interface 3.2 Compression format H.264 format: more excellent frame rate, quality image output 3.3 Monitoring and Recording Monitor: MAX 6CH 960H (960*576 ) 、MAX 4CH 720P(1280*720)... -
Page 9: Others
Anti-shock for the PCB panel and parts. Watch dog function to avoid system crush. 4 Technical Parameters Items Device parameters DVR/NVR Performance index 4CH 960H 4CH IP 4CH AHD Name Product Name SD Mobile DVR 720P SD Mobile DVR 720P SD Mobile DVR... - Page 10 PAL: 1 or 4*720P PAL: 1 or 4*720P PAL: 1 or 4*960H(960*576) (1280*720) (1280*720) Playback Resolution NTSC: 1 or NTSC: 1 or 4*720P NTSC: 1 or 4*720P 4*960H(960*480) (1280*720) (1280*720) Audio Bitrate 4KByte / s / channel Audio Taking Up Of...
- Page 11 Distortion Plus Noise ≤-30dB Recording Mode Sound And Image Synchronization Audio Compression G711A Image Compression H.264 Fixed Code Stream PAL: 6*960H(960*576) PAL:2*720P(1280*720)+4*960H(960*576) Image Format NTSC:6*960H(960*480) NTSC: 2*720P(1280*720)+4*960H(960*576) Video Stream 192Kbps-2.0Mbit/s(channel) CIF:85M-394MByte/hour Video Taking Up Of D1、 720P:85MB-900MByte/hour Digital Hard Disk...
-
Page 12: Instruction Of Installation
5 Instruction of Installation Instruction of External Interface Wiring Page 11... - Page 13 Page 12...
- Page 14 Page 13...
-
Page 15: Instruction Of Sd Card Installation
Remarks: If the power supply is 12V, then the current of 12V output can be just 1A. So if there are more than 3pcs cameras, we suggest customers to get power for other cameras from the 12V vehicle power directly or use Our special car power supply. -
Page 16: Instruction Of Using
6 Instruction of Using Instruction of Front Panel PWR LED: lighting while work starts. Power LED on. GPS LED: GPS working LED indicator 4G LED: 3G working LED indicator WIFI LED: when wifi module is running the LED is on. -
Page 17: Instruction Of Remote Control Operation
Instruction of Remote Control Operation ①Lead to menu;②Return Record Enter the sub-menu to set and confirm Playback on the mobile DVR ①Stop when recording or playback; ②Delete Pause/Play when playback Fast-forward when playback video , play speed can be x2, x4, x8, press one time is x2, press two times is x4, and press 3 times is x8. - Page 18 Control PTZ Zoom Control PTZ focus Mute key, to turn on or turn off audio output when playback videos with audio.(The audio input of the playback device must be connected to the audio output of the DVR.) ① Exit when video playback or backup. ② Exit from PTZ mode.
-
Page 19: Menu Setting Instruction
Other Not mentioned buttons, not in use. buttons Remark: When the DVR is in alarm condition, the remote control is invalid. Menu Setting Instruction (Our company system support IR remote control and mouse to operation, This document introduces the operation of the remote control, the left click of mouse means to confirm or enter, and the right click means exit or return) First press"... - Page 20 Setup setting: includes options of “Base”, “User” , “Serinal”, “PTZ”, “GPS”, “G-sensor” and “NTP” Base setting: Set the System time, TV system, Language,etc. Date format: Offer 3 display methods like “y/m/d, m/d/y, d/m/y” for personal habit.
- Page 21 Time: Adjust the time of HDD recorder Language: Set "Chinese", "English", "Portuguese", "Russian" and "French", have to restart the DVR after setting. Video Mode: Set "PAL" or "NTSC", have to restart the DVR after setting. Delay Time: DVR Time-lapse turn off function after the car ignition off, the default time is 5S, and 30s,1min,2min,5min,10min,20min,30min,2hour,4hour, The longest time is 24 hours, all could be set,have to restart the DVR after setting.
- Page 22 New password:Enter the new password. Common user: set up the user name of common. Password: Enter the default password before changing the new password. New password:Enter the new password. Serial setting: this is Serial setting to set up the communication protocol with external equipment.
- Page 23 Protocols: default PELCO-D, support PELCO-D and PELCO-P. Channel-Address: Channel one-Device address. Channe2-Address: Channel two-Device address. Channe3-Address: Channel three-Device address. Channe4-Address: Channel four-Device address. GPS setting: Time zone: different by countries, e.g: China for UTC+08 ...
- Page 24 G Sensor-X:2000mg( default value, this value will change accordingly if the X direction gravity accelerated speed value is changeable). G Sensor-Y:2000mg(default value, this value will change accordingly if the Y direction gravity accelerated speed value changeable ).
- Page 25 Vehicle information: details of car plate number, route and driver code. Car ID: can be showed by English, Chinese simplified language, Numbers or common symbols. A-person:setup the original carried person for the vehicles. Line Num: the driving route and code.
- Page 26 System information: Display DVR hardware code number,software version information( only view, couldn’t be changed) Device encoding: only for this DVR, the code is unique. Firmware version: the version No. of DVR software. IMIE: IMIE No. of 3G/4G network or module ...
- Page 27 Configuration management Import: Import the configuration parameters. Export: Export the configuration parameters. Renew: Restore the factory parameter. Disk:Check and format Disk Name:Display the system recognized HDD name. Overwrite: Choose on and off ...
- Page 28 Format: Format HDD(only format the head files of HDD) . Select this item, there is a format interface after press“ ”,confirm to format, cancel to return the original interface. Record: the video files setting, It includes “codec” , ”channel” and ”record plan”.
- Page 29 “CIF,HD1,D1”is optional, only “CIF” for network transmission. Frame:1-25/30fps The left side is local storage information, The right side is network transmission information. Stream mode: Constants Bit Rate and Variable Bit Rate. Quality:Video quality setting ...
- Page 30 Record plan Channel: select the channel setting (the information of each channel could be set independently) Record mode:real time and event or no record File length:the packaged video files length setting(5/10/15/25/30/60 minutes optional) Prerecord:Before the alarm recording time(no,5s,10,15s) ...
- Page 31 There is video date in the menu, it will show the vide time after press ”Search”, choose the playback time range according to require time ,then press “Play “button to replay the video. File format suffix "_P" is power off video file , suffix "_S" indicates an alarm trigger video files, suffix "_T"...
- Page 32 LAN: connecting via RJ45. 3G/4G: insert 3G/4G SIM card into the slot. WIFI: connecting the network of WIFI. IPC: To connect the IPC camera Settings. SIP: Chinese government standard platform CH ID: Chinese government standard platform ...
- Page 33 Gateway: gateway under LAN or WIFI mode. DNS: please input when the server IP is DNS, and not necessary when IP is static. Server IP: If the units login on our server, please use cvideoview.com, and if the units login ...
- Page 34 WIFI Setting: Net type: Select 3G-WIFI when the type is under LAN. DHCP: ON Access Network setup →“WIFI” SSID: WIFI router device name. Password: using password for SSID. Certificate: Support “WPA-PSK”. Encryption: Support ”TKIP”.
- Page 35 Notes: Please make sure the router WIFI encryption keep the same with the setup in MDVR if the units use WIFI. IPC Setting(This function can only suit for Mobile NVR ) Channel:main channel , different channel set can choose.
- Page 36 Password:the user names password Search:it is can search the local network ipc when click the search button Save:click the save button to keep the sets after set Note: the network type must be changed to LAN when connect with ipc.
- Page 37 Sensor Name:put and modify the name of sensor. Trigger level:High or low level trigger the alarm. linkage:Set up ON/ OFF video linkage function. OSD:Choose whether to overlay alarm information. Lock:Won't cover this alarm video after choose this lock.
- Page 38 No detect Low sensitivity High sensitivity Other: other alarm setting. Alarm out time:Alarm output time (5s-900s). Low voltage:The low voltage alarm about car battery. Low speed:The low speed alarm. High speed:The high speed alarm. ...
-
Page 39: Dvr Video Playback Instruction
DVR Video Playback Instruction Our company System support 2 video playback ways. Users can watch the video playback with the IR remote control, the specific steps are as follows: Enter the main menu, move to “playback” option ,press“... - Page 40 User can watch the video playback with the mouse, the specific steps are as follows: Enter the main menu, Click on the “playback” option to enter, next select the playback date, file type and time frame ,then press “Search” to display the video files of the selected date(file named by the record time).After selected the time and channel , press “Play”...
-
Page 41: Video Backup
User press “ ” on the playback interface, and then use the mouse to click” ”to implement different functions, such as: before, stop, play, pause, a frame play, fast forward, next and audio(each channel). Video Backup Our company System support 2 video backup ways. -
Page 42: Ptz Control
The proprietary data files also could be converted to the common format, suitable for different reading demands). Specifics refer to the local playback analysis software instruction). PTZ control This function just used to has PTZ function models, there is two ways. Operations are as followings:... -
Page 43: Extranet Port Mapping
Total Record 4CH 960H Data 4CH 720P Data Size VIDEO QUALITY Frame Size Per Hour Per Hour 2.0 Mbps (HIGHEST) 100 frame 3.6GB 5.16GB 1.5 Mbps 100 frame 2.65GB 3.87GB (HIGHER) 1.2 Mbps HIGH(default) 100 frame 2.1GB 3.09GB 1.0 Mbps 100 frame 1.8GB... - Page 44 Open the file of “DVR_Server.cfg” in the server installation path, can check whether the ports have been set successfully. Port: 8001, 9001, 8101 Access into router→”Advanced”→”Port forwarding “ Add the ports of 8001, 8101, 9001 to the port forwarding.
- Page 45 Name: fill in a name for MDVR port. Ports to Open: 8001, 8101, 9001 IP Address: Server IP address Inbound Filter:TCP、UDP、Allow ALL, Pls select “Allow All” Schedule:select “Always” Fill in the ports, and click” Save settings”. Page 44...
- Page 46 After the port mapping settings, find the “IP Address” in the WAN, the IP Address is your CMS server IP. login the server IP on the CMS client to access. Notes: When extranet access into LAN server, it need do mapping on the router. Then extranet can access into WAN IP.
- Page 47 Leased line: It will assign a static IP address, and you can access directly So, when set up the server with the way of ADSL dial-up, you can binding DDNS via domain in order to prevent the distribution of different dynamic IP in each dial.
- Page 48 Notes: DDNS need to be applied by customers if necessary. Fill in the user name and password, use DDNS login, it shows connect successfully if login properly, and will display the applied the DNS. Notes: Pls refer to the Oray for the DNS apply.
Need help?
Do you have a question about the 4CH 960H and is the answer not in the manual?
Questions and answers