Advertisement
Advertisement
Table of Contents

Related Manuals for dtp AP1

Summary of Contents for dtp AP1
- Page 1 DTP SUPPLIES AP1 & AP2 CURTAIN EYELET PRESS BENCH ASSEMBLY INSTRUCTION MANUAL...
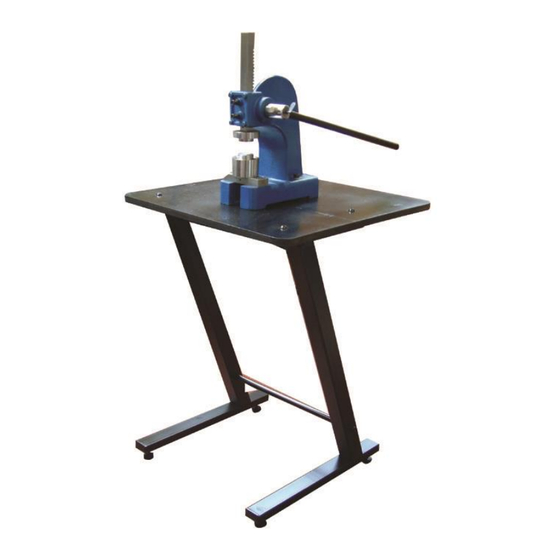
- Page 2 AP1 and AP2 Table Assembly INTRODUCTION This bench is designed to support the AP1 or AP2 Curtain Eyelet Setting Machine. The bench is supplied in flat pack form and is pre-drilled to accept the machine head. TOOLS REQUIRED The following tools are required for assembly.
- Page 3 AP1 and AP2 Table Assembly ASSEMBLY INSTRUCTIONS BEFORE ASSEMBLY Before assembly ensure that the work surface is flat and clean. ASSEMBLY Take one of the Z Legs and hold with the feet pointing downward. Push one of the M10 washers over a M10x75mm Cap Head Bolt and then push the bolt through the hole in the side of the leg at the top.
- Page 4 AP1 and AP2 Table Assembly Push another one of the M10 washers over another M10x75mm Cap Head Bolt. Take the second Z leg and then push the bolt through the hole in the outside of the leg at the top as illustrated below. Finger tighten the bolt.
- Page 5 AP1 and AP2 Table Assembly Turn the frame over so that the feet are at the top. Using a tape measure diagonally across to the centre of each foot. This is done to ensure that the bench frame is square. Twist the frame gently until the diagonal measurements across the feet are equal.
- Page 6 AP1 and AP2 Table Assembly Take the bench top and place it over the frame so that the four holes in the top align with the holes in the frame. Take the four M10x80mm Countersunk Head Bolts and push them through the holes in the bench.
- Page 7 AP1 and AP2 Table Assembly Using the 6mm Allen key and the 17mm spanner tighten each of the table top nuts and bolts in turn. The completed bench is shown below. Finally, check that the bench is stable on the surface and does not rock and ensure that all the bolts are fully tight.
Need help?
Do you have a question about the AP1 and is the answer not in the manual?
Questions and answers