
Related Manuals for Fluke PLS 3R


Summary of Contents for Fluke PLS 3R
- Page 1 3R, 3G 5R, 5G Point Laser Levels Users Manual 02/2020 All product names are trademarks of their respective companies.
- Page 2 LIMITED WARRANTY AND LIMITATION OF LIABILITY This Fluke product will be free from defects in material and workmanship for three years from the date of purchase. This warranty does not cover fuses, disposable batteries, or damage from accident, neglect, misuse, alteration, contamination, or abnormal conditions of operation or handling.
-
Page 3: Table Of Contents
Table Of Contents Title Page Introduction ............................1 How to Contact Fluke ..........................1 Safety Information ..........................1 Product Familiarization.......................... 4 Features ............................4 Lasers and Optical Glass ........................ 5 Controls ............................6 Center Point and Accessory Mount ....................7 Use the Product ............................ - Page 4 3R, 3G, 5R, 5G Users Manual...
-
Page 5: Introduction
90 ° up, down, and forward from the Product. The 5R and 5G emit point lasers 90 ° up, down, left, right, and forward from the Product. Use the Product to layout reference points and to make sure conditions are level and plumb. How to Contact Fluke To contact Fluke, call one of the following telephone numbers: • Technical Support USA: 1-800-44-FLUKE (1-800-443-5853) •... - Page 6 • Replace the batteries when the low battery indicator shows to prevent incorrect measurements. • Be sure that the battery polarity is correct to prevent battery leakage. • Use only Fluke approved power adapters to charge the battery. • Do not short the battery terminals together.
- Page 7 Point Laser Levels Introduction Table 1. Symbols Symbol Description Symbol Description Battery Low battery indicator. This product complies with the WEEE Directive marking requirements. The affixed label indicates that you must not discard this electrical/electronic product in domestic household waste. Product Category: With reference to the equipment types in the WEEE Directive Annex I, this product is classed as category 9 “Monitoring and Control Instrumentation”...
-
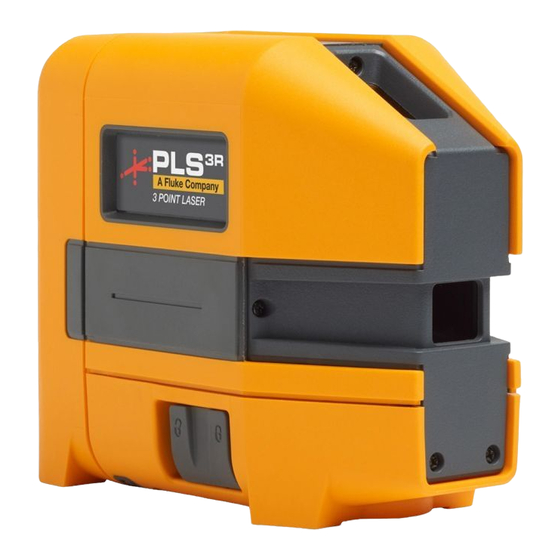
Page 8: Product Familiarization
The manual explains features for multiple models. Because models have different features and accessories, not all of the information in the manual may apply to your Product. Features Table 2 to identify the features and standard accessories of your Product. Table 2. Features A Fluke C ompa ny 1” 44mm (1.71 I n) 0.5” 0.5”... -
Page 9: Lasers And Optical Glass
Point Laser Levels Lasers and Optical Glass Lasers and Optical Glass Table 3 shows the lasers and optical glass. Table 3. Lasers and Optical Glass Item Description Item Description Housing glass insert 90 ° horizontal point lasers (5R, 5G only) Optical glass 90 °... -
Page 10: Controls
3R, 3G, 5R, 5G Users Manual Controls Table 4 lists the Controls of the Product. Table 4. Controls Item Description Function Power button Turns on or off the lasers. Laser LED Shows green when at least one laser is on. Lock LED Shows green when the laser lock is enabled. -
Page 11: Center Point And Accessory Mount
Point Laser Levels Center Point and Accessory Mount Center Point and Accessory Mount Figure 1 shows features that help to layout reference marks. The vertical laser is centered 1.25 in (31.75 mm) from both sides of the Product. To stabilize the Product and view the laser that points down, use the accessory mount to secure the Product to the magnetic L-bracket, the floor stand, or a tripod. -
Page 12: Use The Product
3R, 3G, 5R, 5G Users Manual Use the Product Use the Product to layout reference points and to make sure conditions are level and plumb. W* Warning To prevent eye damage and personal injury, do not look into the optical windows when the Laser indicator LED shows green. -
Page 13: Existing Horizontal Or Diagonal Alignment
Point Laser Levels Existing Horizontal or Diagonal Alignment Existing Horizontal or Diagonal Alignment To determine if an existing item is level or aligned: Put the bottom of the Product on a stable surface. Point the forward laser at the target area. Measure the distance from the item to the laser at various distances from the Product. -
Page 14: Plumb Marks
3R, 3G, 5R, 5G Users Manual Plumb Marks The Product sends plumb marks up and down. New Plumb Marks To identify new plumb marks on a ceiling or roof: Place a cross mark on the point to be transposed. Center the down laser over the cross mark. See Figure 4. Place a mark at the point where the up laser intersects the target area. -
Page 15: Existing Item Plumb Check
Point Laser Levels Existing Item Plumb Check Existing Item Plumb Check To determine if an existing item is plumb: Point either the up or down laser at the target area. Measure the distance from the item to the laser at various distances from the Product. See Figure If the measurements are the same, the item is plumb. -
Page 16: Square Marks (5R, 5G Only)
3R, 3G, 5R, 5G Users Manual Square Marks (5R, 5G Only) Use the forward and horizontal lasers to create new square marks or to determine if an existing item is square. To layout a new square for a wall or staircase (See Figure Mark a vertical line on a wall. -
Page 17: Check Product Accuracy
Point Laser Levels Checking the Horizontal Leveling Accuracy Checking the Horizontal Leveling Accuracy A free measuring distance of 15 ft on a firm surface in front of two walls A and B is required for the check. Mount the tool onto a tripod, or place it on a firm and level surface 6'' from wall A. Switch the tool on and set the lock to "unlock". - Page 18 3R, 3G, 5R, 5G Users Manual Align the height of the tool (using a tripod or by underlaying, if required) in such a manner that the front point of the laser is projected against the previously marked point on the wall B. 180°...
-
Page 19: Plumb Accuracy
Point Laser Levels Plumb Accuracy Plumb Accuracy To check the accuracy of the plumb: Find a site that has a known vertical height X. Put unit on floor stand and place on the floor. Place a cross mark at the bottom of the site. Center the down laser on both axes of the cross mark. -
Page 20: Accessories
3R, 3G, 5R, 5G Users Manual Accessories Table 6 is a list of the accessories available for the Product. Table 6. Accessories Model Description PLS FS Floor stand 5031929 PLS MLB Magnetic L-bracket 5031934 PLS BP5 BP5 alkaline battery pack 5031952 PLS RRT4 Red magnetic reflective target... -
Page 21: Batteries
Point Laser Levels Batteries Batteries Replace the batteries when the battery indicator LED is red. To install or replace AA batteries (see Figure Open the battery compartment. Install three AA batteries. Observe the correct polarity. Close the battery compartment. 3 AA Figure 8. -
Page 22: Housing Glass Insert
3R, 3G, 5R, 5G Users Manual Housing Glass Insert If the optical glass is damaged, replace the housing glass insert. See Table 6 for the part number to order for your Product. To replace the housing glass insert (see Figure Remove the five housing glass insert screws. -
Page 23: Specifications
Point Laser Levels Specifications Specifications 3 x AA Alkaline IEC 3 x AA Alkaline IEC Batteries RBP5 RBP5 Battery life, continuous use, both lasers, as tested ≥30 hours ≥100 hours ≥20 hours ≥70 hours Green ≥16 hours ≥45 hours ≥9 hours ≥25 hours *For RBP5 Rechargeable Battery please refer to the RBP5 Rechargeable Battery Pack Instructions manual.
Need help?
Do you have a question about the PLS 3R and is the answer not in the manual?
Questions and answers