
Summary of Contents for HERO Ultrablend Trumix Series
- Page 1 TRUMIX VORTEX BLENDER OPERATING AND SERVICE MANUAL MECHANICAL TIMER AND DIGITAL PANEL MODELS Revision 2.00 I.C.T.C. Holdings Corporation HERO Products Group 720 Eaton Way. Delta, BC V3M 6J9 Canada Phone 800.494.4376 • Fax 866.778.3323...
-
Page 2: Table Of Contents
S E C T I O N 4 confidential and may not be copied or TROUBLESHOOTING disclosed to others without prior written IDENTIFYING PROBLEMS permission from HERO Products Group. THE MIXER DISPLAY IS BLANK 4-1-1 THE MIXER DISPLAYS THE MESSAGE “STOP” 4-1-2 THE MIXER DISPLAYS THE MESSAGE “dL”... -
Page 3: Overview
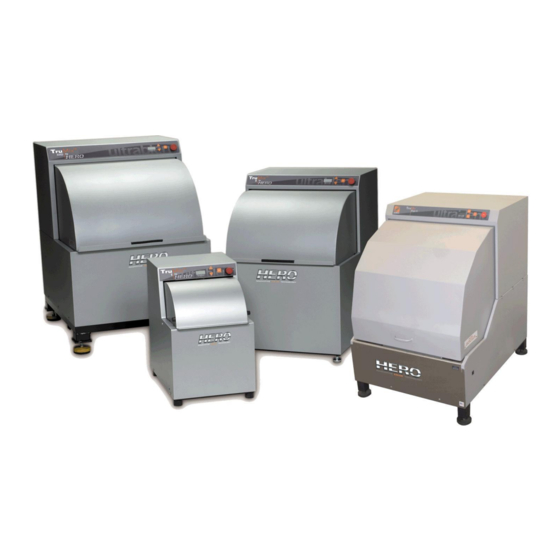
SECTION 1: OVERVIEW 1-1: INTRODUCTION This manual provides general operating procedures for your TruMix™ vortex blenders. Before operating the unit or starting any service procedure, carefully read through the Please contact HERO’s Customer procedure steps corresponding diagrams. Service Department at 1-800-494-4376 for assistance if needed. - Page 4 Standard Electrical Requirements 115 Volts, 60 Hz. TruMix 1: 6 Amps TruMix 5/XHD: 12 Amps TruMix Ergo 5: 3.5 Amps Maximum recommended weight limit The maximum recommended weight is 20 pounds for all TruMix 1 models. The maximum recommended weight is 80 pounds for all TruMix 5 models. The maximum recommended weight is 80 pounds for all TruMix XHD models.
- Page 5 1-3: SETUP Unpacking 1. When the package arrives, cut the banding material around the box. 2. Lift and remove the box covering the mixer. 3. Cut the banding material around the blender. 4. Carefully cut through or unwrap the shrink-wrap and the edge boards. 5.
-
Page 6: Operating Instructions
SECTION 2: OPERATING INSTRUCTIONS 2-1: WARNINGS Grounding Instructions This product should be grounded. In the event of an electrical short circuit, grounding reduces the risk of electric shock by providing an escape wire for the electric current. This product is equipped with a cord having a grounding wire with an appropriate grounding plug. - Page 7 Remember to always unplug the blender from the outlet prior to cleaning. Never use flammable solvents when cleaning spills or spatters. Please follow these guidelines since your HERO Warranty does not protect you from improper, negligent, or abusive operation.
-
Page 8: General Operating Instructions
2-2 GENERAL OPERATING INSTRUCTIONS 2-2-1 LOADING 1. Make sure that the container is full and properly sealed. 2. Lift the front-loading cabinet door. 3. To load the container • TruMix 1, TruMix 5 and TruMix XHD. i. Rotate the receiving bucket until its opening is at the front. ii. - Page 9 Figure 2-2-A ERGO 5 LOADING PROCEDURE LOADING 2. If not, close the door and press the 1. Ensure the bucket latch is on your right 3. Pull the black handle on the latch away green Jog button on the right hand side and hinge on your left - door opens from the bucket to release the gate.
- Page 10 Figure 2-2-B ERGO 5 UNLOADING PROCEDURE UNLOADING 2. If not, close the door and press the 1. The bucket should stop with the latch 3. Release the bail cord from the bail on your right and the hinge on your green Jog button on the right hand side handle.
-
Page 11: Trumix Models
2-3 TRUMIX MODELS The TruMix vortex mixers may be equipped with either a mechanical timer or one of the following electronic control models. Time Select Preset Time In order to operate these TruMix models correctly, please follow these instructions after loading the container according to instructions in 2-2: 2-3-1 MECHANICAL TIMER MODEL 1. -
Page 12: Model With Locking Mechanism
Digital Panel Information NOTE: Press the button to view the number of cycles, the total time and the average mixing time per cycle (Preset Time model). Press the Up and Down buttons simultaneously to display the number of cycles, the total time and the average mixing time per cycle (Time Select model). -
Page 13: Maintenance
3-1 MAINTENANCE OVERVIEW The vortex blenders are designed for maintenance-free operation. If any adjustments are necessary, contact HERO’s Customer Service Department at 1-800-494-4376 for assistance. If paint is spilled on or inside the mixer, follow the instructions below to clean the spill immediately. -
Page 14: Troubleshooting
SECTION 4: TROUBLESHOOTING 4-1: IDENTIFYING PROBLEMS 4-1-1: THE MIXER DISPLAY IS BLANK On power up the display should show 00:00 or STOP. If the display is blank, then one of the following items may be the cause: 1. The circuit breaker has tripped. Check that the circuit breaker on the right hand side of the machine has not tripped. -
Page 15: The Mixer Displays The Message "Stop
(magnet away from the switch) the switch should be open (no continuity). • Upon reconnection of power, if the dL message does not disappear then the display circuit board may need to be replaced. Contact HERO’s Customer Service Department at 1-800-494-4376 to further troubleshoot this problem. 4-1 Page 2 Revision 2.00... -
Page 16: The Mixer Moves On The Floor
(TruMix 1/5/XHD) or directly to the terminal blocks (Ergo 5). Refer to Appendix 4-2A/B/C/D for detailed wiring information. If the problem persists contact HERO’s Customer Service Department at 1-800-494-4376 to further troubleshoot this problem. 4-1-6: THE DOOR WILL NOT OPEN This situation can occur only in models with the interlock option. -
Page 17: Mixer Display Counts Down, Mixing Stops Early
4-1-7: MIXER DISPLAY COUNTS DOWN, MIXING STOPS EARLY There is a fault with the control or power wiring. Refer to Appendix 4-2-A/B for detailed wiring information for the TruMix 1/5/XHD and to Appendix 4- 2-D for the Ergo 5 and proceed as follows: Unplug the paint blender. -
Page 18: The Mixer Is Making Excessive Noise
There may be a high pitched whine when the VFD is energized. This is normal If the problem persists contact HERO’s Customer Service Department at 1-800-494-4376 to further troubleshoot this problem. 4-1-8: THE MIXER IS MAKING EXCESSIVE NOISE If the noise is a grinding drive-related noise, check the condition of the upper and the lower gears. -
Page 19: Digital Panel - Tm 1
Appendix 4-2-A Digital Panel - TM 1... -
Page 20: Digital Panel - Tm 5 / Tm Xhd 4-2-B
Appendix 4-2-B Digital Panel - TM 5 / TM XHD... -
Page 21: Mechanical Timer - Tm 1 / Tm 5 / Tm Xhd 4-2-C
Appendix 4-2-C Mechanical Timer - TM1 / TM5 / TM XHD... -
Page 22: Ergo 5
Appendix 4-2-D Ergo 5... -
Page 23: Service
SECTION 5: SERVICE 5-1 CABINET REMOVAL / REPLACEMENT Note: The TruMix Ergo 5 cabinet may only be removed by a qualified service technician. 5-1-1 REMOVE TRUMIX 1 CABINET 1. Unplug the paint blender. 2. Using a Phillips medium screwdriver, remove the (4) screws and lock washers shown in Item #1 (Figure 5-1A) that hold the rear panel to the cabinet. -
Page 24: Replace Trumix 1 Cabinet
5-1-2 REPLACE TRUMIX 1 CABINET 1. Replace the cabinet over drive mechanism and place it onto the base pan. 2. Replace the (4) screws and lock washers shown in Item #2 (FIGURE 5-1B) that hold the cabinet to the base. 3. -
Page 25: Replace Trumix 5 / Xhd Cabinet
Figure 5-1E 5-1-4 REPLACE TRUMIX 5 / XHD CABINET 1. Replace cabinet over drive-mechanism and place onto base pan. 2. XHD and Ergo 5: Replace bucket per Section 5-2-1. 3. Refasten the screws/ lock washers, Item #2, that hold cabinet to base. ((4) on TruMix 5, (6) on TruMix -XHD). -
Page 26: Mechanical Drive Assembly
5-2 Mechanical Drive Assembly 5-2-1 BUCKET REMOVAL & REPLACEMENT 1. Unplug the paint blender. 2. Using a Phillips medium screwdriver, remove the (3) screws and lock washers shown in Item #5 in FIGURE 5-2A, at the bottom of the bucket. Figure 5-2A Figure 5-2B 3. -
Page 27: Cabinet Leveling
5-2-3 CABINET LEVELING TRUMIX 5; XHD & ERGO 5 MODELS Cabinet Leveling Leveling Pads: Your blender has four (4) leveling pads or jacking screws at each corner of the base assembly (Refer to Figure 5-2D). 1. Unplug the paint blender. 2. -
Page 28: Bail Cord Replacement
5-2-4 BAIL CORD REPLACEMENT TRUMIX 5, XHD & ERGO 5 MODELS 1. Unplug the paint blender. 2. Using a medium Phillips screwdriver remove two screws and washers holding bail cords to bucket. 3. Remove old bail cords from bucket. 4. Place loops of new bail cords over posts as shown. The bail cords should be stretched after assembly. -
Page 29: Electrical Assembly
5-3 ELECTRICAL ASSEMBLY 5-3-1 MECHANICAL TIMER REPLACEMENT 1. Unplug the paint blender. 2. Remove the cabinet rear-panel using the instructions from Section 5-1. 3. Mounted inside of the upper cabinet are both the timer and a safety limit- switch. 4. Remove the black timer knob from front of blender. 5. -
Page 30: Fuse Replacement
5-3-2 FUSE REPLACEMENT Digital Panel - TruMix 1/5/XHD 1. Unplug the paint blender. 2. Using a Phillips head screwdriver, remove the screws from the back panel of the machine. Set the screws aside for reuse. 3. The fuse is located in the gray power junction box. Depending on model this could be located on the right side or under the dividing shelf. - Page 31 Ergo 5 1. Unplug the paint blender. 2. Remove the Stainless Steel cover / roller assembly and the front panel to expose the control enclosure. 3. There are two fuses inside the control enclosure: one in the fuse block mounted on the DIN rail just to the right of the Variable Frequency Drive, the other on the circuit board just to the left of the larger transformer.
-
Page 32: Circuit Breaker Replacement
5-3-3 CIRCUIT BREAKER REPLACEMENT Unplug the paint blender. Remove the cabinet rear-panel per Section 5-1. Carefully slide the two black wires and connectors from the blade terminals on the circuit breaker. It may be necessary to unplug the main power input wires from the power box connector to ease the removal of these two wires. -
Page 33: Power Cord Replacement
5-3-4 POWER CORD REPLACEMENT 1. Unplug the paint blender. 2. Remove the cabinet rear-panel per Section 5-1. 3. Cut the tie wraps that hold the motor and power cords together. 4. Disconnect the power-cord connector. 5. Loosen the gray strain relief, Item #1, that tightens around the power-cord where it passes through the base plate. -
Page 34: Limit Switch / Magnetic Switch Replacement
5-3-5 LIMIT SWITCH / MAGNETIC SWITCH REPLACEMENT Unplug the paint blender. Remove cabinet rear-panel per Section 5-1. Mounted inside of the upper cabinet there is a safety switch to ensure the blender cannot run with the door open. In blenders equipped with a mechanical timer the switch is a mechanical limit switch. - Page 35 Magnetic Switch 1. Disconnect the magnetic switch plug from the circuit board. For the Ergo 5, also disconnect the connector for the right hand switch in the rear of the machine (extended cable running from the switch to the rear of the machine. 2.
Need help?
Do you have a question about the Ultrablend Trumix Series and is the answer not in the manual?
Questions and answers