Table of Contents
Advertisement
Quick Links
Advertisement
Table of Contents

Summary of Contents for Addlogix EchoView EchoView - Wireless Video Adapter
- Page 1 EchoView - Wireless Video Adapter...
-
Page 2: Table Of Contents
Table of Contents 1 INTRODUCTION EATURES VERVIEW RODUCT PECIFICATION INIMUM YSTEM EQUIREMENTS 2 CONFIGURATION AND SETUP ETWORK ONNECTIONS LAN S ETTINGS ONNECTING IRELESS 3 SOFTWARE INSTALLATION NSTALLING FOR THE IRST PDATING OFTWARE NINSTALLING OFTWARE 4 USING WIRELESS VIDEO APPLICATION DDLOGIX IRELESS IDEO NABLING... -
Page 3: List Of Figures
List of Figures 1: TCP/IP P IGURE ROPERTIES 2: LAN S ____________________________________________________________ 5 IGURE ETTINGS 3: F IGURE IREFOX ONNECTION 4: A IGURE DDLOGIX PLASH 5: E ______________________________________________________________ 10 IGURE 6: P ID ___________________________________________________________ 10 IGURE ROJECTOR ________________________________________________________ 5 _____________________________________________ 6 ETTINGS __________________________________________________ 6 CREEN... -
Page 4: Introduction
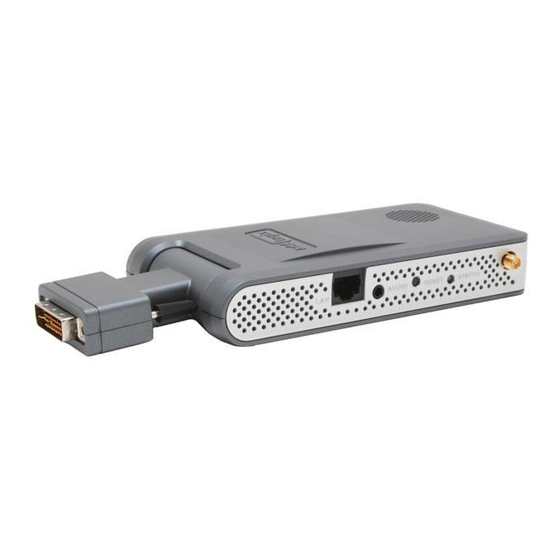
Introduction 1.1 Features Overview • Automatic driver download and installation • 1024 x 768 video resolution at 16-bit color depth • Proprietary patented Codec • 802.11 b/g compatible • Internet accessible • Firmware upgradeable • Multiple levels of security 1.2 Product Specification Hardware Overview Video Connector Audio Connector... -
Page 5: Configuration And Setup
2.2 LAN Settings If your PC is configured to connect to the proxy server, then please follow the instructions below on how to temporarily disable the proxy server connection while using the Addlogix wireless video adapter. For Internet Explorer users: Open Internet Explorer. -
Page 6: Connecting Wireless Video Adapter
Adapter (not included) is required to connect a DVI-D or DVI-A display monitor. Please refer to owner’s manual of the display monitor. Addlogix wireless video adapter is not guaranteed to work with every display monitor that uses a DVI-I connector for video output. -
Page 7: Software Installation
View Available Wireless Networks. In the Wireless Network Connection dialog window, click to select the wireless network that’s shown on the splash screen matching the SSID (i.e. AddLogix-XX) in the top right corner and click Connect Close the Wireless Network Connection dialog window when the wireless network status for AddLogix-XXXX is shown connected. -
Page 8: Uninstalling Software
3.3 Uninstalling Software Once the un-installation begins, you cannot stop or cancel this process. Click Start and navigate the mouse cursor to All Programs > AddlogixWP Click Uninstall and the software removal process will begin. When the un-installation process is finished, reboot your PC. -
Page 9: Using Wireless Video Application
Stop Projecting button becomes Projecting button. Press the Projecting button to resume wireless video session. Select Projector One or more available Addlogix wireless video adapter(s) is shown in an optional menu for you to select Display Options Windows’... -
Page 10: Enabling Access Id
The projector access ID is a security layer to restrict users who are not in the same room as the Addlogix wireless video adapter from accessing it. This access ID is randomly generated each time when the wireless video adapter is powered on and it can only been seen on the splash screen. -
Page 11: Configuring Administrative Password
The wireless video application will automatically detect for the last firmware available. Follow the message prompts to complete firmware upgrade process. Cycle-power the Addlogix wireless video adapter and update the software in your PC (see section 3 Updating Software). 4.6 Enabling External Antenna Addlogix wireless video adapter offers the option to attach an external antenna that maximizes its wireless connectivity. -
Page 12: Security Settings
Click Yes when the message prompt asks “Do you wish to use your own wireless utility?”. Launch your PC’s default wireless network utility to connect the AddLogix-XXXX SSID. In wireless network key (security) settings, select “Share” for the network authentication and “WEP”... -
Page 13: Troubleshooting
! Please refer to section 2, Configuration and Setup and configure your PC accordingly. ! Be sure you have selected the correct wireless network, i.e. AddLogix-XXXX. ! Click Download link on the Addlogix webpage and click Run to begin software installation process.
Need help?
Do you have a question about the EchoView EchoView - Wireless Video Adapter and is the answer not in the manual?
Questions and answers