Advertisement
SAFETY INSTRUCTIONS & PRODUCT WARNINGS
It is the user's responsibility to ensure the safe and proper use of this product. StoreYourBoard.com, a Spire
LLC company, is not responsible for damage or injuries related to installation or use, including improper or
inadequate mounting. Wear eye protection during installation and check for electrical wiring in the wall before
screwing or drilling into the wall. Not a toy; not intended for children. Misuse of this product could result
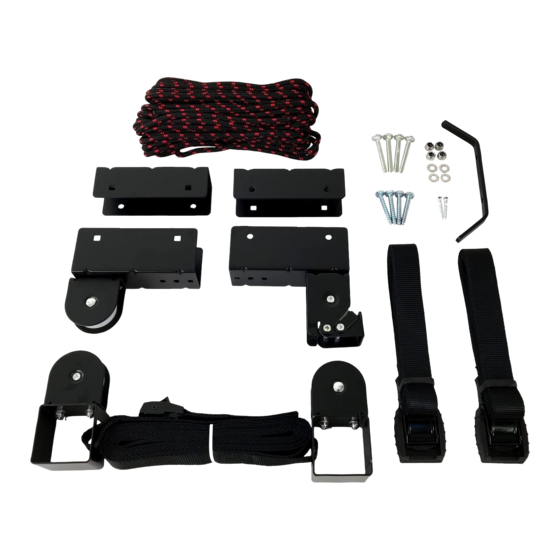
(2) Mounting brackets
(1) Single pulley bracket
(1) Dual pulley bracket
For easiest installation, we strongly recommend viewing
https://www.storeyourboard.com/kayak-canoe-hoist-hi-lift.html
Bringing you the best racks, bags & accessories.
Hi-Lift
PRO
THANK YOU FOR YOUR PURCHASE!
Please read all instructions before installing this product
in serious injury or death.
Weight Limit
the Hi-Lift Installation Video at:
Simply visit
www.StoreYourBoard.com
into the search tab.
by
Includes
(2) Square Brackets
(2) Adjustable straps
(1) Rope
60
OR
and type
"Hi-Lift"
Need help?
info@storeyourboard.com
1.877.880.5934
(1) Cleat
(1) Hardware set
LBS.
Advertisement
Table of Contents

Summary of Contents for StoreYourBoard Hi-Lift PRO
- Page 1 SAFETY INSTRUCTIONS & PRODUCT WARNINGS It is the user's responsibility to ensure the safe and proper use of this product. StoreYourBoard.com, a Spire LLC company, is not responsible for damage or injuries related to installation or use, including improper or inadequate mounting.
- Page 2 Hi-Lift INSTRUCTIONS (CONTINUED) Bracket Installation Begin by matching each pulley to a corresponding mounting bracket. Square holes to square holes, round holes to round holes. Lay the mounting brackets with their corresponding pulleys on the floor in the direction they should be mounted. [See image]. "Locking hinge"...
- Page 3 Hi-Lift INSTRUCTIONS (CONTINUED) Continuing from #3 on the preceding page, pass over one of the double pulleys at #4. Once over the pulley continue UNDER the "locking hinge" and through the corresponding hole at #5. Immediately reverse the rope to pass through the neighboring hole at #6 and continue UNDER the "locking hinge"...
Need help?
Do you have a question about the Hi-Lift PRO and is the answer not in the manual?
Questions and answers