Advertisement
Quick Links
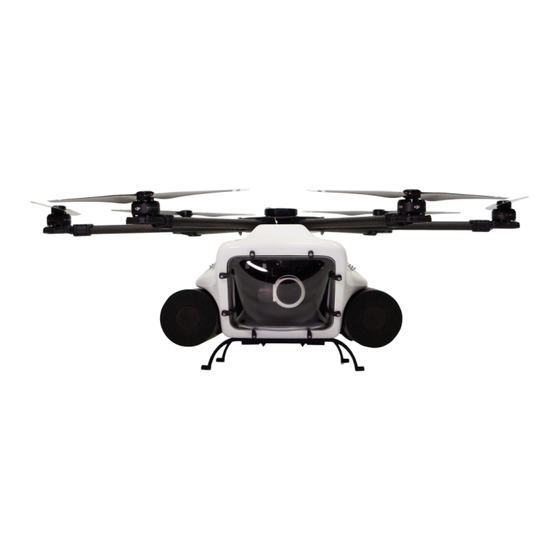
The HexH2O V2 Build Guide
The following build guide is specifically for the HexH2o Version 2 model
models).
You are free to build the HexH2o in whichever way you wish, however we recommended you follow
is guide closely in order to get the most from your machine.
This tutorial is based on using the DJI E600 Tuned Propulsion System
HexH2o V2 is specifically designed for the DJI E600, if you wish to use a different propulsion
system please contact us before placing your order and we can supply you with the V1 model.
1. UNPACKING YOUR HEXH2O
Your kit will include:
Painted HexH2o V2 body
Foam buoyancy aids & retainer strips
Perspex viewing dome and rear hatch with retaining clips and seal
Carbon top and bottom plates
6 x Carbon Fibre 16mm arms
6 x Lightweight carbon motor mount assembly
6 x Folding centre arm assembly
HexH2o sticker kit
GoPro (3 & 4) anti reflection sticker
Electronics tray with DJI Naza and gimbal mounts
Distribution board mount
24v Cooling Fan
Bolt, washer and grommet kit
GPS Mount/casing assembly
Naza LED stand off and grommet assembly
Cable location mounts & cable ties
Velcro
Breather kit
2 x HexH2o hex keys and mini level
Gimbal lock (locks gimbal in place during transportation)
Waterproof Drones - The HexH2O and QuadH2O professional waterproof drones
Waterproof Multirotors
https://www.quadh2o.com
(go here for Version 1
1 / 25
Advertisement

Related Manuals for QuadH2O HexH2O V2

Summary of Contents for QuadH2O HexH2O V2
- Page 1 This tutorial is based on using the DJI E600 Tuned Propulsion System HexH2o V2 is specifically designed for the DJI E600, if you wish to use a different propulsion system please contact us before placing your order and we can supply you with the V1 model.
- Page 2 Waterproof Drones - The HexH2O and QuadH2O professional waterproof drones Waterproof Multirotors https://www.quadh2o.com 1. TOOLS FOR THE JOB Soldering Iron, flux, solder Heat shrink (various sizes) Quick drying (5min) Epoxy Clear marine grade sealant (Sikaflex 291i recommended) Hot (glue) gun...
- Page 3 Waterproof Drones - The HexH2O and QuadH2O professional waterproof drones Waterproof Multirotors https://www.quadh2o.com Power connectors (eg: XT60) Thread lock Wire cutters Hobby knife Small socket set (7mm) 3. Dome and rear hatch When removing the dome or rear hatch, turn the retaining clips quarter turn ANTI-CLOCKWISE. If you try to open them by turning clockwise you will over tighten them and this may damage the paintwork.
-
Page 4: Top Plate Assembly
Waterproof Drones - The HexH2O and QuadH2O professional waterproof drones Waterproof Multirotors https://www.quadh2o.com this will allow you to adjust the buoyancy aids as required. 5. Top plate assembly 4 / 25... - Page 5 Waterproof Drones - The HexH2O and QuadH2O professional waterproof drones Waterproof Multirotors https://www.quadh2o.com Using the provided components, build up the top and bottom carbon plates, arms and mounting clamps. You will note that the arms have holes pre-drilled at the ends. The arms can only be inserted one way in order for the holes to line up.
- Page 6 Waterproof Drones - The HexH2O and QuadH2O professional waterproof drones Waterproof Multirotors https://www.quadh2o.com Ensure the non folding clamps are fitted with the provided 1mm washers – 2 at the top and 2 at the bottom. Don’t fit the motor mounts to the arms just yet.
- Page 7 Waterproof Drones - The HexH2O and QuadH2O professional waterproof drones Waterproof Multirotors https://www.quadh2o.com Note the bottom plate has 4 counter sunk holes (for the stand off bolts) – there are access holes in the top plate allowing you to access the bolts after the plates have been built/fitted.
- Page 8 Waterproof Drones - The HexH2O and QuadH2O professional waterproof drones Waterproof Multirotors https://www.quadh2o.com Carefully fit the 6 larger motor cable grommets into the pre-drilled holes in the top of the hull, then fit the 2 remaining smaller grommets into the pre-cut breather tube holes.
- Page 9 Waterproof Drones - The HexH2O and QuadH2O professional waterproof drones Waterproof Multirotors https://www.quadh2o.com Next, fit the supplied top plate stand offs to the HexH2o, ensuring you fit the supplied 2mm washers on either side of the HexH2o body: bolt – washer – HexH2o – washer – stand off (don’t forget blue thread lock).
- Page 10 Waterproof Drones - The HexH2O and QuadH2O professional waterproof drones Waterproof Multirotors https://www.quadh2o.com Next mount the base of GPS holder (the smaller half) to the top plate using some of the provided 3M tape or one of your Naza GPS stem 3M pads as pictured, (do not cover any top plate screws or the stand off location holes).
- Page 11 Waterproof Drones - The HexH2O and QuadH2O professional waterproof drones Waterproof Multirotors https://www.quadh2o.com Using the provided 3M tape, mount the GPS unit to the inside of the provided GPS mount. 11 / 25...
- Page 12 Waterproof Drones - The HexH2O and QuadH2O professional waterproof drones Waterproof Multirotors https://www.quadh2o.com Then using some Marine grade sealant run a bead around the inside of the top half of the GPS holder and inside the neck (where the cable comes out. Gently push fit the top half of the GPS unit in place, effectively sealing the Naza GPS inside the holder.
- Page 13 Waterproof Drones - The HexH2O and QuadH2O professional waterproof drones Waterproof Multirotors https://www.quadh2o.com Note you will need to extend the cables to suit. First cut off the motor bullet connectors. Then create your 18 extended leads (using 18AWG cable) with female bullet connectors at one end.
- Page 14 Waterproof Drones - The HexH2O and QuadH2O professional waterproof drones Waterproof Multirotors https://www.quadh2o.com Feed the cables through the motor grommets from the inside of the HexH2o out, then run them down the arm, leaving the ends of the cables poking out the end.
- Page 15 Waterproof Drones - The HexH2O and QuadH2O professional waterproof drones Waterproof Multirotors https://www.quadh2o.com Slide all of the cables through the motor mount and slide the motor mount onto the arm. Each arm has pre drilled holes at each end, one end specifically fits the motor mounts whilst the other end is for the clamps.
- Page 16 Waterproof Drones - The HexH2O and QuadH2O professional waterproof drones Waterproof Multirotors https://www.quadh2o.com liquid electrical tape under the heat shrink to give extra protection to the joint. Then carefully pull the cables back through from the inside of the HexH2o.
- Page 17 Waterproof Drones - The HexH2O and QuadH2O professional waterproof drones Waterproof Multirotors https://www.quadh2o.com Then solder your main power cable to the board (approx 6? long using 12AWG cable) with your chosen connector on one end (this will connect to your flight batteries).
-
Page 18: Electronics Tray
Waterproof Drones - The HexH2O and QuadH2O professional waterproof drones Waterproof Multirotors https://www.quadh2o.com Bond the provided distribution board stand off to the HexH2o (using 5min epoxy), then screw the distribution board to the stand off using one of the E800 bolts (supplied in the E600 tool kit) Now its time to fit the ESC’s in place, gently clip each ESC into the ESC holders. - Page 19 Waterproof Drones - The HexH2O and QuadH2O professional waterproof drones Waterproof Multirotors https://www.quadh2o.com #15). 19 / 25...
-
Page 20: Video Transmitter
Waterproof Drones - The HexH2O and QuadH2O professional waterproof drones Waterproof Multirotors https://www.quadh2o.com 14. Video Transmitter If you are using a video transmitter for a downlink, you will need to connect this to the power on your electrics tray, or power distribution board and connect the video link to your Gopro, gimbal or OSD (depending on your setup). - Page 21 Waterproof Drones - The HexH2O and QuadH2O professional waterproof drones Waterproof Multirotors https://www.quadh2o.com Ensure you pick a location for the Antenna that does not foul the folding arms. 15. NAZA LED location We provide a small stand off and a viewing grommet for the NAZA LED. This is optional but it enables you to view the LED status without having any reflections being picked up by your GoPro.
- Page 22 Waterproof Drones - The HexH2O and QuadH2O professional waterproof drones Waterproof Multirotors https://www.quadh2o.com Carefully push the provided clear grommet through the hole, then mount the stand off on the inside (using some 5min Epoxy for the grommet and Marine grade sealant on the stand off ).
- Page 23 Waterproof Drones - The HexH2O and QuadH2O professional waterproof drones Waterproof Multirotors https://www.quadh2o.com Finally fix the LED unit over the stand off using some of the provided velcro. Using Velcro means you can easily remove it should you need to plug the Naza into the assistant software.
- Page 24 Waterproof Drones - The HexH2O and QuadH2O professional waterproof drones Waterproof Multirotors https://www.quadh2o.com Ensure the area is water tight. 24 / 25...
- Page 25 Waterproof Drones - The HexH2O and QuadH2O professional waterproof drones Waterproof Multirotors https://www.quadh2o.com 16. Mounting your batteries Your batteries will fit nicely in the floor of the HexH2o; either one lipo (fit sideways) or two lipo’s (next to each other running front to back). Keep them in place using velcro. Position them to ensure your centre of gravity is maintained.
Need help?
Do you have a question about the HexH2O V2 and is the answer not in the manual?
Questions and answers