Table of Contents
Advertisement
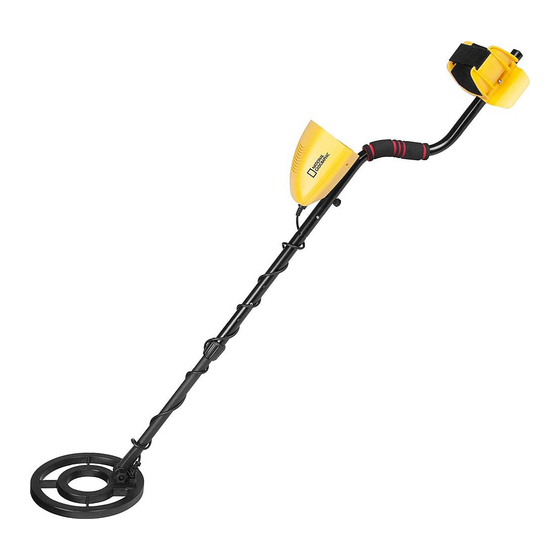
DIGITAL METAL
WARNING:
CHOKING HAZARD — Small parts.
Not for children under 3 years.
DETECTOR
INSTRUCTION MANUAL
2
X
NOT INCLUDED
Do not mix old and new batteries. Do not mix alkaline,
standard (carbon-zinc), or rechargeable (ni-cad, ni-mh, etc.) batteries.
Non-rechargeable batteries are not to be recharged.
Please recycle batteries responsibly.
AGES
80-20012
Advertisement
Table of Contents

Subscribe to Our Youtube Channel
Related Manuals for National Geographic 80-20012

Summary of Contents for National Geographic 80-20012
- Page 1 AGES 80-20012 DIGITAL METAL DETECTOR INSTRUCTION MANUAL WARNING: CHOKING HAZARD — Small parts. NOT INCLUDED Not for children under 3 years. Do not mix old and new batteries. Do not mix alkaline, standard (carbon-zinc), or rechargeable (ni-cad, ni-mh, etc.) batteries.
-
Page 2: Table Of Contents
Features Preparation Assembling the Detector Installing the Batteries Using Headphones Listening Safely Functions and Indications A Quick Look at the Detector Displays Target Denomination/Tones Operations Turning on the Detector Setting the Operation Mode Testing and Using the Detector Indoor Testing and Use Outdoor Testing and Use Search Coil Sweeping Hits Application Hints... -
Page 3: Features
With your metal detector, you can hunt for coins, relics, jewelry, gold, and silver just about anywhere. The detector is versatile and easy to use. The detector’s features include: LCD Display—shows the probable type of metal with an arrow, the depth of the target, DISC range, the level of SENS with segment, the operating mode, and battery indication. -
Page 4: Preparation
PREPARATION Control Box GOLD BRONZE Fixing Screw Assembling the Detector 8" 6" SENS DEPTH 4" 2" Assembling your detector is easy and requires no special tools. Just follow BATT VOLUME SENS DEPTH these steps. MODE ENTER POWER PHONE POWER PHONE Latch Assembly Hole DOWN... -
Page 5: Installing The Batteries
6. Turn the stem’s lock nut on the middle stem clockwise until it loosens. Adjust the stem to a length that you feel comfortable when you stand upright with the detector in your hand, and the search coil is level with the ground with your arm relaxed at your side. -
Page 6: Using Headphones
USING HEADPHONES 1. Insert the headphones’ 3.5mm plug into the PHONE jack. At this time the internal speaker disconnects. 2. Set the VOLUME to the desired setting. Listening Safely • To protect your hearing, set the volume to the lowest setting before you begin listening, adjust the volume to a comfortable level. -
Page 7: Target Denomination/Tones
Target Denomination IRON NAIL – indicates that the target is probably iron or nail. Some oxidized iron might register somewhere within the SILVER range. AL/5¢/PULL TAB – indicates that the target is probably 5¢, aluminum can, or pull tab. GOLD RANGE –... -
Page 8: Operations
OPERATION 1. Press POWER button to turn on the detector. Press POWER again to power off. LCD displays all symbols. 2. SETTING SENSITIVITY Press SET, sensitivity level bar flashes. Then press UP button to increase the sensitivity or press DOWN button to decrease it. After that, press ENTER to confirm the setting. -
Page 9: Testing And Using The Detector
5. PINPOINT After you find a metal object, you can use P/P to pinpoint the target. Hold down P/P button. LCD will display P/P and an icon of an eye. Slowly move the search coil above the sound area. The detector sounds and the depth indicator on the LCD displays the probable depth of the target. -
Page 10: Outdoor Testing And Use
Fixing Screw 8" 6" SENS DEPTH 4" 2" BATT VOLUME SENS DEPTH MODE ENTER POWER PHONE POWER PHONE Latch DOWN MODE Outdoor Testing and Use 1. Slide POWER to power on the detector. GOLD 2. Follow the instructions described in OPERATION to set SENSITIVITY, BRONZE VOLUME and operation mode. - Page 11 Control Box GOLD BRONZE Fixing Screw 8" 6" SENS DEPTH 4" MEDIUM TONE 2" BATT VOLUME SENS DEPTH MODE ENTER POWER PHONE • It’s better you sweep the search coil from side to side in an arc line of 3 POWER inches motion and keep the search coil parallel with the ground.
-
Page 12: Application Hints
APPLICATION HINTS Pinpointing The Target Accurately pinpointing a target makes digging it up easier. But it takes practice. We suggest you practice finding samples on your own property before you search other locations. Follow these steps to pinpoint a target. 1. -
Page 13: Factors That Affect The Detecting
Factors That Affect The Detecting It’s difficult to have an accurate detecting result. Sometimes the detecting may be restricted by some factors. • The angle of the target buried in the soil. • The depth of the target. • The level of oxidization of the target. •... - Page 14 TROUBLESHOOTING GUIDE Problem Reason Suggestion 1. The detector may receive interference and false signal from 1. Change searching place The detector displays or sounds broadcast antenna and other 2. Wait for some time to check without detecting any target electronic lines again 2.
- Page 16 ©2018 National Geographic Partners LLC. All rights reserved. NATIONAL GEOGRAPHIC and Yellow Border Design are trademarks of the National Geographic Society, used under license. ©2018 Explore Scientific, LLC.
Need help?
Do you have a question about the 80-20012 and is the answer not in the manual?
Questions and answers