Table of Contents
Advertisement
Quick Links
Advertisement
Table of Contents

Summary of Contents for Snarkoon LIGHT2 100
- Page 1 Manual...
-
Page 2: Table Of Contents
Contents ....... . 3 Specifications 1.1 General ....... . . 3 1.2 Button Properties . -
Page 3: Specifications
1. Specifications 1.1 General Max. DPI/CPI 5,000 Min. DPI/CPI Sensor Optical Chip PixArt 3325 Illumination Max. Polling Rate 1,000 Hz Frames Per Second 4,000 Inches Per Second Max. Acceleration 20 g Mouse Feet 3, Pure PTFE 1.2 Button Properties Number of Buttons Programmable Buttons Durable Omron Switches in Left and Right ... -
Page 4: Software Properties
1. Specifications 1.4 Software Properties Gaming Software Onboard Memory for Game Profiles Capacity of Onboard Memory 64 kB Number of Profiles 1.5 Cable and Connector Connector Gold-Plated USB Plug Ultraflexible Cable Textile Braided Cable ... -
Page 5: Connecting The Gaming Mouse
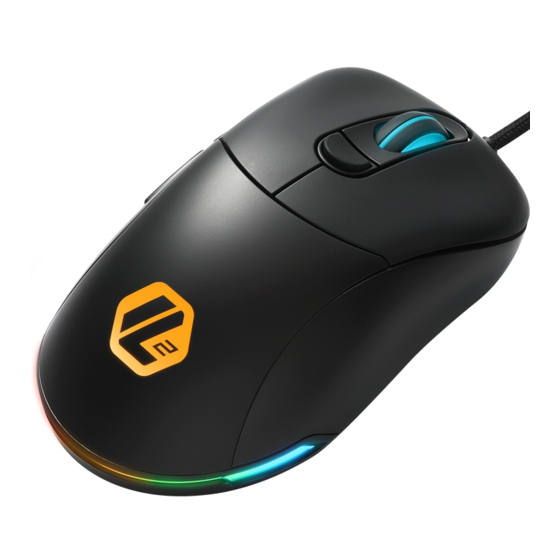
2. Connecting the Gaming Mouse 3. Overview Left Mouse Button Scroll Wheel Right Mouse Button DPI Switch Thumb Button 1 Thumb Button 2 Polling Rate Switch... -
Page 6: Shortcuts
4. Shortcuts Thumb button 1 + Right mouse button (hold for 3 seconds): Lighting Effects Thumb button 2 + Left mouse button + Right mouse button (hold for 3 seconds): Switch Profile (Profile 1 Red, Profile 2 Green, Profile 3 Blue, Profile 4 Yellow, Profile 5 Purple) Thumb button 1 + Thumb button 2 + Scroll wheel (hold for 3 seconds):... -
Page 7: Software Installation
6. Software Installation Download the gaming software for the Light² 100 from the Sharkoon website at www.sharkoon.com. Unzip the ZIP file in a folder of your choice and then double click the file “Light2_100.exe “ to launch the installation. Follow the instructions of the setup wizard and then click on “Finish“... -
Page 8: Software Overview
7. Software Overview Button Assignment: The assignment of the eight but- Macro Manager: In the menu Macro Manager, different tons of the Light 100 can be configured as desired. macros can be recorded, modified or deleted. These are Individual keys can be designated with different com- saved separately, but are then available for use in any mands, functions and macros. -
Page 9: Button Assignment
8. Button Assignment The Light² 100 has eight freely configurable buttons, which can be re-assigned via the software. To change the assignment of a button, select the desired button from the list which is on the left next to the illustration of the Light²... -
Page 10: Dpi Settings
9. DPI Settings The seven DPI steps of the Light² 100 can be modified as desired. Each step can be assigned with a DPI value between 200 and 5,000. The currently selected DPI step is highlighted in blue. DPI steps which are not needed can be deactivated. -
Page 11: Illumination
10. Illumination This menu allows the lighting effects of the Light² 100 to be set and modified. Nine different lighting effects are avai- lable. In addition, the illumination can be completely deactivated if desired. Depending on the selected lighting effect, other elements can be adjusted such as brightness, frequency or individual colors. -
Page 12: Advanced Settings
11. Advanced Settings In “Advanced Settings“, options for the precision and speed of the Light² 100 can be activated and adjusted. Modifications can be made for mouse sensitivity, scroll speed and double-click speed. To adjust any of the settings, move the corresponding slide control to the left or right. Sensitivity: With this option, the pointer speed can be Double-Click Speed: In this menu, it can be set how far adjusted. -
Page 13: Macro Manager
12. Macro Manager In the Macro Manager, macros with up to 50 key com- mands can be recorded, edited and deleted. Macros are independent of game profiles but can be used for any of these profiles after they have been recorded. Before a macro can be used, it must be assigned to a mouse button in the menu “Button Assignment“. -
Page 14: Profile Options
13. Profile Options On the bottom of the Light² 100 software are the profile options. Here, five different profiles can be either selected, saved or altered. Click on the blue field with the black triangle to select a profile. Save Profile / Load Profile: To save a profile on the PC Reset / Save: The two blue buttons on the bottom right of or to import an already existing profile, click on the grey the software allow the currently active profile to be reset... - Page 15 Legal Disclaimer For potential loss of data, especially due to inappropriate handling, Sharkoon assumes no liability. All named products and descriptions are trademarks and/or registered trademarks of the respective manufac- turers and are accepted as protected. As a continuing policy of product improvement at Sharkoon, the design and specifications are subject to chan- ge without prior notice.
Need help?
Do you have a question about the LIGHT2 100 and is the answer not in the manual?
Questions and answers