
Summary of Contents for SITEP PR50
- Page 1 INSTRUCTION MANUAL WATER CHILLER MODEL PRR 50(N) 27 December, 2002 I:\WP51\MANUALS\water cooler PRR50N-c.wpd...
-
Page 2: Table Of Contents
Index: General information page 1 Water Cooler and its components page 2 (Chap. 1) Useful information page 3 (Chap. 2) Working cycle page 4 (Chap. 3) Location and installation guide page 7 (Chap. 4) Technical data page 8 (Chap. 5) Movement and transport page 9 (Chap. -
Page 3: General Information
GENERAL INFORMATION. THIS MANUAL IS TO BE CONSIDERED AS AN INTEGRAL PART OF THE MACHINE AND MUST BE CONSERVED WITH THE MACHINE THROUGHOUT ITS WORKING LIFE. Before carrying out any operation, it is important to read this instruction manual thoroughly, particularly the section concerning risk(see page 15). This manual should be kept in a way so that it is available for consultation at any time and kept so that it is not damaged ( ie. -
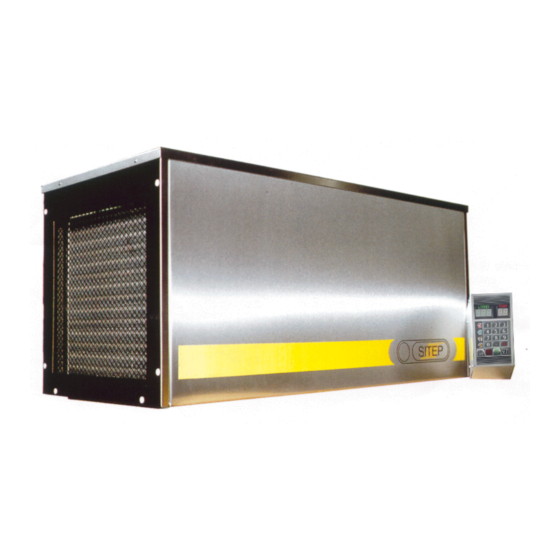
Page 4: Water Cooler And Its Components
Components of package Water cooler unit complete with power cord and plug and control unit with cord Standard wall bracket 10 x Screws for wall bracket 10 x Wall plugs for wall bracket Hoses for inlet water with fittings attached (2 different styles) Hose for outlet water Water filter with 2 brass fittings Hose connectors... -
Page 5: (Chap. 1) Useful Information
DAY TIME PHONE NO 02 9550 5555 AFTER HOURS PHONE NO 0408 298291 NAME OF MANUFACTURE Sitep TYPE OF MACHINE Water Cooler (and heater for models ending with “N”) and metre Contacts in W & P Reedy P/L.: MACHINE SALES: Lars Bryndum &... -
Page 6: (Chap. 2) Working Cycle
CHAPTER 2: Working Cycle Page 4... - Page 7 Connect water to the Machine 1 through the supplied water filter. Open the tap fully. Connect electricity to machine 2 and turn on the power at the power point. Check that the earth leakage switch(this switch provides protection to the operator and in case of variations in current 15 is turned To turn the machine on.
- Page 8 To deposit the preset litres through the deposit hose 19, press “START” 13 and the unit will automatically deposit the set amount (the accuracy will be within 2%). You can stop the deposit at any time by pressing “STOP” 12. The litre amount 18 remaining to be deposited will flash, to complete the deposit press “START”.
-
Page 9: (Chap. 3) Location And Installation Guide
CHAPTER 3: INSTALLATION AND LOCATION GUIDE: The machine must be installed in an environment in which the temperature does not exceed 30 degrees Celsius. The machine should be fixed horizontally to a solid brick wall by the bracket provided using all the ten plugs to spread the load of the unit evenly. Other options are a stand which should be fixed to the wall, or a special wall bracket which will enable fixing onto Bessa brick walls. -
Page 10: (Chap. 4) Technical Data
CHAPTER 4: TECHNICAL DATA: REFRIGERATED/HEATED PR50 PR50N PRR50 PRR50N MODELS Capacity Weight empty Weight full Voltage 240, 50 Hz single phase Rapid cooling + 18 to + 3 in 15minuts Normal cooling 1 hour Built in heater Heater power 240 volt... -
Page 11: (Chap. 5) Movement And Transport
CHAPTER 5: MOVEMENT AND TRANSPORT: When lifting the machine a lifting device should always be used. Always lean and move the machine in a horizontal position. The machine should never be inclined at an angle greater than 45 degrees. The machine should be completely emptied before transportation. Page 9... -
Page 12: (Chap. 6) Installation And Final Test
CHAPTER 6: INSTALLATION AND FINAL TEST. Fasten the bracket to the wall leaving a minimum distance from the ceiling and to the wall on the right hand side of the machine (frontal view) of at least 300mm. (See below) USE ALL THE WALL PLUGS TO SPREAD THE LOAD OF THE UNIT EVENLY. -
Page 13: (Chap. 7) Putting Into Use
CHAPTER 7: PUTTING INTO USE: SETTING THE TEMPERATURE. As per Chapter 2. EXAMPLE: To set temperature to 10 degrees press in the following sequence: “SET” “CE” 10 “SET” If by error the wrong number is entered, wait twenty seconds or press “CE” and repeat the operation. -
Page 14: (Chap. 8) Maintenance And Service
CHAPTER 8: SERVICE MAINTENANCE: Service maintenance of the unit should be carried out at least twice a year. More often if required and only by authorised service companies (the cost for this maintenance service is charged to the customer). This maintenance consists of cleaning all the parts in contact with water, the check of the pressure of the refrigerant, the electrical insulation, checks of all electrical terminals and all the functions of the machine as well as the accuracy of the... -
Page 15: Customer Fault Finding
Customer Fault Finding: PROBLEM ENCOUNTERED REME Why will the unit not turn on ? Check if lead is plugged correctly into Check the power point is turned on. Check earth leakage switch is in the o Hold down the “ON” button on the co Why does the water tank take a long time to fill? Check that the mains water tap is full Check that the water filter is clean ? R Check that the water pressure is suffi... -
Page 16: Electric Circuit
ELECTRIC CIRCUIT: Type. Transformation of voltage 220-12-24 Volt. Control circuit with low voltage 24 Volt, solenoid valve 24 Volt. The electronic control panel with the keyboard for setting up commands functioning at 24 Volt. Power 40 Watt Voltage 240 V Control amperage 190 mA. -
Page 17: Risks
------ RISKS DANGER ! ------ A) Wrong installation of the machine If the machine is installed in an incorrect position, (ie not horizontal), it will result in loss of water. Check thoroughly that the wall bracket or stand has been fastened correctly to the wall, if it is not securely attached to the wall the machine will fall. -
Page 18: Parts Diagram
PARTS DIAGRAM Page 16...
Need help?
Do you have a question about the PR50 and is the answer not in the manual?
Questions and answers