Table of Contents
Advertisement
Advertisement
Table of Contents

Summary of Contents for Oakcastle SB100
- Page 1 Instruction Guide SB100 | HD Freeview Recorder...
-
Page 2: Table Of Contents
Parent control and Automatic Power On ������������������������ 17 System Maintenance �������������������������������������������������������18 Factory Reset and Software Update ��������������������������������19 Network settings and Network Apps ������������������������������20 Troubleshooting ��������������������������������������������������������������21 Specifications ����������������������������������������������������������������� 22 Warranty ������������������������������������������������������������������������ 22 Safety Information���������������������������������������������������������� 23 year Register your product for a FREE 3-year warranty warranty at www.oakcastle.co.uk... -
Page 3: Box Contents
Box Contents What’s in the Box? Oakcastle SB100 HD Freeview Recorder Remote Control (and 2 x AAA batteries) Instructions Guide... - Page 4 Controls & Functions Remote control buttons...
-
Page 5: Controls & Functions
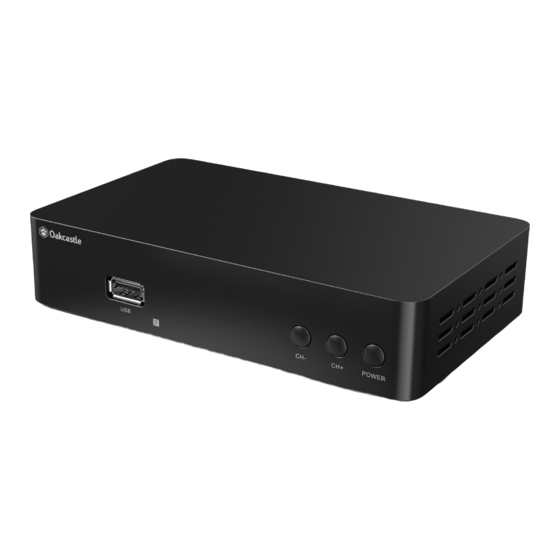
Controls & Functions Power on/off 19. Media: press to access USB PVR button (access PVR content 20. Number keypad menu) V-Format: change TV 21. Recall: Go to previous resolution channel Exit: Exit to top menu 22. Mute/Unmute Fav: Add favourites 23. - Page 6 Controls & Functions Control Buttons 37. USB Port 43. RF LOOP 38. Standby Light 44. HDMI port 39. CH- (prev. channel) 45. Ethernet Port 40. CH+ (next channel) 46. Scart Connection 41. Power on/off 47. Power Supply 42. RF IN...
-
Page 7: How To Connect
Instruction Guide How to Connect TV aerial Rear view of the TV Connection Refer to the diagram above for the connection of your Freeview box to your aerial and TV using the HDMI slot. Step 1: Connect your antenna lead to the TV RF IN port (Ref.42). Step 2: Choose an installation method (HDMI (Ref.44) or SCART (Ref.46)) and follow the steps below. -
Page 8: Instruction Guide
Instruction Guide Getting Started Steps for getting started with your Freeview Box Turn on your TV. Plug the STB (Set Top Box) device into the mains. Connect the STB to your TV using an HDMI cable or SCART cable (See page 5 for details). Select the correct source/video or AV input channel for the HDMI input. -
Page 9: Basic Operation
Instruction Guide Basic Operation Selecting a channel Follow one of the methods below to switch channels. Press up or down on the navigation controls (Ref.11/Ref.14) to move to the next or previous channel. If you already know the channel number, enter the number using the number keypad (Ref.20) and then press OK (Ref.13) or wait for 2 seconds. - Page 10 Instruction Guide Basic Operation Adjusting the volume Press up or down on the remote control (Ref.11/Ref.14) to increase or decrease the volume. Press the mute button (Ref.22) to mute or un-mute the sound. Getting channel information Press the info button (Ref.31) to view program information including the current and next program.
-
Page 11: Organising Channels And Stations
Instruction Guide Organising channels and stations Channel Manager The channel manager allows you to organise channels and stations. To access the channel manager, press Menu (Ref.10) on the remote control. Select ‘Program Edit’ from the menu, and press OK (Ref.13). The default password is 000000. -
Page 12: Usb/Multimedia And Recording
Instruction Guide USB/Multimedia and recording USB Multimedia and recording The USB function can be used to record a program, play or view files from USB. Please see page 22 for details of the types of compatible USB files. Multimedia - Music, Photos, and Films from USB To access the Multimedia menu section, press Menu (Ref.10). -
Page 13: Record
Instruction Guide Record Method 2 - Blue button You can set up to eight timers on the device. Setting a timer will set the device to start and stop recording at specific times. If the device is switched off when a recording is scheduled, it will switch on to begin recording. -
Page 14: Record - Configuring Pvr Partitions
Instruction Guide Record - Configuring PVR Partitions PVR Configure When using an HDD (external hard drive) to record programs, in most cases you can choose from several partitions available to record onto. The set top box will allow you to choose different partitions for recording purposes. -
Page 15: Electronic Program Guide (Epg)
Instruction Guide Electronic Program Guide (EPG) Some providers broadcast information about their programs. This information is available on screen via an electronic program guide, displayed by pressing EPG (Ref.33) on the remote control. You can navigate through the EPG and view information about channels and programs (explained in the next section) or press EPG (Ref.33) or EXIT (Ref.4) to close the guide. -
Page 16: Scanning/Rescanning For Channels And Stations
Instruction Guide Scanning/Rescanning for Channels and Stations The Channel Search option on the main menu enables you to scan for and detect digital TV and radio stations available in your area. You will need to perform a rescan if: • New channels or stations become available •... -
Page 17: Manual Scanning And Audio Language And Format
Instruction Guide Manual Scanning and Audio language and format Manual Searching Note: Automatic searching (described above) is suitable in most cases. You might use the manual search option if you have deleted a channel and now want to access it again. In this case, you would just search for that particular channel. -
Page 18: Audio-Visual (Av Settings) And Options
Instruction Guide Audio-Visual (AV settings) and Options Press MENU (Ref.10) on the remote control. The main menu will appear. Scroll across to select ‘Picture’ under the main menu using the left and right buttons (Ref.12/Ref.32). Under this menu, you can change the following settings: •... -
Page 19: Parent Control And Automatic Power On
Instruction Guide Parent control and Automatic Power On The STB is shipped with a default personal identification number (PIN). The default PIN is 000000. The PIN is required if you have enabled the parental lock. To enable Parent Control: Press MENU (Ref.10) on the remote control. The main menu will appear. -
Page 20: System Maintenance
Instruction Guide System Maintenance You can upgrade the software in your STB as new versions become available. Information about the current version (and information about the hardware) is available from the menu to help you determine if you need to upgrade. This information might also be useful if you need to obtain technical support. -
Page 21: Factory Reset And Software Update
Instruction Guide Factory Reset and Software Update Clearing and resetting data You can reset the STB by restoring the unit to the default settings it had when it left the factory (please see following section for instructions). This clears all channels, stations, preferences and other user settings. You will need to rescan for channels and stations before you can continue watching digital TV or listening to digital radio. -
Page 22: Network Settings And Network Apps
Instruction Guide Network settings and Network Apps Network Settings The network settings are automatically adjusted to the DHCP function. Under Network Settings menu, you can switch the Link Type between LAN and WiFi, and change IP Settings if required. Network Apps 1. -
Page 23: Troubleshooting
Troubleshooting Troubleshooting Possible causes Solutions Symptoms AC power cord is not Check that the power cord is plugged into Indicators on front connected the wall socket. panel do not light up Make sure the power switch is on. The cables connecting the Make sure that the correct cable is connected TV and the receiver are not between the TV and the receiver, and that the... -
Page 24: Specifications
0-50 degrees celsius Warranty All products come with a standard 12 month warranty. All items must www.oakcastle.co.uk be registered on for the warranty to be valid. Once on the web page, use the menu to find “register your product”. You will also be given the chance to extend your warranty for an additional 24 months, free of charge. -
Page 25: Safety Information
1. Read these instructions. 2. Keep these instructions. Instructions are also The apparatus shall not be exposed to dripping or available for download at www.oakcastle.co.uk splashing and no objects filled with liquid, such as 3. Heed all Warnings vases, shall be places on the apparatus. - Page 26 www�oakcastle�co�uk...
Need help?
Do you have a question about the SB100 and is the answer not in the manual?
Questions and answers