Advertisement
Quick Links
Advertisement

Subscribe to Our Youtube Channel
Related Manuals for Verano RV40 ecoline


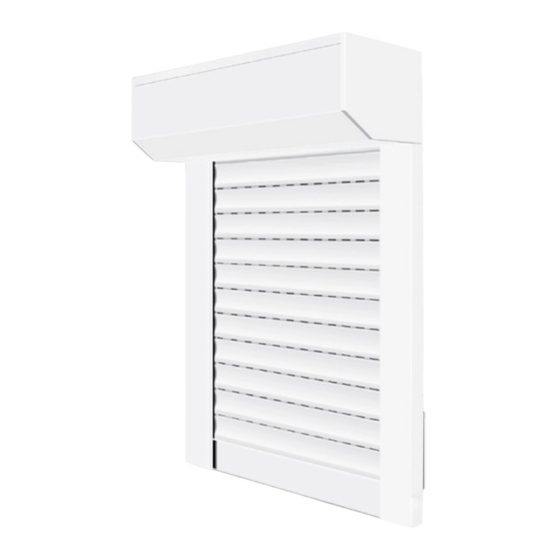
Summary of Contents for Verano RV40 ecoline
- Page 1 INSTALLATION MANUAL ROLLER SHUTTERS RV40 - RV41 ecoline...
-
Page 2: Necessary Tools
INSTALLATION MANUAL ROLLER SHUTTERS Content Package 1 1. Armor in box 2. Control a. manual control: cord or strap winding mechanism b. electrical control : switch + plug c. remote controlled: remote control + plug Package 2 3. Two guides 4. - Page 3 General warning Mounting the Verano® product yourself is at your own risk. Only use this instruction as a tool and for the mounting of this specific Verano® product. If you cannot mount the product yourself, you can always opt for professional mounting.
- Page 4 INSTALLATION MANUAL ROLLER SHUTTERS Instruction placing roller shutter (outside) 1.1 Marking the mounting-holes 1. Place the left guide vertical, at the right height, against the façade or the window frame. Attention! The guides have an open and closed side. The open side needs to be on the window side and conducts the slats.
- Page 5 INSTALLATION MANUAL ROLLER SHUTTERS 1.2 Drilling mounting-holes in the guides Make sure that the holes are drilled precisely 13 mm from the side. Installation on the wall: first drill a hole of 6 mm through both layers of the guide. After that, drill the top hole with a 10 mm drill.
- Page 6 INSTALLATION MANUAL ROLLER SHUTTERS 1.5 Mounting the guides 1. Place the guides back in the façade or the window frame. Make sure that the guides are perpendicular and run parallel to the wall. You can mark the drill holes according to the holes in the guides. 2.
- Page 7 INSTALLATION MANUAL ROLLER SHUTTERS 1.7 Placing the box onto the guides 1. Remove the foil on the back of the box. You can leave the foil on top of the box on. 2. Lift the box with two persons. 3. Conduct the electrical power cord or the pull up band through the drilled transit hole to the inside. Make sure that the pull up band is not twisted.
- Page 8 INSTALLATION MANUAL ROLLER SHUTTERS 1.8 Fixating the box to the wall (optional ) Especially for larger dimensions it is advisable to fixate the sidecovers to the wall. This creates a better connection and the legs of the sidecover are less burdened by the pantser weight. 1.
- Page 9 INSTALLATION MANUAL ROLLER SHUTTERS Installation manual control (inside) 1. Put the pull up band through the pulley on the inside. Make sure that the pull up band is not twisted. 2. Place the pulley in to the control hole. 3. Determine the position of the winding mechanism and mark the two holes on the window frame or the wall.
- Page 10 INSTALLATION MANUAL ROLLER SHUTTERS 7. Pull the end of the pull up band through the winding mechanism and place it across the small hole so that it is tightened. Caution! You may not shorten the band in an early stage! The length of the band is needed when you close the roller shutter.
- Page 11 INSTALLATION MANUAL ROLLER SHUTTERS Installation electrical control (inside) 1. Determine the position of the switch and mark the 2 holes on the wall indoors. 2. Drill the holes with a 6 mm drill. Ø6 230 V 3. Open the switch using a flat screwdriver.
- Page 12 INSTALLATION MANUAL ROLLER SHUTTERS 5. Connect the 4-core power cord of the motor and the 3-core power cord + switch, following the schedule. If necessary, consult an installer. Motor left (seen from the outside) Motor right (seen from the outside) 6.
Need help?
Do you have a question about the RV40 ecoline and is the answer not in the manual?
Questions and answers