
Related Manuals for Logicube ZX-Tower

Summary of Contents for Logicube ZX-Tower
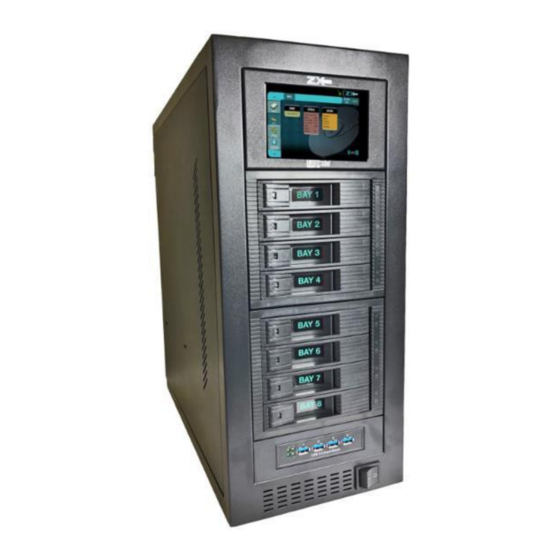
- Page 1 ZX-Tower™ (ZX-T) User’s Manual Logicube, Inc. Chatsworth, CA 91311 Phone: 818 700 8488 Fax: 818 700 8466 Version: 3.0 Date 09/17/2020 MAN-ZX-T Logicube ZX-Tower™ User Manual...
-
Page 2: Limitation Of Liability And Warranty Information
LOGICUBE IS NOT LIABLE FOR ANY INCIDENTAL OR CONSEQUENTIAL DAMAGES, INCLUDING, BUT NOT LIMITED TO PROPERTY DAMAGE, LOSS OF TIME OR DATA FROM USE OF A LOGICUBE PRODUCT, OR ANY OTHER DAMAGES RESULTING FROM PRODUCT MALFUNCTION OR FAILURE OF (INCLUDING WITHOUT... - Page 3 MATERIALS BASIS. LIMITED WARRANTY FOR ONE YEAR FROM THE DATE OF SALE (THE “WARRANTY PERIOD”) LOGICUBE WARRANTS THAT THE PRODUCT (EXCLUDING CABLES, ADAPTERS, AND OTHER “CONSUMABLE” ITEMS) IS FREE FROM MANUFACTURING DEFECTS IN MATERIAL AND WORKMANSHIP. THIS LIMITED WARRANTY COVERS...
-
Page 4: Rohs Certificate Of Compliance
LEGAL RIGHTS, AND YOU MAY HAVE OTHER RIGHTS WHICH VARY FROM JURISDICTION TO JURISDICTION. RoHS Certificate of Compliance LOGICUBE PRODUCTS COMPLY WITH THE EUROPEAN UNION RESTRICTION OF THE USE OF CERTAIN HAZARDOUS SUBSTANCES IN ELECTRONIC EQUIPMENT, ROHS DIRECTIVE (2002/95/EC). THE ROHS DIRECTIVE PROHIBITS THE SALE OF CERTAIN ELECTRONIC EQUIPMENT CONTAINING SOME HAZARDOUS SUBSTANCES SUCH AS MERCURY, LEAD, CADMIUM, HEXAVALENT CHROMIUM AND CERTAIN FLAME-RETARDANTS IN THE EUROPEAN UNION. -
Page 5: Table Of Contents
Table of Contents ZX-TOWER™ (ZX-T) USER’S MANUAL ................I LIMITATION OF LIABILITY AND WARRANTY INFORMATION ............. I ............................ I OGICUBE ISCLAIMER ..............................I ARRANTY HS C ....................... III ERTIFICATE OF OMPLIANCE ................... III OGICUBE ECHNICAL UPPORT ONTACT NFORMATION TABLE OF CONTENTS ......................I 1: INTRODUCTION ........................ - Page 6 5.6.3.2 Time Zone ......................... 41 5.6.4 Display ............................. 42 5.7 N ..........................43 ETWORK ETTINGS 5.7.1 Interfaces ..........................44 5.7.1.1 Configuring a Static IP address ..................44 5.7.1.2 Enabling/Disabling Network Services................45 5.7.2 HTTP Proxy ..........................46 Logicube ZX-Tower™ User’s Manual...
- Page 7 8.11 F ........................59 LASH EMORY ARDS 9: FREQUENTLY ASKED QUESTIONS ..................60 9.0 FAQ ..............................60 10: INDEX .......................... 61 ....................... 62 ECHNICAL UPPORT NFORMATION ..........................62 OFTWARE TTRIBUTION (ESD) WARNING ....................62 LECTROSTATIC ISCHARGE Logicube ZX-Tower™ User’s Manual...
-
Page 8: 1: Introduction
Avoid using soap or other cleaning agents particularly those containing bleach, ammonia, alcohol or other harsh chemicals. • Do not attempt to service or open the Logicube ZX-T. Doing so may void the warranty. If the unit requires service, please contact Logicube Technical Support for assistance. -
Page 9: In The Box
The remaining bays will continue to operate. 1.2 In the Box The complete ZX-T system includes the following: The Logicube ZX-Tower unit • Power cord • CD-ROM with user’s manual • 1.3 Options The following options are available with the ZX-Tower: Logicube ZX-Tower™ User’s Manual... -
Page 10: Specifications
18” cable • M.2 SATA type to SATA adapter • M.2 PCIe NVMe to USB adapter • Flash card reader for compact flash media (connects to USB 3.0 ports) • Extended warranties • 1.4 Specifications Logicube ZX-Tower™ User’s Manual... -
Page 11: 2: Getting Started
Units shipped before 07/24/2019, the power supply has a manual voltage switch (115V/230V) located in the back of the ZX-Tower. Set the correct voltage input before attaching the power cable to avoid damage. Units shipped from 07/24/2019 on have an auto-switching power supply. -
Page 12: Turning The Zx-Ton And Off
To turn the ZX-T off, press and release the power button located on the bottom (front) of the ZX-T. It is not recommended to use the power switch (located in the back) to turn the ZX-T off. Using the power button located on the top (front) gracefully shuts down the ZX-T’s Operating System. Logicube ZX-Tower™ User’s Manual... -
Page 13: Connecting 3.5" Serial Ata (Sata) And Serial Attached Scsi (Sas) Drives
OFF – The ZX-T is not detecting a connection and is not supplying power to that bay. ON (Solid) – The ZX-T is detecting a connection (drive or adapter) and is supplying power to that bay. Yellow/Amber LED • OFF – There is no activity to the drive/bay. Logicube ZX-Tower™ User’s Manual... -
Page 14: Connecting Other Drive Types
The user interface (UI) has been designed to quickly and easily input commands. It is simple and intuitive showing common icons such as tasks, modes of operation, and scroll icons on the screen. The UI is designed to be easily followed, going from left to right across the screen. Logicube ZX-Tower™ User’s Manual... -
Page 15: Touchscreen
HDMI and the ZX-T will automatically show the display on both the ZX-T and the external display. To change the display resolution on the external display: 1. Connect a wired USB keyboard to one of the back USB 2.0 host ports. Logicube ZX-Tower™ User’s Manual... -
Page 16: Usb Flash Drive (Located In The Back Of The Zx-T)
The removable USB flash drive stores the application code. This drive does not store any user data from drives (Hard Disk Drives, Solid State Drives, USB enclosures, etc.) connected to and used with the ZX- Tower. The flash drive is non-user writeable and is only accessible to the Operating System software. Logicube ZX-Tower™ User’s Manual... -
Page 17: 3: Quick Start
4. Tap or click the down arrow located to the right of the screen to scroll down to the second page of information. 5. Locate the line that shows “Wiped”. This will either show True (drive is blank) or False. Logicube ZX-Tower™ User Manual... -
Page 18: Wipe
(Secure Erase then Wipe Patterns) depending on which methods are chosen. For example, if both Secure Erase and Wipe Patterns are selected, the unit will perform a Secure Erase first then a Wipe Patterns wipe. Logicube ZX-Tower™ User’s Manual... -
Page 19: Step-By-Step Instructions - Wipe
Wipe Patterns). If Wipe Patterns is selected, choose the type of Wipe Pattern to perform (DoD or Custom). 4. If If the drive has an HPA, DCO, or ACS3 area that needs to be wiped, tap the HPA/DCO/ACS3 icon and select Yes to wipe the HPA/DCO/ACS3 area of the drive. Logicube ZX-Tower™ User’s Manual... -
Page 20: Task Macro
For example, to set up a Task Macro that will perform 14-pass wipe, users must first set up the Wipe task. Once the Wipe task has been set up, the Task Macro can be set. Logicube ZX-Tower™ User’s Manual... -
Page 21: Step-By-Step Instructions - Task Macro
Continue adding operations desired. Each operation added will appear on the list. To delete an operation, tap the X to the right of the operation. By default, only WIPE 1 will appear. The other tasks will appear when additional tasks are added to the WIPE menu. Logicube ZX-Tower™ User’s Manual... - Page 22 Wipe task, select Wipe 1 then tap OK. 5. Tap the field next to Operation 2 to set the second operation. Since the second task to be run is the same wipe task, select Wipe 1 again, then tap OK. Logicube ZX-Tower™ User’s Manual...
-
Page 23: Logs
In addition to viewing, the logs can be exported to an external USB location such as a USB flash drive. Logs are exported in PDF, HTML and XML format. Details for the Logs screen can be found Section 5.4: Logs. 3.4.1 Step-by-step instructions – Viewing or exporting logs Logicube ZX-Tower™ User’s Manual... -
Page 24: Viewing And Downloading Log Files From The Web Interface
3. Connect a formatted USB drive (USB flash drive or USB external drive) to any of the available USB 2.0 ports located on the back of the ZX-Tower. The USB drive connected to the front USB port must be formatted in Windows using the NTFS, FAT32, or FAT file system. -
Page 25: Deleting Log Files
Statistics screen. 2. A Windows security screen will appear prompting to enter a User name and Password to connect to the unit. Login with the following credentials: User name: it • Password: it • Logicube ZX-Tower™ User’s Manual... - Page 26 (html and pdf) that contain either the HTML or PDF versions of the log files. The XML files can be used with any XML viewer which allows for some customization on how the information can be viewed. Logicube ZX-Tower™ User’s Manual...
-
Page 27: Statistics
Additionally, a QR code can be found on this page. When the QR code is scanned on a device connected to the same network the ZX-Tower is connected to, it will open a web browser to the ZX-Tower’s IP address to access the web interface. -
Page 28: Software Updates
• a static IP address and allows certain network services to be enabled or disabled. HTTP Proxy – For the ZX-Tower to be able to update software from a network (over the internet), • proxy settings may need to be set. Networks that have a proxy server for internet access will require proxy settings for devices like the ZX-Tower to connect to the Internet. -
Page 29: 4: Wipe
(up to 7 passes) along with the type of data written for each pass. Additionally, a 7-pass DoD wipe can be set with pre-selected pass values. The ZX-Tower can verify each pass value through a setting. Any HPA, DCO, or ACS3 can be unlocked and wiped in these settings. -
Page 30: Target
Choose ON to Secure Erase the selected Target drive(s). Most drives support this function. Secure Erase will send a command to the drive instructing it to reset itself to the specifications the drive manufacturer has set. Logicube ZX-Tower™ User’s Manual... -
Page 31: Wipe Patterns
4.2.2.2 HPA/DCO/ACS3 The HPA/DCO/ACS3 button will open the HPA/DCO/ACS3 option for wiping. If the drive to be wiped has HPA, DCO, and/or ACS3 that need to be wiped, select Yes for the corresponding option. Logicube ZX-Tower™ User’s Manual... -
Page 32: Lba
VERIFY – Allows partial or full verification for the wipe process. Both Partial and • Full verify methods conforms to NIST SP 800-88 Rev. 1 verification guidelines. When Verify is set to YES, the total time to wipe the drive could double if FULL is selected. Logicube ZX-Tower™ User’s Manual... -
Page 33: Job Info
Some characters are not valid for a File Name, restricted by the file system: ! @ # $ % ^ & * ( ) { } [ ] | < > ? / : " \ ; , . = Logicube ZX-Tower™ User’s Manual... -
Page 34: Starting The Wipe Operation
When finished, the status will show “COMPLETED”. At this point, it is recommended to tap Reset Task to reset the task, so the drive bays properly reset and not show as being used or assigned for other tasks. Logicube ZX-Tower™ User’s Manual... -
Page 35: 5: Types Of Operations
– Set up to nine (9) different tasks to perform sequentially (one after another). LOGS – Display logs of each task that has been performed on the unit. STATISTICS – This will display tabs that include: Logicube ZX-Tower™ User Manual... - Page 36 • on this page. When the QR code is scanned on a device connected to the same network the ZX-Tower is connected to, it will open a web browser to the ZX-Tower’s IP address to access the web interface. Advanced Drive Statistics – Shows raw S.M.A.R.T. data (if supported) on any drive •...
-
Page 37: Drives
Wipe Patterns wipe with 14 passes, users must first set up two wipe tasks, each with the maximum 7 passes. Once both Wipe 1 and Wipe 2 tasks have been set up, the Task Macro can be created. 5.3.1 Tasks Logicube ZX-Tower™ User’s Manual... - Page 38 Wipe task, select Wipe 1 then tap OK. 6. Tap the field next to Operation 2 to set the second operation. Since the second task to be run is the Drive to Drive Imaging task, select Wipe 2 then tap OK. Logicube ZX-Tower™ User’s Manual...
-
Page 39: Logs
Section 3.4.3 for instructions on how to delete the log files. Section 3.4.4 for instructions on how to access the logs over a network. Logicube ZX-Tower™ User’s Manual... -
Page 40: Statistics
IP address. There is a QR code that can be scanned on a phone or tablet. If the phone or tablet is connected to the same network the ZX-Tower is connected to, it will open a web browser and connect to the IP address of the ZX-Tower. -
Page 41: Network Interface Stats
5.5.4 Debug Logs There may be times when Logicube Technical Support will ask for debug logs. This tab allows the user to export the debug logs to a USB flash drive (connected to one of the available USB 2.0 ports in the back of the unit). -
Page 42: System Settings
• With software version 3.0 and newer, Settings and selections are now persistent through a reboot/power off sequence. When the ZX-Tower is turned on, it will load all the previous settings and selections. The asterisk (*) next to the profile name is the currently loaded profile. -
Page 43: Passwords
To delete a profile, highlight the profile to be deleted then tap the delete icon. A confirmation screen will appear. Tap the Yes icon to delete the selected profile. When loading a profile, the ZX-Tower will take several seconds to completely load the different settings. -
Page 44: Setting Key Passwords
If this key is set, a prompt will appear, and the correct key must be entered before any log files can be deleted. Key: Local HTTP – A key can be set to lock the local touch screen on the ZX-Tower. If this •... -
Page 45: Config Lock Notes
The keys for Log File Deletion, Local HTTP, Remote HTTP, and Config Lock can be saved into a user profile and loaded each time the ZX-Tower is turned on. See Section 5.6.1 more information on saving and loading a user profile. -
Page 46: Forgotten Password Or Config Lock Key
7. Turn the unit off using the power button, then close the Telnet/SSH application. 8. Turn the unit on. When the unit boots up, it will load the default profile (INITIAL.DB). 5.6.2.2 User Account Passwords The ZX-Tower comes with three built-in user accounts: logicube • • iscsi •... -
Page 47: Language/Time Zone
TYPES OF OPERATIONS All user account passwords can be changed on this screen. To change the password for any of the accounts, tap the LOGICUBE, IT, or ISCSI button. A screen will appear: 1. Enter the current password. The default password for each account is:... -
Page 48: Language
Japanese (日本語) • The Custom button is reserved for future language releases. To change the language displayed. As soon as the selection is made, the ZX-Tower’s screen (or the computer’s Internet browser) will automatically refresh and display the selected language. -
Page 49: Display
If needed, a wired mouse can be used to click the Calibrate icon. Simply connect the mouse to any of the available USB ports in the front or back. It is recommended to disconnect the mouse when the calibration screen appears (before starting the calibration process). Logicube ZX-Tower™ User’s Manual... -
Page 50: Network Settings
A total of four targets should appear one at a time. 4. When the calibration finishes, the screen should go back to the ZX-Tower GUI. 5.7 Network Settings The Network settings screen has the following tabs: Interfaces, HTTP Proxy, and Network Configurations. -
Page 51: Interfaces
Edit Configuration button. 5.7.1.1 Configuring a Static IP address The ZX-Tower is DHCP enabled by default. The ZX-Tower can be configured with a static 1. From the Interfaces tab, select the network interface to edit (ETH0 or ETH1) then tap Edit Configuration. -
Page 52: Enabling/Disabling Network Services
There are 7 services that can be disabled (enabled by default): SSH – Disabling this will block Secure Shell (SSH) traffic. • Telnet – Disabling this will block Telnet traffic. • HTTP – Disabling this will block web browser connections to the ZX-Tower. • Logicube ZX-Tower™ User’s Manual... -
Page 53: Http Proxy
If the network the ZX-Tower is connected to uses an HTTP proxy server to access the Internet, proxy settings may need to be set for the ZX-Tower to be able to update software from a network (over the internet). This typically includes a server (or IP address), a host port, username, and password. -
Page 54: Software Update
From the web through a network connection or from a USB drive. For the latest step-by-step instructions on how to update the software, please read the ZX Software readme file located on the ZX-T Support page on the Logicube website at https://www.logicube.com/knowledge/zx-tower. In-depth information on updating the ZX-T software can be... -
Page 55: 6: Updating/Loading/Re-Loading Software
1. Connect the ZX-Tower to a network with Internet access and turn the ZX-Tower on. 2. From the main menu on the ZX-Tower, locate and tap the Software Updates icon on the left side. 3. Select From Network. The ZX-Tower will check for software on Logicube’s server. After a few seconds, one of the following messages will appear: NEWER VERSION AVAILABLE –... -
Page 56: From Usb Drive (Through A Software File Download)
(that has the extracted software from step 2 to the U1 port (the leftmost USB port on the front). 4. From the main menu on the ZX-Tower, locate and tap the Software Updates icon on the left side. 5. Select From USB Drive. The ZX-Tower will check for the version of the software on the USB drive. -
Page 57: Firmware Update
7. Turn the ZX-Tower off. Wait at least 5 seconds then turn the ZX-Tower back on. Verify the software version by going to the Software Updates screen then go to Section 6.2 Firmware Update... - Page 58 FIRMWARE UPGRADE NOT AVAILABLE – This message will appear if the device does not require a firmware update. No further action is necessary if this message appears. Logicube ZX-Tower™ User’s Manual...
-
Page 59: 7: Remote Operation
(text) based and is for advanced users who have knowledge of command line functions. This type of connection requires a Telnet or SSH client. There are several Telnet and SSH clients available from different software companies. Microsoft Windows also has a built-in Telnet client that can be used. Logicube ZX-Tower™ User Manual... -
Page 60: Connecting Using Telnet
5. Login with the username “it” (without the quotes) and the password “it” (without the quotes). A command prompt should appear in the SSH window. The unit can now be configured or managed through the command line interface. Logicube ZX-Tower™ User’s Manual... -
Page 61: Zero Configuration Networking (Zeroconf)
(connected through a network cable) directly to a Windows based computer that is DHCP enabled, both the unit and the Windows based computer will automatically configure themselves to be seen by each other using TCP/IP with a 169.254.x.x IP address configuration. Logicube ZX-Tower™ User’s Manual... -
Page 62: 8: Optional Adapters
Logicube has many different adapters that allow you to use almost any drive with the ZX-T. This chapter lists some of the available optional adapters that can be used with the ZX-T. Please refer to our ZX-Tower Adapter Guide (available on our website) for a complete list and illustrations on how these adapters connect to ZX-T. -
Page 63: And Arallel Ata (Pata/Ide) Drives
1.8” PATA/IDE drives can be connected using the 1.8” adapter (P/N F-ADP-Z-1.8-IDE) shown above (left). This 1.8” adapter connects to the SATA/SAS Extension Adapter (P/N F-ADP-SATA-X-ZC, right). The SATA/SAS Extension Adapter (P/N F-ADP-SATA-X-ZC) is required when using this adapter. 8.5 eSATA Drives Logicube ZX-Tower™ User’s Manual... -
Page 64: Zif Drives
1.8” micro SATA drives can be connected using the adapter (P/N F-CABLE-MCRSATA) shown above (left). This micro SATA adapter connects to the 2.5” SAS adapter (P/N F-ADP-Z-2.5-SAS, right). The 2.5” SAS adapter (P/N F- ADP-Z-2.5-SAS) is required when using this adapter. Logicube ZX-Tower™ User’s Manual... -
Page 65: Msata (Mini Sata) Drives
M.2 PCIe NVMe-Type SSDs can be connected using the adapter (P/N F-ADP-NVME-USB) and connects to the front USB 3.0 ports. The F-ADP-NVME-USB adapter only supports M.2 PCIe NVMe type SSDs and does not support AHCI type drives. Logicube ZX-Tower™ User’s Manual... -
Page 66: Flash Memory Cards
DEFAULT PASSWORDS 8.11 Flash Memory Cards Flash memory cards can be connected using a Logicube validated adapter. This multi-card reader connects to the front USB 3.0 ports. Third party multi-card readers are not tested and may not work with the ZX-T. -
Page 67: 9: Frequently Asked Questions
A. Each of the ZX-T’s USB ports meets the standard specification of up to 5V of power. If your USB device has higher power requirements an external power source will be necessary. Check with the manufacturer of your USB device to determine the exact power requirements. Logicube ZX-Tower™ User Manual... -
Page 68: 10: Index
System Settings, 35 FAQs, 60 Task Macro, 30 Features, 1 Task Macros, 13 Firmware Updates, 50 Technical Support, Logicube, III, 62 Flash memory cards, 59 Time Zone, 40 Image, 30 Touchscreen, 8, 42 Imaging, 10, 22 Types of Operation, 28... -
Page 69: Technical Support Information
The ZX-Tower (ZX-T) has been designed to minimize the effects of ESD and if an ESD event occurs the unit may experience a temporary loss of functionality. If this occurs, please power down the ZX-T and power it back up, this should clear any temporary loss of functionality.
Need help?
Do you have a question about the ZX-Tower and is the answer not in the manual?
Questions and answers