Table of Contents
Advertisement
Quick Links
A
E
B
F
C
G
D
H
Step 1:
Start with side A (A) and insert
one of the clips (I) into the slots with
the square marking as shown.
Step 4:
Attach side B (B) to the rest
of the box, by connecting the slots
marked "B" as shown.
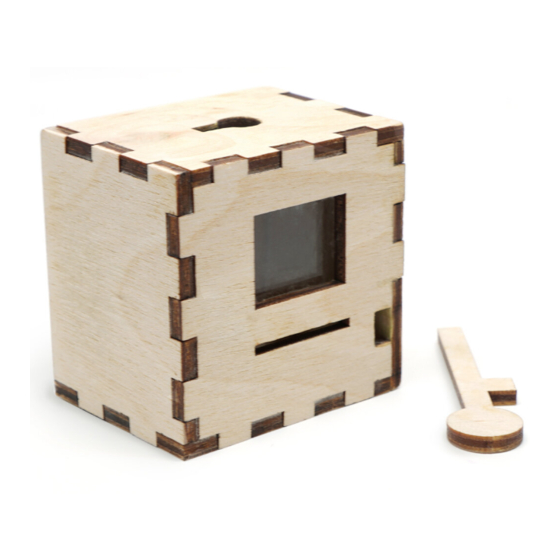
MAGIC PENNY BOX - INSTRUCTIONS
I
A - Side A
B - Side B
C - Side C
J
D - Side D
E - Box Face
F - Magnet Wall
G - Keyhole Wall
H - Magnet Piece
I - Clips (2)
J - Keys (2)
Step 2:
Connect side A (A) with the
box face (E) so the A markings are
aligned as shown.
Step 5:
Insert the magnet piece (H)
into side C (C) with the magnet facing
upwards.
Prep:
•
Lay out your pieces so you can easily identi-
fy them.
•
Use markers or paint to decorate the vari-
ous parts to personalize your box.
•
We recommend coloring the pieces before
assembling the locomotive.
Additional Information
1. You can use wood glue to secure the parts if
necessary. Dispense small amounts of glue.
Masking tape will help secure the pieces
while the glue dries.
2. Your penny box has been laser cut on ply-
wood which is not always uniform in width.
Consequently some pieces may fit more
tightly than others.
3. Use sandpaper to sand down parts if the fit
is tight.
Step 3:
Insert the other clip (I) into
side B (B) where the square marking is
located as shown.
Step 6:
Attach side (C) to the rest of
the box.
Advertisement
Table of Contents

Related Manuals for ScienceSeeds MAGIC PENNY BOX

Summary of Contents for ScienceSeeds MAGIC PENNY BOX
- Page 1 MAGIC PENNY BOX - INSTRUCTIONS Prep: • Lay out your pieces so you can easily identi- fy them. A - Side A • Use markers or paint to decorate the vari- B - Side B ous parts to personalize your box.
- Page 2 (H). Step 9b: Here is another view of the Step 10: Your magic penny box is Present your new puzzle with the provided key (J). magnet connection. complete! Slide a penny into the slot on the...
Need help?
Do you have a question about the MAGIC PENNY BOX and is the answer not in the manual?
Questions and answers