
Summary of Contents for Aviosys IP Power 9858 MT
- Page 1 IP Power 9858 MT User Manual Version: V1.00 ( Firmware Version: 1.1.5 ) Date Released: DEC. 2019 Warning: Any changes made to this equipment without permission may cause damages to the device! - 1 -...
- Page 2 IMPORTANT NOTICE 1. IP Power 9858MT was designed for indoor use, we carry no responsibility for possible damages caused by outdoor use, especially in the rain. 2. Please use the power adapter provided by the dealer, we carry no responsibility for the possible damage from using power adapters not provided by us .
-
Page 3: Table Of Contents
Table of Content 1. INTRODUCTION ....................5 2. PRODUCT INFORMATION ................6 2.1 Features : ..............................6 2.2 Specification ............................7 2.3 Minimum System Requirements ......................7 2.4 Package Contents............................ 8 2.5 Interface ..............................8 3. SETTING UP YOUR DEVICE ................. 10 3.1 Before Starting ............................10 3.2 Hardware Connection ...........................10 3.3 Software Installation ..........................10... - Page 4 4.5.4 Firmware ............................52 5.OTHER WAYS TO CONTROL ................ 53 5.1 CGI HTTP Commands ........................53 5.2 Telnet Control ............................55 6.FAQ : ....................... 56 - 4 -...
-
Page 5: Introduction
1. Introduction IP Power 9858MT is a new generation of the Power Distribution Unit (PDU) & Remote Power Control (RPC) system. Its able to control in the network With embedded web server and HTTPS protection , 9858MT supports higher grade security as working on Internet. -
Page 6: Product Information
19. Specific software developed by Aviosys and provided free of charge : - SDK Available : HTTP Command ( Compatible with 9858DX) - IP Power Center - control multiple Aviosys IP devices in same AP. - CNT software ( Cross Network Technology )- allows user eliminate set up work on any Router without port forwarding , simply Plug &... -
Page 7: Specification
2.2 Specification ⚫ Power input : 100 - 240VAC , 50-60Hz , ⚫ Maximum loading of each output: 10A ⚫ Maximum of Total loading : 10A / 240VAC , 15A / 100VAC ⚫ Fuse protection : 10A / 250VAC ( with spare fuse in socket ) ⚫... -
Page 8: Package Contents
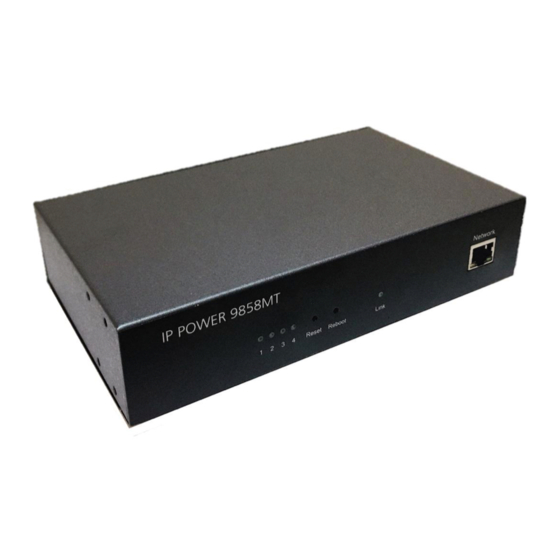
2.4 Package Contents 9858MT Unit x 1 Guide for online CD direction : include software QI and manual 2.5 Interface Front View From Left to right : LED of Outlet Status The outlet status #1 ~ #4 Indicator - Green light ON as outlet ON. Light OFF as outlet OFF Reset To set back the setting to factory default , please keep pressing the reset button with a sharpen pin and release... - Page 9 Rear View ⚫ 9858MT-S : ⚫ 9858MT-T : Interface from Left to right : Connect up to 4 individual outlets to be controlled by the 9858MT. Ports 4 outlets sequence as 4 / 3 / 2 / 1 . ⚫ 9858MT-S : IEC320 socket , 10A / 240VAC ⚫...
-
Page 10: Setting Up Your Device
6. ) Go to page #14 for software installation guide – use IP EDIT to log in the webpage of 9858MT. 3.3 Software Installation www.aviosys.com/cd Please Go to . The note with this online CD link comes with the package . -
Page 11: Lan Connect By Ip Search Software " Ipedit
1.) Select the IP Power 9858MT 2.) All the available downloads for the 9858MT will be shown 3.) Download the required software – IPEdit.exe - by clicking on the download button. Then you can select to connect 9858MT. “ IPEDIT “ 3.3.1 LAN connect by IP Search software IP Edit is a search tool designed to search, configure, or access the IP Power 9858MT from a local networked computer. - Page 12 Notice : If can’t see the IP in the area of Local Devices of IPEDIT.exe. Please check the following situation 1. Boot up successfully : Please reboot the 9858MT and check if there are 1 short beep after 1 minutes . This beep means the device boot up successfully . If not , the device may have issue.
- Page 13 Check to see that the gateway IP and the IP Address (9858MT) match user current network. If not, type in the correct information, then hit the submit button to save changes. For example: If user have the following information regarding the 9858MT and user network User PC Network : Computer IP Address: 192.168.1.122 Gateway: 192.168.1.1...
-
Page 14: Internet Setup
Setup Port Mapping / Port Forwarding in your router. Please check your Router owner’s manual . ⚫ Use our own software “ IP Power Center “ : Please refer to the “IP Power Center “ manual in software section of www.aviosys.com/cd - 14 -... -
Page 15: Using Ip Service
3.3.3 Using IP Service IP Service is a function which allows user to search for the device easily without having to remember long complicated IP address. Instead, if user know the device’s name of user IP Power device and user can easily find IP Address with IP Service. To log in the webpage of 9858MT on Internet , user still need to do the “Port Forwarding “... - Page 16 5.) After user have connected to user device, type in the Login and Password for user device - 16 -...
-
Page 17: Web Interface
4. Web Interface Once the 9858MT has been setup correctly, log into the device. The default Username and Password for the 9858MT Username : admin Password: 12345678 The Control Console The Right side Menu of the Web Interface control the functionality and setup of the IP Power 9858MT. -
Page 18: Top Column
4.1 Top Column 4.1.1 Device name This section show the device name . You can change the device name here : Application → IP Service → Device name Change name “ IP POWER 9858MT “ as “Enjoy 9858MT “ Notice : Please do not use symbol like !@#$%^&*()_+ as the character of the device name . - Page 19 4.1.2 Column Display : For Smartphone user to control 9858MT easily , user can select to show or to hide the left control section by pressing the blue area near device name for Smartphone control : With left control section : Without left control section : - 19 -...
-
Page 20: Time
4.1.3 Time : In this section, it shows Time at Year – Month – Date Hours : Minutes : Seconds . To setup the Time , Please go to “ System → Management → NTP Settings “ , please press “Apply”... -
Page 21: Power Control
4.2 Power Control : The IO Control Section allows you to directly / automatically control the outlets of the 9858MT as well as schedule Daily, Weekly, and Monthly power cycles. There are 3 sections : Control , Schedule & Ping . 4.2.1 Control There are 2 setting pages in this Section. - Page 22 For example : The following pictures means that Power #1 & #4 is ON , Power #2 & #3 is OFF Power Cycle : Manually Control the relay delay some times to turn ON or OFF . The relay cycle time can be set from 1 to 9999 seconds As ON, Select OFF and press “Power cycle ”...
- Page 23 Original Outlet as “ ON “ , select final status as “ OFF “ & fill 3 sec . After press “ power cycle “ button, the outlet will be ON for 3 seconds and then turn OFF . ON ( 3 sec ) →OFF Original Outlet as “...
- Page 24 ⚫ Inverter : Change the outlet status from ON to OFF ,or form OFF to ON by one button contorl. B. Advance Setup : In this page, user can setup Name of each port , Notification , Power cycle , Shutdown On LAN Settings , Wake On Lan Settings Name of each port User can name each power by click the name above the power button .
- Page 25 After click confirm , the page will go to “ power control “ page to shpwthe update name. B.2 Notification setting User can do several notification here . ⚫ Forbidden off manually : Select by port will disable the power control in webpage . The disable is for the control in webpage only .The control through HTTP command is still working .
- Page 26 ⚫ Forbidden power cycle : Select by port will disable the power cycle control in webpage . The disable is for the control in webpage only .The control through HTTP command is still working . For Example : Select the power cycle control in webpage of power 1 & power 2 for be disable ⚫...
- Page 27 Beep Alarm Setting: User can setup the operation beep ( short time beep) sound here. ⚫ Default Power Status : The control section allow user to set the power status on ON or OFF or LAST when the device get power rebooted . As select “Last “ , the output will be at the same status ON / OFF before the device power turn off .
- Page 28 NOTE : The delay time setup in this section is for “ Shutdown ON LAN “ procedure . Not for outlet ON/OFF function ⚫ Wake on Lan settings : This is a application for PC / Server / Main board which had been enable the “ WAKE ON LAN “...
-
Page 29: Schedule
4.2.2 Schedule In this section , user can see the setting schedule list first up to 29 rules . To setup each schedule , please press “ Schedule Setting “ , then user can get the “ Schedule List “ page as following : Please click the button to switch between “... - Page 30 The schedule allows you to control the power outlet or turn ON / OFF/ RESET at assigned time Adding a Scheduled Event 1. Select the Action Duration : There are 3 setting - Once , Every Day . Every Week 2.
-
Page 31: Ping
Apply / Edit a Schedule Event : Please select the Rule you want to edit in Scheduler Table. , Change the setting like Duration , Date , Time and Action. Then Press “Apply Np. X Sch “ button to confirm the setting and you will see the page refresh and new setting display in Scheduler list Delete - Click “... - Page 32 Ping Setting Page : There are 3 sections of the setting area : 1. Setting Rule Numbers : User can click to select different rules numbers at the right side button “ Rule No: X “ as following pictures . There are 29 rules available. 2.
- Page 33 As setting finished , please click “ Apply “ to save the setting in this area , the webpage will refresh and user can see the final setting result. Ten different set up rules for different port . 3. Other Setting : The setting here is for each rule .
- Page 34 ⚫ IP & Host Name : Input the IP Address ( ex: 122.116.123.138) or Host - web address ( ex: www.google.com) user would like to Ping. User can use the “ ping test “ bottom to check the address valid or not ⚫...
-
Page 35: Network
4.3 Network : There are 3 sections in this port : LAN Network , DNS setting and Port setting LAN Network Settings : The network status is connected by ether cable with RJ45 connector . There are 3 network connection way : Static IP / DHCP / UPNP A. - Page 36 User can only revise the Host Name under DHCP mode. This is also the default setting for fast LAN connection solution. As the IP from DHCP Service of user`s router will be changed by router . 9858MT will remember last IP of 9858MT assigned by user`s router in “Last DHCP state “ for information Please do fill up the correct gateway / port for login from Internet .
-
Page 37: Application Settings
4.4 Application Settings : 4.4.1 Email There are 2 sections in this part -- E-mail setting and POP3 Control : ⚫ Email Setting : User can get e-mail advice as one of the following situation happen : Receive E-mail with IP information & MAC Address as 9858MT device boot up. Receive E-mail as ON/OFF status change in each output . - Page 38 ⚫ SMTP Server: This is the mail server of sender . If user select @gmail or @hotmail account as SMTP Server , 9858MT will fill the SSL & Port automatically ⚫ Port : This is the port of SMTP Server. Most common port to send out e-mail is port 25 ⚫...
- Page 39 POP3 Server: This is receiver’s mail server ⚫ From : Sender’s email address . Ex.: aviosys@gmail.com ⚫ Port : This is the port of POP3 Server. If user select @gmail or @hotmail account as SMTP Server , 9858MT will fill the SSL & Port automatically.
- Page 40 ⚫ CTRL format : Control format by subject or by body ( e-mail contents) For example : Use Gmail as sender and receiver Sender`s e-mail : 123@gmail.com Username to log in sender`s @gmail : 123@gmail.com abc@def.com Password to log in sender`s @gmail : 12345678 Command format &...
- Page 41 There are 2 section of the command IPPOWERCTRL:TAG=Test This is command part. Beside the tag message part ( like Test on above example) user can change in setting section , the other command must be CAPITAL and are fixed content . 2.
-
Page 42: Ddns
4.4.2 DDNS The DDNS section allows user to setup the 9858MT with a DDNS server (i.e. www.dyndns.com). After the server has been setup correctly, enter the necessary information into the 9858MT DDNS settings. Note : The DNS server will have extra change as apply new account. Account : the Username / account name of DDNS account Password : the Password of DDNS account Domain name : The DDNS name user apply . - Page 43 A.SNMP This section is for development of system integrator who is familiar with SNMP knowledge. In community Authority , user can select “ Read only” or “Read / Write” In “ Trap “ type ,user can select “ v1 trap “ , “ v2c trap “ or “ v2c inform” In MIB file section , user can get MIB information.
- Page 44 Notice: The command “ –C “ & “ -T “ are for models 9858MT only . C.Modbus TCP A. Modbus : We supply 3 models of ModBus control C-1 ModBUS TCP : Just Enable or disable this function - 44 -...
- Page 45 C-2 Modbus Gate way model : Need to Enable Modbus , Enable RTU & fill Modbus ID . C-3 Modbus RTU : Need to Enable Modbus , Enable RTU & fill Modbus ID . D.BACnet TCP In this section is for development of system integrator who is familiar with Telnet to enable / disable the function and to setup it`s port .
-
Page 46: Ip Service
4.4.4. IP SERVICE In this section , user can setup IP Server & CNT ( Cross Network Technology ) , CNT ( MQTT ) A. IP Service & CNT Setting : The IP SERVICE allow 9858MT to be accessed easily on the internet by our IP Power Center or IP EDIT. -
Page 47: System Setting
B. CNT ( MQTT) – For developing only. 9858MT supports MQTT fucniton. Please contact with your distributor for the details if you would like to develop own system. 4.5 System Setting : - 47 -... -
Page 48: Management
4.5.1 Management In this section there are 5 settings: Administrator setting, Langrage Settings , NTP settings , Import Configuration files and System Reset . Administrator setting In this section allows user to change password for 3 different authorization level . The account name and password can be changed , but each Authorities only support one Account name &... - Page 49 Viewer guest guest Note Please amend the password as number or English character from 1 to 8 characters. Do not use special symbol like “ ” ; : ~ ! @ # $ % ^ & * ( ) Please click “Apply “ button after change the account name / password Langrage Settings There are 3 language option of 9858MT .The default langrage is English.
- Page 50 As press “ Import “, there is caution message show as following : Before click “ Ok “ to import , please do read following notice : ⚫ Do NOT import DAT file which is not export form 9858MT. The warranty will be invalided if any wrongdoing from “...
-
Page 51: System Information
4.5.2 System Information User can get the system information here . 4.5.3 System Log In this section , user can get the 9858MT system operation information and send the information to assign Server IP address ( not support name ) . The system information will be deleted after 9858MT device power reboot. -
Page 52: Firmware
4.5.4 Firmware Please only use the file supply from Aviosys distributor or Aviosys . There are two sections : Bootloader & Firmware The firmware update function only support in LAN connection . Before update , please DO READ THE HI-LITE MESSAGE BLOW : It takes about 1 minute to upload upgrade flash and be patient please. -
Page 53: Other Ways To Control
5.Other ways to control Besides webpahe control ,there are several ways to control the outlets : by HTTPS/CGI command or by Telnet . 9858MT also support SNMP ( MIB) , Mudbus /TCP and BACnet /TCP . Please check page #41 to check and enable the function . 5.1 CGI HTTP Commands CGI Commands allow you to easily integrate the 9858MT with other systems and programs. - Page 54 2.4 To set the power on / off :setpower&p6x=0 or 1 p6x=0 means off,p6x=1means ON,x can be 1 to 4 ( power1 to power 4) Example : Turn on POWER1 and POWER2 and turn off POWER3: http://192.168.1.18/set.cmd?cmd=setpower&p61=1&p62=1&p63=0 System return: CGI Command : Data follows p61=1,p62=1,p63=0 2.5 Setup power to reboot as RESET:setpowercycle&...
-
Page 55: Telnet Control
5.2 Telnet Control Please enable the telnet function in “Application “ → “ Communication “ Or Check page #41 to check and enable the function . Notice: The command “ –C “ & “ -T “ are for models 9858MT only . - 55 -... -
Page 56: Faq
6.FAQ : Q1: Why can`t I see the 9858MT`s IP address in IPEDIT.exe ? Ans.: Please check the PC you use is under same LAN/ network / segment as 9858MT . Please turn off some Anti-Virus / online chatting software . If there are morn than 1 network card , include dynamic network card , please disable one and make sure the one you selected is Under the same segment with IP9858MT.
Need help?
Do you have a question about the IP Power 9858 MT and is the answer not in the manual?
Questions and answers