Advertisement
Table of Contents
NL35 INSTALLATION/OPERATION MANUAL
DO NOT PLUG LIGHT IN UNTIL INSTRUCTED IN MANUAL
READ ALL DIRECTIONS FIRST THEN REFER TO EXAMPLE IMAGES BEFORE PERFORMING THAT STEP
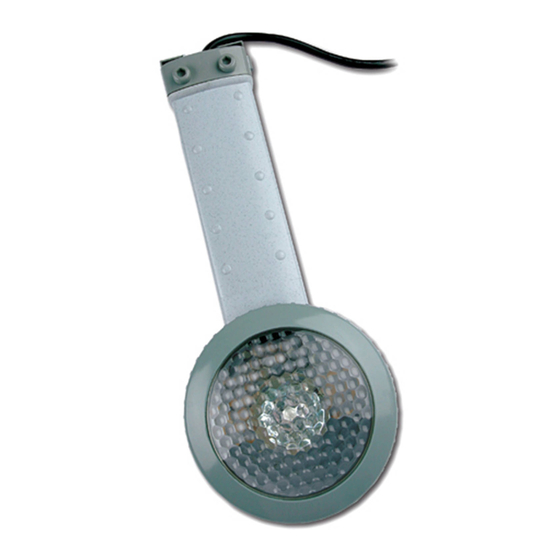
A. To install bulb, place the light on a table or similar flat, dry working surface.
Use the supplied multitool lock key to loosen the seal ring. Insert the key into the locking latch
on the bottom of the light as shown in FIG 1. Turn and hold the key to the left to release the
locking mechanism. At the same time rotate the seal ring in a counter clockwise direction to
loosen. Remove ring and lens. (See FIG 2)
®
Advertisement
Table of Contents

Related Manuals for Nitelighter NL35

Summary of Contents for Nitelighter NL35
- Page 1 ® NL35 INSTALLATION/OPERATION MANUAL DO NOT PLUG LIGHT IN UNTIL INSTRUCTED IN MANUAL READ ALL DIRECTIONS FIRST THEN REFER TO EXAMPLE IMAGES BEFORE PERFORMING THAT STEP A. To install bulb, place the light on a table or similar flat, dry working surface.
- Page 2 B. Remove the bulb from its box being careful not to touch the lens of the bulb. Install the bulb by pressing the two bronze legs of the bulb into the ceramic socket in the light housing as shown in FIG 3. C.
- Page 3 INSTALLATION A. Remove top cap of pool vertical post nearest your installation. B. Lift one end of your pool’s top ledge. The top ledge is comprised of flat sections that extend around the top of the pool wall. C. Slide the pool light onto the pool wall submerging the light in the water. Locate the light in the middle of the top rail to allow for easier installation.
- Page 4 WINTERIZATION IMPORTANT: FAILURE TO PROPERLY WINTERIZE YOUR LIGHT WILL RESULT IN TERMINATION OF WARRANTY. Begin by unplugging the power cord from its power source. Using the included seal lock key, use the hex key side as shown in Fig 6. Insert tool into bolt head and turn counter clockwise until it is completely loose.
Need help?
Do you have a question about the NL35 and is the answer not in the manual?
Questions and answers