
Summary of Contents for Greemman RECO130F
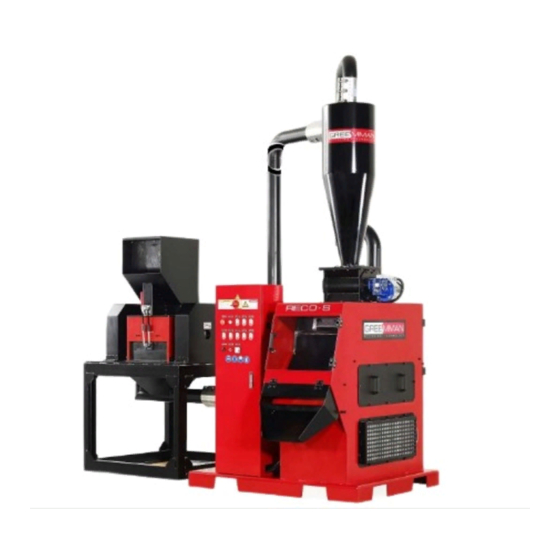
- Page 1 Scrap Cable Grunulator Scrap Cable Grunulator Scrap Cable Grunulator RECO130F RECO130F RECO130F & RECO200 & RECO200 & RECO200 MANUAL BOOK MANUAL BOOK MANUAL BOOK GREEMMAN INDUSTRY CO.,LTD. www.greemman.com contact@greemman.com...
- Page 2 I N D E X 1. General information 1-1. Certificate 1-2. Identification Plate 1-3. Guarantee 1-4. Introduction of manual 2. Safety 2-1. Safety rule 2-2. Outline concerning safety 2-3. Warning of Danger 2-4. Pictographs to warn danger 2-5. Danger of operating section 3.
-
Page 3: General Information
1. General information 1. General information 1. General information 1-1. Certification ISO14001 ISO9001 1-2. Identification Plate The picture shows the identification plate installed on the machine. The model, the serial number, the building year which are stamped on the plate have to be cited every time you ask for information concerning the mill or for the order of spare parts. - Page 4 IMPORTANT : All the operators and technicians who use the machine are responsible of its running. It is necessary to consult and read carefully the present manual before performing any operation concerning the starting of the machine. The aim of the present manual is to make the operators aware of the main prescriptions and criterions to guarantee their safety.
-
Page 5: Safety Rules
★ Operator/electrician Qualified technician able to conduct and make the machines running in normal conditions; he is able to intervene on all the electrical, maintenance and repair operations. He is able to intervene in presence of tension inside the electrical cabinets and connector blocks. - Page 6 8. The area for the maintenance and repair operations (ordinary and extraordinary) must be clean and dry. 9. Respect all the indications inside the present manual. 10. before starting any operation for the electrical connection, make sure that the tension and the frequency correspond to the data of the plate on the machine. 2-2.
- Page 7 2-3. Warning of Danger During operation or maintenance of the system, pay attention to the following three warning levels. Understand the contents and take proper actions. Warning messages are shown in warning labels on the system and in Precautions for Safety in this manual. ‘Danger’...
- Page 8 Safety Symbols Table 1. Label Definition Danger of High Voltage Electrical Shock Touching energized parts will burn finger injure the operator or may kill him. sure turn power before operation maintenance of the system. Dnager of Hand Drawing-in and Cutting Moving parts can drawing-in and cut.
- Page 9 ● Voltage and Current Hazards It is very dangerous to turn on the power without prior notice to workers maintaining the system. Never turn on the power unexpectedly. Careless supply of power will injure or kill workers due to operating automation or electric shock.
- Page 10 ● Operation Procedure Press the Emergency Off switch with composure when you find danger and/or automatically sensing the Non-contact, magnetic safety switches during the door open. The Emergency Off switch becomes concave. <Figure 1-1 Pressing Emergency Off Switch and Non-contact, magnetic safety switch> After pressing the Emergency Off switch, it is kept concave.
- Page 11 1. Insert a part of the breaker and hang 2. Lock the padlock the lock out tool on the locking hole. <Figure 3 Locking Padlock> <Figure 2 Turning off the main switch> ★ Follow-up Check 1. Make sure that the padlock is locked firmly 2.
-
Page 12: Specification
Application cable Copper core, Less than 2.5 ~ 3 mm diameter RECO130F Maximum 170kg / hr ( input materila –with standard cable Throughput as per GREEMMAN sample ) RECO200 Maximum 250kg / hr RECO130F 18HP / 13.5kw Total Power RECO200 28HP / 21.0kw... - Page 13 4. Construction 4. Construction 4. Construction 4-2. Deal drawing & parts list ● Granulator A’ssy<RECO130F> Parts No. Description G100A1500 Inlet Hopper G100A2000 Bed knife holder G100G1000 Bed knife G100A1014 Shaft door G100A1000 Granulator chamber G100G2000 1.5mm Screen G100G3000 2.5mm Screen...
- Page 14 ● Shaft A’ssy<RECO130F> Parts No. Description G100P1005 Powerlock G100A6000 Belt pulley G100P1012 Oil seal G100P1003 Oil cap G100P1004 Oil gage G100A7000 Left oil flange G100P1007 Lock nut G100P1006 Bearing G100P1010 Oil seal G100A8000 Left oil flange G100P1013 Oil seal G100A9000...
- Page 15 ● Bottom frame A’ssy<RECO130F> Parts No. Description G100A1900 Pulley cover G100P1015 V-Belt G100A1700 Outlet hopper G100P1002 Motor pulley 10H50Z4PSI 10HP Motor G100A1800 Motor base G100A1604 Bottom frame G100A2100 Wheel cover G100P1017 Multi joint - 13 -...
- Page 16 ● Granulator A’ssy<RECO200> Parts No. Description G200A1500 Inlet Hopper G200A2000 Bed knife holder G200G2000 Bed knife G100A1014 Shaft door G200A1000 Granulator chamber G200G5000 1.5mm Screen G200G3000 2.5mm Screen G200G4000 4mm Screen G200A4000 Screen stainer G100A1400 Bracket G100A5000 Toggle clamp G200A3000 Front cover - 14 -...
- Page 17 ● Shaft A’ssy<RECO200> Parts No. Description G100P1005 Powerlock G100A6000 Belt pulley G100P1012 Oil seal G100P1003 Oil cap G100P1004 Oil gage G100A7000 Left oil flange G100P1007 Lock nut G100P1006 Bearing G100P1010 Oil seal G100A8000 Bearing housing G100P1013 Oil seal G200A1100 Shaft G100G5000 Fly knife G100A9000...
- Page 18 ● Bottom frame A’ssy<RECO200> Parts No. Description G100A1900 Pulley cover G100P1015 V-Belt G100A1700 Outlet hopper G200P1000 Motor pulley 20H50Z4PSI 20HP Motor G200A1800 Motor base G200A1600 Bottom frame G100A2100 Wheel cover G100P1017 Multi joint - 16 -...
- Page 19 ● Separator A’ssy Parts No. Description RCSP1020 Control Box RECOA1008 Pete’s filter RECOA1005 Filter holder RECOA1010 Front door RCSP1005 Door hinge RECOA1005 Air lock hopper RCSA1007 Dust suction guide RCSA1001 Separator frame RCSP1007 Toggle clamp RECOA1009 Back door window RCSP1006 Door hinge RECOA1003 Back door...
- Page 20 ● Tubing A’ssy Parts No. Description RCSP1009 Tubing A 05H50ZAPSI 5HP Motor RCSP1021 Blower RECOA1300 Dust suction 01H50Z2PSI 1HP Motor RCSP1023 Dust bag RCSP1009 Tubing B G100P1017 Multi joint RCSA1300 Tubing C RCSA1900 Cyclone - 18 -...
- Page 21 ● Air lock A’ssy Parts No. Description RCSA1600 Air lock cover RCSA1504 Air lock wing RCSA1500 Air lock shaft A’ssy RCSA1700 Left bearing cover RCSP1017 Bearing RCSA1400 Air lock chamber RCSA1800 Right Bearing cover RCSP1000 Geared motor - 19 -...
- Page 22 ● Separator table A’ssy 1 Parts No. Description RCSA1205 Spring RECOA1100 Separator table RECOA1204 Separator table base OMB6P50 Vibrating motor RECOA1209 Oscillation mounting RCSA1008 Oscillation mounting base - 20 -...
- Page 23 ● Separator table A’ssy 2 Parts No. Description RCSP1003 Knob RECOA1206 Separator window RECOA1202-1 Copper guide RCSP1004 Knob RECOA1202 Separator table holder RECOA1207 Side rubber plate RCSA1104 Back rubber plate RECOA1202-2 Plastic guide - 21 -...
- Page 24 4-3. Circuit diagram - 22 -...
- Page 25 - 23 -...
- Page 26 - 24 -...
- Page 27 - 25 -...
- Page 28 - 26 -...
- Page 29 - 27 -...
- Page 30 - 28 -...
-
Page 31: Maintenance
5. Maintenance 5. Maintenance 5. Maintenance 5-1. Cleaning ● Separator table cleaning - Loosen No.3 knob and Separate No.4 window - Open No.1 and No.2 door - Loosen No.5 knob - Pull out No.6 separator table - Clean out separator table by air compressor. - This separator table must be cleaned everyday. - Page 32 ● Pete’s filter cleaning - Loosen No.1 bolt - Pull out No.2 Pete’s filter - Clean out No.2 Pete’s filter by air compressor - 30 -...
- Page 33 ● Dust bag cleaning - Loosen No.1 bolt - Clean out No.2 dust bag by air compressor - Pull out No.2 dust bag 5-2. Replacement ● Replacement of Screen - Loosen No.1 bolt - Open No.3 toggle clamp - Separate No.2 front cover - 31 -...
- Page 34 - Pull out No.4 Screen - Replace another size of screen and assemble reverse older ● Replacement of Fly knife -Open No.1 toggle clamp -Open No2. hopper -Loosen No.3 bolt -Separate No.4 fly knife -Replace new fly knife and assemble reverse older - 32 -...
- Page 35 ● Replacement of Bed knife - Loosen No.3 bolt - Open No.1 toggle clamp - Separate No.4 bed knife holder - Open No2. hopper - Replace new bed knife and assemble reverse older - Separate No.5 bed knife - 33 -...
- Page 36 If any, please lit us know. Thank you for your co-operation. Your And please kindly fill the information as above and email. or fax to us. Signature The Fax No is +82-31-949-7319(Korea.south) GREEMMAN IND Customer Care Team - 34 -...
- Page 37 GREEMMAN INDUSTRY Co.,Ltd GREEMMAN INDUSTRY Co.,Ltd 1237-37, Gyoha-ro, Paju-si, Gyeonggi-do, Korea. 413-180 1237-37, Gyoha-ro, Paju-si, Gyeonggi-do, Korea. 413-180 TEL. +82-31-949-7317, FAX : +82-31-949-7319 TEL. +82-31-949-7317, FAX : +82-31-949-7319 sales@greemman.com sales@greemman.com http://www.greemman.com http://www.greemman.com Manual ver. GM130916 Manual ver. GM130916...
Need help?
Do you have a question about the RECO130F and is the answer not in the manual?
Questions and answers