
Summary of Contents for iMARC Pet tag engraving system
-
Page 1: Table Of Contents
ABLE OF ONTENTS Getting started Holder Installation and Setup Engraving a Tag Engraving Clipart Administrative Functions International Characters Clipart Troubleshooting Look for tips and tricks on the inside back cover. -
Page 2: Getting Started
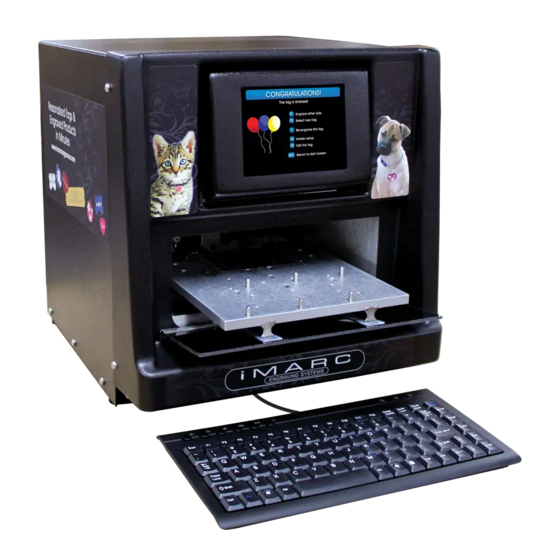
ETTING TARTED Before you plug in your new iMARC and engrave your first tag, familiarize yourself with some of the components of the machine. Master SD Card Upgrade 5 amp Reboot slot, start button iMARC Fuses and indicator LEDs A REAR VIEW... - Page 3 ETTING TARTED Setting up your iMARC is quick and easy. Plug in the keyboard into the keyboard port. Plug your power cord into the electric receptacle. Plug the cord into any standard (110 Volt) outlet, and switch on the machine.
- Page 4 & S OLDER NSTALL ETUP Once you’ve turned on your iMARC system, it is now time to install the holders. Your holders need to be installed on the engraving table during HOLDER SETUP. Tag Holder Engraving Table- Engraving Table- With holders installed No holders installed Select the holders that you want to install –...
- Page 5 & S OLDER NSTALL ETUP The holder setup is simple. You can follow the onscreen instructions as well as the steps on this page. This is the HOLDER SETUP screen. The current position to be installed will be flashing. Insert your first holder into position 1 on the engraving table. Note: For easiest installation and removal, position the holes in the holder directly over the pins in the engraving table, and move the holders directly up and down over the pins.
-
Page 6: Engravinga Tag
NGRAVING Engraving your tag is quick and easy. Each option is clearly stated as you follow the steps to your completed tag. Press any key to continue . From the INTRODUCTION SCREEN, press any key to get started. Note: After a period without keystrokes, the machine will reset to this screen. - Page 7 NGRAVING In the TAG SELECTION screen, move through the available tags using the up and down arrow keys. If the tag you want to engrave does not show up on the screen, press F4 to return to HOLDER SETUP and install the correct holder. (see pg.
- Page 8 To engrave clipart onto your iMARC tags, press 8 and turn to page 14 for additional instructions. If your iMARC has your company’s logo stored in it, press 9 to select your logo and enter the letter A to engrave it.
- Page 9 Type in your information as you would like it to appear on the front of the tag. Keep in mind that iMARC will automatically increase or decrease your type size for optimum coverage.
- Page 10 NGRAVING The door will open and the table will move out for tag insertion. The tag position will flash indicating where to insert the tag to be engraved. Note: Ensure that your tag is inserted completely flat into the tag holder. Press Esc at any Press F4 to Press Enter to...
- Page 11 NGRAVING Using the CHECK TEXT screen, make sure you’ve typed in your information correctly and that you have chosen the correct type style. Note: Text will not be enlarged to fit on the screen, but will be at the proper size on the tag. Press Esc at any Press F4 to Press Enter to...
- Page 12 NGRAVING The table will be pulled back into the iMARC and the door will close. While your tag is engraving, you will see the screen shown above. Press Esc at any time to stop the engraving process. Note: Pressing ESC before iMARC starts to engrave will stop the machine before it engraves into the tag.
- Page 13 TAG number 1. and will your tag. SELECTION Note: The automatically Note: This will screen. iMARC will engrave the bring you back automatically tag twice, to the CHOOSE begin the making the FONT screen. engraving final engraving process.
-
Page 14: Engraving Clipart
INPUT SCREEN, and then press F2. Press Enter to engrave the tag, or the number 2 for deeper engraving. If you would like to add your company’s logo to your iMARC, call 888-99-iMARC or email us at sales@imarcengraver.com... -
Page 15: Administrative Functions
All of the functions that you and your managers might require can be found by accessing the holder setup screen. (F4 from the introduction screen) Setting the time is The iMARC not needed; it will contains an not affect your internal clock tags. -
Page 16: International Characters
NTERNATIONAL HARACTERS The iMARC is capable of engraving international characters, however they are not available with every type style. To utilize all of the special characters, you will need to use the iMARC Block type style. Some characters may be available with other type styles. - Page 17 NTERNATIONAL HARACTERS Example: To get the letter è, you would need to have the caps locks key off, hold the alt key and press E. To get the letter Ñ, you would need to have the caps locks key on, hold the ctrl key and press N. To get the letter Æ, you would need to have the caps locks key on, hold the ctrl key and press 4.
-
Page 18: Clipart
LIPART Instructions: To use the various clipart available in your iMARC, select the image you want, proceed through the tag selection screens as normal. In the CHOOSE FONT screen, press #8 then simply type the corresponding number or letter of your image in... - Page 19 LIPART...
-
Page 20: Troubleshooting
Resetting the tag holders Use this procedure if a large or small shape is missing on the iMARC screen when trying to engrave a tag. Press any key to continue .
Need help?
Do you have a question about the Pet tag engraving system and is the answer not in the manual?
Questions and answers