
Summary of Contents for FUJI TECOM FSB-8D
- Page 1 FUJIDIGITALSOUNDDETECTOR FSB - 8D INSTRUCTION MANUAL Instruments for the location of underground utilities and water leaks.
-
Page 3: Table Of Contents
● INDEX Page USE 3 ● ● WARRANTY ..................3 FOR SAFE USE ................ 4 ● ● BEFORE USE THE DETECTOR ..........6 DETECTOR COMPOSITION ........... 7 ● NAME OF EACH PART ..............8 ● HOW TO USE ................9 ●... - Page 4 Thank you very much for selecting Fuji FSB-8D digital sound detector. This instruction manual describes handling of Fuji FSB-8D digital sound detector. As this manual contains methods for use, make sure to carefully read this manual before use and to properly understand its handling method before use.
-
Page 5: Use
WARRANTY Fuji FSB-8D Digital Sound Detector is repaired or replaced by free of charge under the warranty within the period of twelve (12) months after the purchase from Fuji representatives in case that the FSB-8D is malfunctioned in spite of the ordinary operation or handling in accordance with the cautions and instructions given in this instruction manual. -
Page 6: For Safe Use
FOR SAFE USE WARNING This symbol is used for showing presence of potential danger that may trigger death or serious personal injury. CAUTION This symbol is used for showing presence of potential danger that may trigger personal injury of medium or minor level. WARNING If a headphone is used for hearing leak sound during operation of this detector, ●... - Page 7 FOR SAFE USE CAUTION Do NOT use this detector for other than detection of leak sound from pipes. ● Positively mount the battery cover. The batteries will come off, if mounting ● of the battery cover is incomplete. Do not shelve or leave this detector at a place of high temperature. ●...
-
Page 8: Before Use The Detector
BEFORE USE THE DETECTOR Make sure conduct simple inspection before use, in order to correctly use the detector. Simple inspection is of three items indicated below. 1. Check of components 2. Check of batteries 3. Check of operation of the detector ATTENTION We recommend you to have the entire functions of this detector inspected by our maintenance department periodically to permit safe and pleasant... -
Page 9: Detector Composition
DETECTOR COMPOSITION This detector is composed of eight (8) items indicated below. Check if all the components are provided. If there is any missing item, please contact your dealer. Main Amplifier ..Contact Rod ..1 ● ● Extension Contact Rod .. -
Page 10: Name Of Each Part
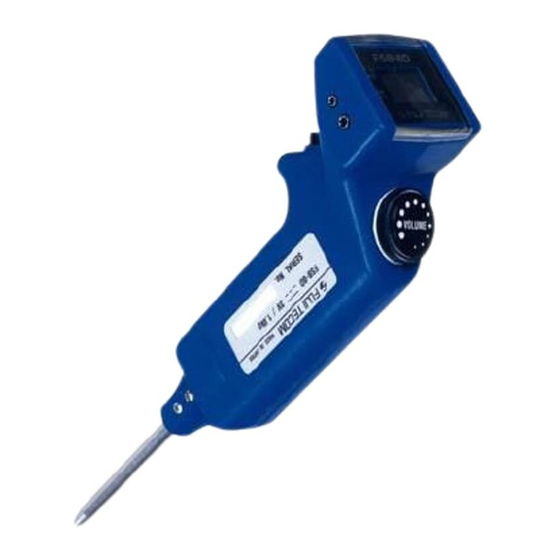
NAME OF EACH PART Signal Output Jack Headphone Jack ON/OFF Switch Volume Control Contact Rod Volume Control Battery Case Cover... -
Page 11: How To Use
HOW TO USE 1. HOW TO SET UP (1) Connect the sensing bar to the main unit. (2) Insert the headphone plug into the jack ( ) in the main unit. (3) Locate the intermediate point of the volume control dial at the mark. -
Page 12: Replacement Of Batteries
Replace the batteries with new one in such a case. Use two alkali dry batteries (LR6). Positively mount the battery cover. FSB-8D CAUTION If no numerical value or mark is displayed at all by the LCD when the power switch is pressed. There is a possibility where the batteries were completely exhausted or the detector has failed. - Page 13 HOW TO USE CAUTION If batteries that are other than what is specified by us were used, troubles resulting from such use will not be covered by our warranty. If batteries that are other than what is specified by us were used, a difference in the continuous working time will arise due to the difference in the battery capacity.
-
Page 14: How To Use
* The power is OFF when the ON/OFF switch is released. FSB-8D CAUTION This detector is not capable of self-supporting on a paved road. Lay it on the ground at a non-wet place that will not obstruct pedestrians, bicycles, vehicles, etc. -
Page 15: Switching The Sensitivity (Sens)
HOW TO USE 4. SWITCHING THE SENSITIVITY (SENS) The SENS switch is of three (3) positions. It is used for attenuating the signal by a certain value for output. [The initial setup is Large ( ).] Medium ( ): The signal level is about 1/10 of that of Large ( Small ( ): The signal level is about 1/100 of that of Large ( Large Medium... -
Page 16: Sens Switch And Volume Control
HOW TO USE 5. SENS SWITCH AND VOLUME CONTROL The volume is separated from the display circuit so that the numerical value displayed on the LCD will not change when the volume control is turned. The SENS switch is linked with volume and displayed value. The volume and displayed value change simultaneously when the switch position changes. -
Page 17: Specification
SPECIFICATION ■MAIN AMPLIFIER Pickup : NPC Piezoelectric element Amplification degree : 55dB Frequency band : 100Hz~2000Hz Notch filter : 150, 180Hz Lowest voltage to operate : 2.0V Battery warning indication : 2.2V : -5~+55 C Operation temperature range Consumption current : 22mA (At no signal) Continuous operation time : Minimum 25 hours (Condition : Alkaline... -
Page 18: How To Store The Detector
HOW TO STORE THE DETECTOR Care after use Carefully wipe off dust and contaminants and clean the detector after use ● of this detector, and store it in the carrying case. If this detector was wetted, carefully wipe off the moisture before storage. ●... -
Page 19: Parts List And Illustrations
PARTS LIST AND ILLUSTRATIONS... - Page 20 PARTS LIST AND ILLUSTRATIONS < >=Order Code Volume Control <010113> Dust-Control Sheet <054135> Housing (Left) <218109> M3 6 Sus Screw (4PCS.) <218126> Pick-Up Fixing Axis <218118> O-Ring <218125> Panel Cover <218111> Panel <218112> Black Button <218114> Main PCB & LCD PCB Assy <218101> 3 ...
Need help?
Do you have a question about the FSB-8D and is the answer not in the manual?
Questions and answers