Advertisement
1. AgriEid Cattle Scales have been pre-calibrated in the factory for a
maximum weight reading of 1500kg for your convenience.
2. Bolt the load cells to your platform as per the following instructions
and switch on the load indicator to check the initial weight reading.
3. If you need to disconnect the cables to install the load cells, ensure
the wiring is replaced in the same order and configuration.
4. If the weight reading is not correct in your initial test (stand on the
scales and weigh yourself) follow the simple instructions in this
document to quickly calibrate the scales and get operational.
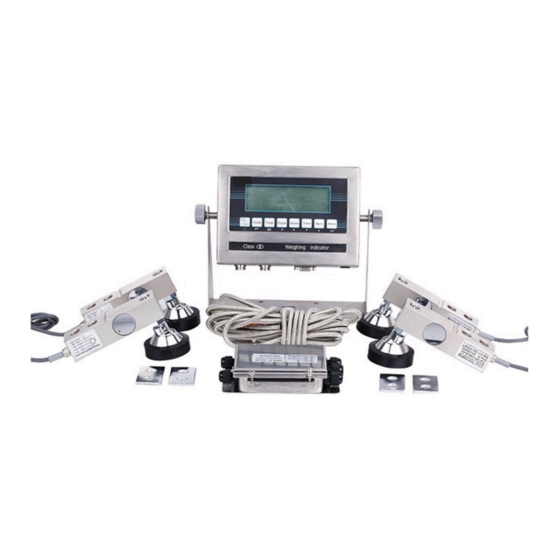
Equipment Supplied: AgriEid Cattle and Livestock Digital Scales
(4) x Load Cells with 3.5m cable to connect load cells to junction box
(4) x Load Cell Spacers + (8) Bolts with washers
(1) x Junction Box
(1) x Quick Connect Cable (Junction Box to Indicator)
(1) x Digital Weight Indicator
Advertisement
Table of Contents

Summary of Contents for AgriEid Cattle Scales
- Page 1 1. AgriEid Cattle Scales have been pre-calibrated in the factory for a maximum weight reading of 1500kg for your convenience. 2. Bolt the load cells to your platform as per the following instructions and switch on the load indicator to check the initial weight reading.
- Page 2 Step 1 : Build a sturdy platform out of hard wood (45-50mm thick) or metal to hold the estimated max weight of the livestock being weighed. Step 2 : Turn the platform upside down and use the spacers provided to drill 2 x holes at each corner of the platform. Space these holes and the load cells about 200-300mm from each edge of the platform.
- Page 3 Step 4 : Each load cell has 3.5m of cable. Each of the 4 cables is screwed into the appropriate position on the junction box which must match the load cell position on the platform (see below). The digital weight indicator has a 3.5m quick connect cable that is connected to the center slot on the left hand side of the junction box (cable with a rubber seal and marked...
- Page 4 Step 5 : CALIBRATION : Once the individual load cells have been firmly bolted to the platform and the cables connected you will need a test weight to check and calibrate the indicator to be sure it is delivering an accurate reading. If the displayed weight is not correct complete the following simple calibration to get the system operational.
- Page 5 DIGITAL INDICATOR SET-UP Menu : Hold and Print buttons pressed at the same time then C1 – Select ‘1’ then ENTER (SETS TO KG) C2 – Select ‘1’ then ENTER (ONE DECIMAL PLACE) C3 – Select ‘5’ then ENTER (GRADUATION) C4 –...
- Page 6 Anything you can get an accurate weight of that can be easily added to the platform for final calibration. Remember less movement = more accurate readings. For additional support information please check the support page on agrieid.com for latest installation guides, product manuals and support videos. Any technical support questions – please just email...
Need help?
Do you have a question about the Cattle Scales and is the answer not in the manual?
Questions and answers