Table of Contents
Advertisement
Quick Links
Advertisement
Table of Contents

Subscribe to Our Youtube Channel
Related Manuals for Edimax AI-1001W V2


Summary of Contents for Edimax AI-1001W V2
- Page 1 AI-1001W V2, V3, V4 Quick Installation Guide 12-2019 / v1.0...
-
Page 2: Table Of Contents
Contents I. Safety Information ..........1 II. Product Information ..........2 II-1. Package Content ................2 II-2. LED Indicator ................... 3 II-3. Hardware Introduction ..............4 II-4. System Requirement ............... 5 III. Hardware Installation ......... 6 III-1. Airbox Installation ................6 III-2. -
Page 3: Safety Information
You can find all supporting documents from the link below or via QR Code: https://www.edimax.com/download (Once you’ve visited the Edimax official website, please enter model no. “AI-1001W V2, V3, V4” into the search box to search for your product.) -
Page 4: Product Information
II-1. Package Content USB Cable Power Adapter AI-1001W V2, V3, V4 Cable Ties Screws Wall Bracket Set Quick Installation Guide NOTE: AI-1001W V2 will no longer include the wall bracket set with its product. -
Page 5: Ii-2. Led Indicator
II-2. LED Indicator LED Status for AI-1001W V2, V3: Color LED Status Description Booting up Flashing slowly Waiting for setup Status Flashing quickly AirBox in default Setup completed Wi-Fi Wi-Fi connected Green Flashing Wi-Fi is operational but not connected Internet... -
Page 6: Ii-3. Hardware Introduction
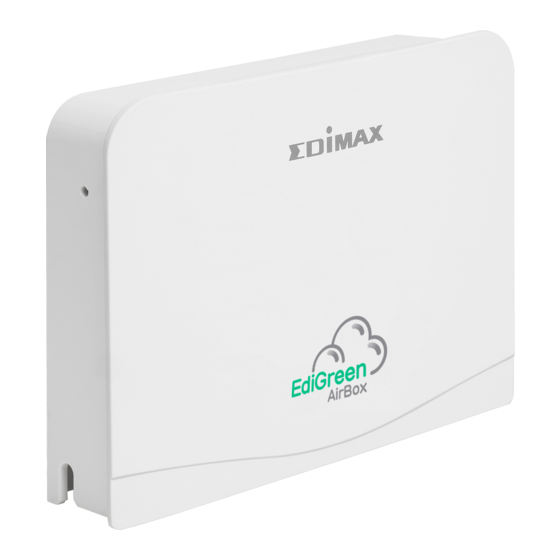
II-3. Hardware Introduction... -
Page 7: Ii-4. System Requirement
Description Reset Button Micro USB Port (Power 5V/1A) Sensor LED Internet LED Wi-Fi LED Status II-4. System Requirement Internet with Wi-Fi Connection 2.4G (802.11n) Computer or mobile device with web browser Android 5 and above iOS 9 and above... -
Page 8: Hardware Installation
1. Please plug the power adapter to a power socket and connect the AI-1001W V2, V3, V4 using the USB cable. (The red status LED will turn on) 2. Please wait a moment for the device to boot up (red status LED will stay on during boot up). -
Page 9: Iii-2. Wall Bracket Installation
III-2. Wall Bracket Installation The installation of wall-mount stand for AI-1001W V3, V4 is shown as figure below: III-3. Replace The PM 2.5 Sensor 1. Disconnect the AI-1001W V3, V4 from power. Then unplug the power adaptor before cleaning moderately. 2. - Page 10 3. Carefully pull out the PM2.5 sensor. 4. After the ribbon cable is removed, take off the existing sensor and replace with the new one. Then install the new sensor in accordance with installation guideline stated above. Please remember the color orientation of the cable and insert the cable back according to its color orientation.
-
Page 11: Edigreen App Installation
˙ Your mobile device is able to connect to your home's Wi-Fi network or whichever network you anticipated the detector to connect to. Please make sure this network has internet connectivity. NOTE: If you have trouble setting up AI-1001W V2, V3, V4 via Wi-Fi, please turn off your mobile device 4G connection. -
Page 12: Iv-1. Edigreen Account
IV-1. EdiGreen Account First time users, please follow the steps below to register the EdiGreen account, 1. Tap the icon in the top right corner of the homepage. 2. Tap “Add New Device”. - Page 13 3. Click on “Sign Up” below to register an account. 4. Enter a valid email and password. Validate your password again and tap “Next”. Please make sure the email address is valid.
- Page 14 5. Please check your email for a message with your code. (Your code is 6 numbers long). 6. Enter the 6 digits code and tap “OK“.
- Page 15 7. You will see “Setup Successful”, please tap “Ok”. 8. Enter your email and password. Login your account. NOTE: For how to reset the password, please refer to the manual for more detailed instructions.
-
Page 16: Iv-2. Adding Devices (Wi-Fi, Android)
IV-2. Adding Devices (Wi-Fi, Android) 1. Turn on Wi-Fi in your Android phone. 2. Open the EdiGreen App. 3. A pop-up Declaration and Statement will be displayed on screen, please press “AGREE” to continue. (This Declaration appears only once when EdiGreen is opened for the first time) - Page 17 4. Tap the icon in the top right corner of the homepage. 5. Tap “Add New Device”.
- Page 18 6. Select a model. 7. The app will start searching for available Wi-Fi network for the detector. Tap the desired Wi-Fi network.
- Page 19 8. Choose either “ACCURATE LOCATION” or “INACCURATE LOCATION”. 9. Enter a device name, password and validate the password again. NOTE: AI-1001W V4 does not have“device name/ password”page.
- Page 20 10. Select a Wi-Fi network. 11. Enter the Wi-Fi password and press “OK” to continue. Please find the unique SSID of your detector on the product label. The final two digits ** of the SSID "PM2.5_Setup_**" is the final two digits of the detector's “Setup WiFi SSID”.
-
Page 21: Iv-3. Ai-1001W V4 (Nb-Iot, Android)
Setup Complete! Now you are able to monitor the air quality near your unit, anywhere with your mobile device. IV-3. AI-1001W V4 (NB-IoT, Android) Please follow the steps below to add your AI-1001W V4 to the EdiGreen. 1. Select AI-1001W_V4. - Page 22 2. Select the NB-IoT mode. 3. Select your device from the device list.
- Page 23 4. Choose “ACCURATE LOCATION” or “INACCURATE LOCATION”. Setup Complete! You are successfully connect to your AI-1001W V4 to EdiGreen via NB-IoT.
-
Page 24: Iv-4. Adding Devices (Wi-Fi, Ios)
IV-4. Adding Devices (Wi-Fi, iOS) 1. Open the EdiGreen App. 2. A pop-up Statement and Declaration will be displayed on screen, please press “OK” and “Agree” to continue. (This Declaration appears once only when EdiGreen is opened for the first time) - Page 25 3. Tap the icon in the top right corner of the homepage. 4. Tap “Add New Device”.
- Page 26 5. Select a model. 6. Pop-up Wi-Fi Connection tutorial will be displayed on screen.
- Page 27 7. Go to Wi-Fi settings and choose the SSID “PM2.5_Setup_XX” of your detector. Please find the unique SSID of your detector on the product label. The final 2 digits ** of the SSID "PM2.5_Setup_**" is the final two digits of the detector's “Setup WiFi SSID”. 8.
- Page 28 9. Enter a device name, password and validate the password again. NOTE: AI-1001W V4 does not have“device name/ password”page. 10. The app will start searching for available Wi-Fi network for the detector. Tap the desired Wi-Fi network and enter the Wi-Fi password and press “OK”...
-
Page 29: Iv-5. Ai-1001W V4 (Nb-Iot, Ios)
Setup Complete! Now you are able to monitor the air quality near your unit with your mobile device anywhere. IV-5. AI-1001W V4 (NB-IoT, iOS) Please follow the steps below to add your AI-1001W V4 to the EdiGreen. 1. Select AI-1001W_V4. - Page 30 2. Select NB-IoT mode. 3. Pop-up Wi-Fi Connection tutorial will be displayed on screen.
- Page 31 4. Go to Wi-Fi settings and choose the SSID “PM2.5_Setup_XX” of your detector. Please find the unique SSID of your detector on the product label. The final 2 digits ** of the SSID "PM2.5_Setup_**" is the final two digits of the detector's “Setup WiFi SSID”. 5.
- Page 32 6. Open the EdiGreen again to start the installation. Setup complete! You are successfully connect to your AI-1001W V4 to EdiGreen via NB-IoT.
-
Page 33: Reset To Factory Default Settings
V. Reset to Factory Default Settings If you experience problems with the device, try rebooting it by reconnecting the power. If rebooting does not work, try resetting it back to its factory default settings. This resets all settings back to the default settings. To perform a factory reset, please follow steps below: 1. -
Page 34: Cleaning The Unit
Cleaning the Unit Choose either of the two options below depending on the cleaning tool you have. It is recommended to clean the sensors every 3-6 months for optimal sensor functionality. If you have other pump-like cleaning tools available (e.g. for computers), you may also utilize them. -
Page 35: Vi-2. Dust-Off Canned Compressed Air
VI-2. Dust-off Canned Compressed Air 1. Direct the nozzle of the compressed air at an opening of a sensor. 2. Keep the nozzle at 10cm from the sensor opening. 3. Use short bursts (1-2 seconds) of air spray a few times to clean the sensor. 4. - Page 36 COPYRIGHT Copyright Edimax Technology Co., Ltd. all rights reserved. No part of this publication may be reproduced, transmitted, transcribed, stored in a retrieval system, or translated into any language or computer language, in any form or by any means, electronic, mechanical, magnetic, optical, chemical, manual or otherwise, without the prior written permission from Edimax Technology Co., Ltd.
- Page 37 Federal Communication Commission Interference Statement 15.21 You are cautioned that changes or modifications not expressly approved by the part responsible for compliance could void the user’s authority to operate the equipment. 15.105(b) This equipment has been tested and found to comply with the limits for a Class B digital device, pursuant to part 15 of the FCC rules.
- Page 38 EU Declaration of Conformity English: This equipment is in compliance with the essential requirements and other relevant provisions of Directive 2014/53/EU, 2014/35/EU. Français: Cet équipement est conforme aux exigences essentielles et autres dispositions de la directive 2014/53/EU, 2014/35/EU. Čeština: Toto zařízení je v souladu se základními požadavky a ostatními příslušnými ustanovení mi směrnic 2014/53/EU, 2014/35/EU.
- Page 39 Declaration of Conformity We, Edimax Technology Co., Ltd., declare under our sole responsibility, that the equipment described below complies with the requirements of the European Radio Equipment directives. Equipment: Air Box Model No.: AI-1001W V2/V3 The following European standards for essential requirements have been followed:...
Need help?
Do you have a question about the AI-1001W V2 and is the answer not in the manual?
Questions and answers