Table of Contents
Advertisement
Available languages
Available languages
GONFIATORE ELETTRICO - 12V
GONFIATORE ELETTRICO - 12V
GONFIATORE ELETTRICO - 12V
CONSERVARE QUESTE ISTRUZIONI
CONSERVARE QUESTE ISTRUZIONI
ATTENZIONE! Leggere queste istruzioni prima di utilizzare il gonfiatore. Il non seguire queste
ATTENZIONE!
ATTENZIONE! Leggere queste istruzioni prima di utilizzare il gonfiatore. Il non seguire queste
istruzioni potrà danneggiare il prodotto o causare seri danni alle persone.
Leggere queste istruzioni prima di utilizzare il gonfiatore. Il non seguire queste
istruzioni potrà danneggiare il prodotto o causare seri danni alle persone.
istruzioni potrà danneggiare il prodotto o causare seri danni alle persone.
Avvertenze:
Avvertenze:
1. Leggere queste istruzioni.
AVVERTENZE:
1. Leggere queste istruzioni.
2. Conservare questo manuale.
1. Leggere queste istruzioni.
2. Conservare questo manuale.
3. Seguire fedelmente le istruzioni.
2. Conservare questo manuale.
3. Seguire fedelmente le istruzioni.
4. Non invertire i terminali polarizzati della batteria. Rosso è positivo, nero è negativo.
3. Seguire fedelmente le istruzioni.
4. Non invertire i terminali polarizzati della batteria. Rosso è positivo, nero è negativo.
5. Proteggere il cavo di alimentazione da possibili danneggiamenti.
4. Non invertire i terminali polarizzati della batteria. Rosso è positivo, nero è negativo.
5. Proteggere il cavo di alimentazione da possibili danneggiamenti.
5. Proteggere il cavo di alimentazione da possibili danneggiamenti.
6. Per l'assistenza rivolgersi solo a personale qualificato.
6. Per l'assistenza rivolgersi solo a personale qualificato.
6. Per l'assistenza rivolgersi solo a personale qualificato. L'assistenza è necessaria
L'assistenza è necessaria quando l'apparato è stato danneggiato in qualsiasi modo.
L'assistenza è necessaria quando l'apparato è stato danneggiato in qualsiasi modo.
quando l'apparato è stato danneggiato in qualsiasi modo.
GE 20-1
GE 20-2
GE 20-1
Manuale d'Istruzioni
Manuale d'Istruzioni
Advertisement
Table of Contents

Summary of Contents for Bravo SCOPREGA GE 20-2
- Page 1 GE 20-1 GE 20-2 GE 20-1 GONFIATORE ELETTRICO - 12V GONFIATORE ELETTRICO - 12V GONFIATORE ELETTRICO - 12V CONSERVARE QUESTE ISTRUZIONI CONSERVARE QUESTE ISTRUZIONI ATTENZIONE! Leggere queste istruzioni prima di utilizzare il gonfiatore. Il non seguire queste ATTENZIONE! ATTENZIONE! Leggere queste istruzioni prima di utilizzare il gonfiatore. Il non seguire queste istruzioni potrà...
- Page 2 7. Non smontare l’apparecchio. Il rimontaggio non corretto può indurre corto circuiti. 8. Assicurare un’adeguata ventilazione ed evitare di posizionare oggetti sopra o intorno al gonfiatore durante il funzionamento. 9. Non bruciare o distruggere la batteria anche se gravemente danneggiata o completamente esaurita.
- Page 3 Non ricaricare la batteria quando la temperatura dell’ambiente è inferiore a +4,5°C (+40°F), o superiore a +40,5°C (+105°F). Questo è importante e previene seri danni alla batteria. 2. Durante la ricarica, il caricatore e la batteria possono diventare caldi. Questo è normale e non indica un problema.
- Page 4 UTILIZZI CONSIGLIATI: • Oggetti gonfiabili di grandi dimensioni come tavole da surf / gommoni / kayak / kite / ecc. Dati tecnici: • Zattere / materassi ad aria / gonfiabili da piscina / ecc. Dati tecnici: • Portata 125 L/min DATI TECNICI: •...
-
Page 5: Collegamento Degli Accessori
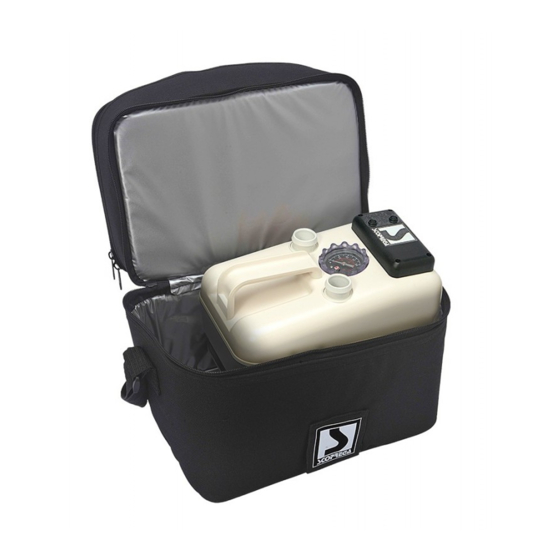
UTILIZZO del GE 20-2 ACCESSORI E CAVI DI ALIMENTAZIONE • I cavi 12V ed il tubo dell’aria si trovano all’interno della borsa a tracolla. • Gli accessori, come il carica batterie 110-240V e il cavo per la presa accendisigari si trovano nel vano superiore della borsa a tracolla. -
Page 6: Soluzione Dei Problemi
SOLUZIONE DEI PROBLEMI PROBLEMA POSSIBILE CAUSA POSSIBILE SOLUZIONE Ricaricare la batteria con il caricabatteria 110-240V o Batteria SCARICA collegare l’apparato a una batteria esterna tramite i morsetti di alimentazione Il gonfiatore non parte Non è stato premuto il tasto ON Premere il tasto ON Sostituire il fusibile con uno dello stesso tipo (30 A) Il fusibile di protezione è... - Page 7 GE 20-1 GE 20-2 GE 20-1 ELECTRICAL INFLATOR - 12V ELECTRICAL INFLATOR - 12V ELECTRICAL INFLATOR - 12V SAVE THIS INSTRUCTION MANUAL FOR REFERENCE SAVE THIS INSTRUCTION MANUAL FOR REFERENCE WARNING! Read all instructions before operating the inflator. Failure to follow all instructions WARNING! WARNING! Read all instructions before operating the inflator.
-
Page 8: Stay Alert
Check with local codes for possible special disposal instructions. 10. If any leakage of liquid from the battery cells occurs, discontinue use immediately and return the battery to your local Bravo Service Center or authorized service facility. 11. Never attempt to open the battery for any reason. -
Page 9: Important Charging Notes
IMPORTANT CHARGING NOTES 1. Longest life and best performance can be obtained if the battery is charged when the air temperature is between 18°- 24°C (65°F and 75°F). DO NOT charge the battery in an air temperature below +40°F (+4.5°C), or above +105°F (+40.5°C). -
Page 10: Suggested Uses
Suggested Uses: SUGGESTED USES: • Large rigid inflatable like SUPs / Inflatable Boats / Kayak / Kites / etc. • Large rigid inflatable like SUPs / Inflatable Boats / Kayak / Kites / etc. • Rafts / air mattresses / swimming pool floats / etc. •... -
Page 11: Fitting The Accessories
USE of GE 20-2 HOSE AND CORD STORAGE • The 12Vdc cords and the air hose are located in the carry bag. • The accessories like 110-240 Vac battery charger and cigarette plug are stored on the upper compartment of the carry bag. FITTING THE ACCESSORIES •... -
Page 12: Troubleshooting
TROUBLESHOOTING PROBLEM POSSIBLE CAUSE POSSIBLE SOLUTION Recharge the battery by the 110-240Vac Battery LOW battery charger or connect the unit to an external battery via alligator clips. Unit will not Start ON push button not ON Push the button to ON. Replace the fuse with one of the same size (30 A). - Page 13 GE 20-1 GE 20-2 GE 20-1 ELEKTRISCHE PUMPE - 12V ELEKTRISCHE PUMPE - 12V ELEKTRISCHE PUMPE - 12V DIESE ANLEITUNG AUFBEWAHREN DIESE ANLEITUNG AUFBEWAHREN ACHTUNG! Lesen Sie diese Anleitung bevor Sie die Pumpe verwenden. Bei Nichtbeachtung ACHTUNG! Lesen Sie diese Anleitung bevor Sie die Pumpe verwenden. Bei Nichtbeachtung dieser Anleitung kann das Produkt beschädigt werden oder es können schwere ACHTUNG! dieser Anleitung kann das Produkt beschädigt werden oder es können schwere...
- Page 14 Schutz der Umwelt. 10. Falls Flüssigkeit aus der Batterie austritt, stellen Sie die Nutzung sofort ein, und bringen Sie sie zur nächstgelegenen Kundendienststelle von Bravo oder einer anderen Vertrags Kundendienststelle. 11. Versuchen Sie nicht die Batterie zu öffnen. Falls das Kunststoffgehäuse Beschädigungen aufweist, stellen Sie die Nutzung sofort ein und laden Sie die Batterie nicht wieder auf.
- Page 15 8. DAS GERÄT NICHT UNBEAUFSICHTIGT LASSEN. Übermäßiger Druck kann zu einem für Personen gefährlichen Bersten führen. 9. ACHTUNG! GEFAHR DES UNSICHEREN BETRIEBS. Nehmen Sie keinerlei Veränderungen an der Pumpe oder an ihren Zubehörteilen vor. Nehmen Sie keine Reparaturversuche vor und Bohren Sie keine Löcher in das Gehäuse. 10.
-
Page 16: Technische Daten
GE 20-2 ist dank der eingebauten Batterie bequem tragbar. Wenn der Batteriestand während des Betriebs abgesunken ist (GELBES bzw. ROTES Licht im Druckmesser), kann zur Unterstützung externer Strom eingespeist werden. Hierduch wird die Pumpe weiterbetrieben während die Batterie gleichzeitig wieder aufgeladen wird. Im Lieferumfang enthalten ist ein Kabel mit Zigarettenanzünder Adapter und ein Kabel mit Krokodilklemmen zum direkten Anschluss an die Polklemmen einer 12V Autobatterie. - Page 17 Bedeutung der Farbe des Lichts im Druckmesser: Bedeutung der Farbe des Lichts im Druckmesser: 1. Grün IN BETRIEB und Batterie AUFGELADEN 1. Grün IN BETRIEB und Batterie AUFGELADEN 2. Gelb Batterie teilweise LEER 2. Gelb Batterie teilweise LEER 3. Rot Überhitzung (das Gerät stoppt automatisch) 3.
-
Page 18: Störungssuche
ACHTUNG Kontrollieren Sie die richtige Polarität (rote Klemme am Pluspol). Bei falscher Polung startet die Pumpe nicht. • Betätigen Sie die Taste ON. Das Gerät startet und das Licht im Druckmesser wird GRÜN. ACHTUNG Gehen Sie beim Anschluss des Kabels an die Polklemmen der Autobatterie vorsichtig vor und vermeiden Sie, dass die Autobatterie durch leitfähige Gegenstände wie Ringe, Armbänder oder Schlüssel, kurzgeschlossen wird. - Page 19 GE 20-1 GE 20-2 GE 20-1 INFLADOR ELÉCTRICO - 12V INFLADOR ELÉCTRICO - 12V INFLADOR ELÉCTRICO - 12V CONSERVAR ESTAS INSTRUCCIONES CONSERVAR ESTAS INSTRUCCIONES CONSERVAR ESTAS INSTRUCCIONES CONSERVAR ESTAS INSTRUCCIONES ¡ATENCIÓN! Leer estas instrucciones antes de utilizar el inflador manual. Si no se siguen estas ¡ATENCIÓN! ¡ATENCIÓN! Leer estas instrucciones antes de utilizar el inflador manual.
- Page 20 10. No utilizar la batería si se producen escapes de líquido y comunicarlo al centro de asistencia técnica de BRAVO o al centro autorizado más cercano. 11. No tratar de abrir la batería. No utilizar si el recipiente de plástico presenta signos de daños.
- Page 21 NORMAS DE USO DE LA BATERÍA 1. Recargar la batería cuando la temperatura del lugar está comprendida entre los 18°- 24°C (65°F - 75°F) para proporcionar una mayor duración y un mejor rendimiento. NO recargar la batería cuando la temperatura del lugar sea inferior a +4,5°C (+40°F), o superior a +40,5°C (+105°F).
- Page 22 USOS RECOMENDADOS: • Objetos inflables de grandes dimensiones como tablas de surf / embarcaciones / kayak / cometas / etc. • Balsas / colchones de aire / piscinas hinchables / etc. Dati tecnici: DATOS TÉCNICOS: • Portata 125 L/min • Capacidad 125 L/min •...
- Page 23 UTILIZACIÓN DE GE 20-2 ACCESORIOS Y CABLES DE ALIMENTACIÓN • Los cables de 12V y el tubo de aire se encuentran dentro del bolso bandolera. • Los accesorios, como el cargador de la batería 110 - 240V y el cable para la toma de encendedor se encuentran en el hueco mayor del bolso bandolera.
- Page 24 BÚSQUEDA DE AVERÍAS BÚSQUEDA DE AVERÍAS PROBLEMA CAUSA POSIBLE SOLUCIÓN POSIBLE Recargar la batería con el cargador 110-240V o conectar el aparato a una batería externa mediante los bornes Batería CARGADA de alimentación No se ha pulsado el botón ON Pulsar el botón ON El inflador no arranca Sustituir el fusible por uno similar (modelo 30 A)
- Page 25 GE 20-1 GE 20-2 GE 20-1 GE 20-1 GONFLEUR ÈLECTRIQUE - 12V GONFLEUR ÈLECTRIQUE - 12V GONFLEUR ÈLECTRIQUE - 12V GONFLEUR ÈLECTRIQUE - 12V CONSERVER CES INSTRUCTIONS CONSERVER CES INSTRUCTIONS CONSERVER CES INSTRUCTIONS ATTENTION ! Lire ces instructions avant d’utiliser le gonfleur. Toute inobservation des instruc- ATTENTION ! Lire ces instructions avant d’utiliser le gonfleur.
-
Page 26: Consignes Générales De Sécurité
10. Ne pas utiliser la batterie si des fuites de liquide sont constatées et la confier au centre d’assistance Bravo ou au centre agréé le plus proche. 11. Ne pas essayer d’ouvrir la batterie. Si le boîtier en plastique de la batterie présente des signes de détérioration, ne pas l’utiliser. -
Page 27: Risque D'électrocution
CONSIGNES D’UTILISATION DE LA BATTERIE 1. Recharger la batterie lorsque la température ambiante est comprise entre 18 et 24°C (65 à 75°F) afin d’obtenir une plus longue durée et un meilleur rendement, NE PAS recharger la batterie lorsque la température ambiante est inférieure à +4,5°C (+40°F) ou supérieure à... - Page 28 APPLICATIONS: • Objets gonflables de grandes dimensions comme les planches de surf / les canots pneumatiques / les kayaks / les kitesurfs / etc. • Canots pneumatiques / matelas / piscines / etc. Dati tecnici: DONNEES TECHNIQUES: • Portata 125 L/min •...
-
Page 29: Raccordement Des Accessoires
UTILISATION du GE 20-2 ACCESSOIRES ET CÂBLES D’ALIMENTATION • Les câbles 12V et le tube d’air se trouvent à l’intérieur de la sacoche à bandoulière. • Les accessoires, comme le chargeur de batterie 110-240V et le câble de la prise allume- cigares, se trouvent dans le compartiment supérieur de la sacoche à... -
Page 30: Dépannage
DÉPANNAGE DÉPANNAGE DÉFAILLANCE CAUSE POSSIBLE ACTION CORRECTIVE Batterie DÉCHARGÉE Recharger la batterie à l’aide d’un chargeur 110 - 240 V ou raccorder l’appareil à une batterie extérieure sur les bornes d’alimentation Le gonfleur ne La touche ON n’a pas été enfoncée Appuyer sur la touche ON démarre pas Remplacer le fusible présentant le même ampérage (30 A) - Page 31 NOTE...
- Page 32 www.scoprega.it...
Need help?
Do you have a question about the SCOPREGA GE 20-2 and is the answer not in the manual?
Questions and answers