Table of Contents
Advertisement
Available languages
Available languages
Quick Links
Advertisement
Chapters
Table of Contents

Related Manuals for Homematic IP HmIPW-BRC2


Summary of Contents for Homematic IP HmIPW-BRC2
- Page 1 Installations- und Bedienungsanleitung Installating instruction and operating manual Wired Wandtaster für Marken- S. 2 schalter – 2-fach Wired Remote Control for brand p. 29 switches – 2 buttons HmIPW-BRC2...
- Page 2 Lieferumfang Anzahl Bezeichnung Homematic IP Wired Wandtaster für Markenschalter – 2-fach Schrauben 3,2 x 15 mm Schrauben 3,2 x 25 mm Bedienungsanleitungen Beiblatt mit Sicherheitshinweisen Dokumentation © 2020 eQ-3 AG, Deutschland Alle Rechte vorbehalten. Ohne schriftliche Zustimmung des Herausgebers darf diese Anleitung auch nicht auszugsweise in...
- Page 5 click...
- Page 7 Homematic IP...
-
Page 9: Table Of Contents
Adapter für Markenschalter ..........18 Anlernen ................19 5.4.1 Anlernen an die Zentrale CCU3 ......20 5.4.2 Anlernen an die Homematic IP Cloud per Wired Access Point (demnächst verfügbar) ....22 Fehlercodes und Blinkfolgen ........24 Wiederherstellung der Werkseinstellungen ....25 Wartung und Reinigung ..........26... -
Page 10: Hinweise Zur Anleitung
Hinweise zur Anleitung Hinweise zur Anleitung Lesen Sie diese Anleitung sorgfältig, bevor Sie Ihre Homematic IP Geräte in Betrieb nehmen. Bewahren Sie die Anleitung zum späteren Nachschlagen auf! Wenn Sie das Gerät anderen Personen zur Nutzung über- lassen, übergeben Sie auch diese Anleitung. - Page 11 Gefahrenhinweise Verwenden Sie das Gerät nicht, wenn es von au- ßen erkennbare Schäden, z. B. am Gehäuse, an Bedienelementen oder an den Anschlussbuchsen ausweist. Lassen Sie das Gerät im Zweifelsfall von einer Fachkraft prüfen. Betreiben Sie das Gerät nur in Innenräumen und setzen Sie es keinem Einfluss von Feuchtigkeit, Vibrationen, ständiger Sonnen- oder anderer Wärmeeinstrahlung, übermäßiger Kälte und kei-...
- Page 12 Homematic IP Wired Bus vorgesehen. Der Homematic IP Wired Bus ist ein SELV-Stromkreis. Eine gemeinsame Führung der Netzspannung und des Homematic IP Wired Bus in Installations- oder Verteilerdosen ist nicht zulässig. Die not- wendige Isolation einer Netzspannung der Haus- installation zum Homematic IP Wired Bus ist immer einzuhalten.
-
Page 13: Funktion Und Geräteübersicht
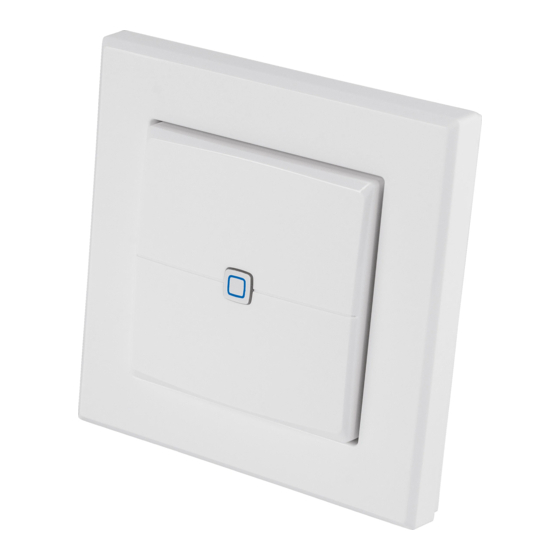
Das Gerät ist nur für den Einsatz in Wohnberei- chen, Geschäfts- und Gewerbebereichen sowie in Kleinbetrieben bestimmt. Funktion und Geräteübersicht Der Homematic IP Wired Wandaster für Markenschalter ermöglicht die Steuerung von Geräten und Funktionen über eine konventionelle Tasterwippe. Das Gerät wird einfach auf einer Unterputzdose installiert und mit dem Wired-Bus verbunden. -
Page 14: Allgemeine Systeminformationen
Allgemeine Systeminformationen Allgemeine Systeminformationen Dieses Gerät ist Teil des Homematic IP Smart-Home- Systems und kommuniziert über das Homematic IP Protokoll. Sie haben die Möglichkeit, alle Geräte des Systems komfortabel und individuell über die Bedienoberfläche der Zentrale CCU3 oder flexibel per Smartphone über die Homematic ... - Page 15 Inbetriebnahme Bitte notieren Sie sich vor der Installation die auf dem Gerät angebrachte Gerätenummer (SGTIN) und den Verwendungszweck, damit Sie das Gerät im Nachhinein leichter zuordnen können. Alter- nativ steht die Gerätenummer auch auf dem bei- liegenden QR-Code-Aufkleber. Beachten Sie die auf dem Gerät angegebene Ab- isolierlänge der anzuschließenden Leiter.
- Page 16 Zugelassene Leitungsquerschnitte zum Anschluss an das Gerät sind: Starre Leitung: 0,12-0,50 mm Aus Gründen der elektrischen Sicherheit dürfen zum Anschluss des Homematic IP Wired Bus aus- schließlich folgende Leitungen eingesetzt werden: • Fernmeldeleitung J-Y(ST)Y mit 2 x 2 x 0,8 (= 0,5 mm²) oder 4 x 2 x 0,8 (= 0,5 mm²),...
-
Page 17: Installation
Wired Access Points (HmIPW-DRAP) auf “–“ (= Masse) aufgelegt werden. Am Bewegungsmel- der darf der Schirm nicht aufgelegt werden. Installation Der Bus wird vom Homematic IP Wired Access Point (HmIPW-DRAP) gespeist. Weitere Informa- tionen dazu können Sie der Bedienungsanleitung des Wired Access Points entnehmen. -
Page 18: Adapter Für Markenschalter
„5.3 Adapter für Markenschalter“ auf Seite 18) in den Rahmen ein (s. Abbildung 5 oder 6). • Schalten Sie den Homematic IP Wired Bus wieder ein, um den Anlernmodus des Geräts zu aktivie- ren (s. „5.4 Anlernen“ auf Seite 19). -
Page 19: Anlernen
Für eine flexible Steuerung per kostenloser Smartphone- App können Sie das Gerät an die Homematic IP Cloud anlernen (s. „5.4.2 Anlernen an die Homematic IP Cloud per Wired Access Point (demnächst verfügbar)“ auf Seite 22). Dabei ist es möglich, die Wired Geräte •... -
Page 20: Anlernen An Die Zentrale Ccu3
WebUI anlernen. Um das Gerät an die Zentrale CCU3 an- zulernen, gehen Sie wie folgt vor: • Richten Sie zunächst Ihre Zentrale CCU3 gemäß der zugehörigen Bedienungsanleitung ein und lernen Sie den Homematic IP Wired Access Point • Starten Sie die Benutzeroberfläche „WebUI“ auf Ihrem PC. •... - Page 21 Inbetriebnahme Die Zentrale wird für 60 Sekunden in den Anlern- modus versetzt. Ein Infofeld zeigt die aktuell noch verbleibende Anlernzeit. • Nach dem Herstellen der Spannungsversorgung ist das Gerät für 3 Minuten aktiv. Sie können den Anlernmodus manuell für weitere 3 Minuten starten, indem Sie die Systemtaste (A) kurz drücken (s.
-
Page 22: Anlernen An Die Homematic Ip Cloud Per Wired Access Point (Demnächst Verfügbar)
5.4.2 Anlernen an die Homematic IP Cloud per Wired Access Point (demnächst verfügbar) Wenn Sie Ihre Homematic IP Wired Geräte flexibel per Smartphone-App steuern möchten, können Sie die Homematic IP Wired Geräte einfach an die Homematic IP Cloud anlernen. Gehen Sie dazu wie folgt vor: •... - Page 23 Inbetriebnahme Cloud an. • Wählen Sie den Menüpunkt „Gerät anlernen“ aus. • Nach dem Herstellen der Spannungsversorgung ist der Anlernmodus des Geräts für 3 Minuten aktiv. Sie können den Anlernmodus manuell für weitere 3 Minuten starten, indem Sie die Systemtaste (A) kurz drücken (s.
-
Page 24: Fehlercodes Und Blinkfolgen
Fehlercodes und Blinkfolgen Wenn Sie bereits Homematic IP Geräte im Smart- Home-System nutzen oder Ihre Wired Geräte mit Funk-Komponenten von Homematic IP kombi- nieren möchten, können Sie die Homematic IP Wired Geräte auch einfach an einen (bestehen- den) Homematic IP Access Point anlernen. Lernen Sie dazu den Homematic IP Wired Access Point gemäß... -
Page 25: Wiederherstellung Der Werkseinstellungen
Wiederherstellung der Werkseinstellungen Kurzes Anlernmodus Geben Sie die letzten oranges aktiv vier Ziffern der Geräte- Blinken Seriennummer zur (alle 10 s) Bestätigung ein (s. „5.4 Anlernen“ auf Seite 19). 6x langes Gerät defekt Achten Sie auf die rotes Blin- Anzeige in Ihrer App oder wenden Sie sich an Ihren Fach- händler. -
Page 26: Wartung Und Reinigung
Lassen Sie die Systemtaste wieder los, um das Wiederherstellen der Werkseinstellungen abzu- schließen. Das Gerät führt einen Neustart durch. Nach dem Neustart können Sie das Gerät wieder in Ihr Homematic IP System integrieren. Wartung und Reinigung Das Gerät ist wartungsfrei. Überlassen Sie eine Reparatur einer Fachkraft. -
Page 27: Technische Daten
Technische Daten Technische Daten Geräte-Kurzbezeichnung: HmIPW-BRC2 Versorgungsspannung: 24 V , +5 % -20 %, SELV Stromaufnahme: 10 mA max. Leistungsaufnahme im Ruhebetrieb: 50 mW Leitungsart u. -querschnitt: Starre Leitung 0,12-0,50 mm² Installation: nur in Schalterdosen (Gerätedosen) gemäß DIN 49073-1 Schutzart:... - Page 28 Technische Daten Entsorgungshinweis Gerät nicht im Hausmüll entsorgen! Elektroni- sche Geräte sind entsprechend der Richtlinie über Elektro- und Elektronik-Altgeräte über die örtlichen Sammelstellen für Elektronik-Altgeräte zu entsorgen. Konformitätshinweis Das CE-Zeichen ist ein Freiverkehrszeichen, das sich ausschließlich an die Behörden wendet und keine Zusicherung von Eigenschaften beinhaltet.
- Page 29 Package contents Quantity Description Homematic IP Wired Wall-mount Remote Control for brand switches – 2 channels Screws 3.2 x 15 mm Screws 3.2 x 25 mm operating manuals Supplement sheet with safety instructions Documentation © 2020 eQ-3 AG, Germany All rights reserved. Translation from the original version in Ger- man.
- Page 30 Teaching-in ................39 5.4.1 Connecting to the Central Control Unit CCU3 .. 40 5.4.2 Connecting to the Homematic IP cloud using the Wired Access Point (available soon) ... 43 Error codes and flashing sequences ......45 Restore factory settings ..........46 Maintenance and cleaning ..........
-
Page 31: Information About This Manual
Information about this manual Read this manual carefully before beginning operation with your Homematic IP components. Keep the manual so you can refer to it at a later date if you need to. If you hand over the device to other persons for use, hand over this manual as well. - Page 32 Hazard information Do not use the device if there are signs of damage to the housing, control elements or connecting sockets, for example. If you have any doubts, have the device checked by an expert. The device may only be operated indoors and must be protected from the effects of moisture, vibrations, solar or other methods of heat radiation, cold and mechanical loads.
- Page 33 The device is intended for operation within the Homematic IP Wired bus only. The Homematic IP Wired bus is a SELV power circuit. Common cable routing of power supply and the Homematic IP Wired bus in installation or junction boxes is not permitted.
-
Page 34: Function And Device Overview
Function and device overview Function and device overview The Homematic IP Wired Wall-mount Remote Control for brand switches is used to control devices and functions via a conventional button rocker. The device is installed to a flush-mounted box and connected to the wired bus. At the push of a button, you can switch lights on or off or activate the eco mode for your heating. -
Page 35: General System Information
General system information General system information This device is part of the Homematic IP smart home system and works with the Homematic IP protocol. All devices of the system can be configured comfortably and individually with the user interface of the Central... - Page 36 Start-up Please note the insulation stripping length of the conductor to be connected, indicated on the device. Please observe the hazard information in section “2 Hazard information” on page 31 during installation. Please note! Only to be installed by persons with the relevant electro-technical knowledge and experience!* Incorrect installation can put...
- Page 37 Rigid cable: 0.12-0.50 mm For reasons of electrical safety, only the following cables must be used for connecting to the Homematic IP wired bus: • Telephone cable J-Y(ST)Y with 2 x 2 x 0.8 (= 0.5 mm²) or 4 x 2 x 0.8 (= 0.5 mm²), shielded, TP •...
-
Page 38: Installation
Start-up Installation The bus is powered by the Homematic IP Wired Access Point (HmIPW-DRAP). further information, please refer to the operating manual of the corresponding Wired Access Points. To facilitate connection to the terminals, the green push-in terminal (B) can be removed from the device. -
Page 39: Adapters For Brand Switch Systems
Start-up 39) into the frame (see figure 5 or 6). • Switch the Homematic IP Wired bus on again to activate the teach-in mode of the device (see “5.4 Teaching-in” on page 39). Adapters for brand switch systems After installation, the existing frame and rocker of leading manufacturers can continue to be used. -
Page 40: Connecting To The Central Control Unit Ccu3
Unit CCU3” on page 40). Connection to the Homematic IP cloud For flexible control via free smartphone app, connect the device to the Homematic IP cloud (see “5.4.1 Connecting to the Central Control Unit CCU3” on page 40). You •... - Page 41 Start-up the Homematic IP Wired Access Point. • Start the user interface “WebUI” on your computer. • Click the “Teach-in devices” button on the right- hand side of the screen. • To activate teach-in mode, click “Teach-in HmIP device” in the next window. The teach-in mode of the Central Control Unit will be activated for 60 seconds.
- Page 42 Start-up • After power supply is established, the device will be active for 3 minutes. You can manually start the teach-in mode for another 3 minutes by pressing the system button (A) briefly (see figure 7). • Wait until the connection is completed. If connecting was successful, the LED (A) lights •...
-
Page 43: Connecting To The Homematic Ip Cloud Using
Connecting to the Homematic IP cloud using the Wired Access Point (available soon) If you want to control your Homematic IP Wired devices flexibly via smartphone app, they can be connected to the Homematic IP cloud. Therefore, proceed as follows: •... - Page 44 • In the app, give the device a name and allocate it to a room. If you are already using Homematic IP devices in your smart home system or if you want to combine your Homematic IP Wired devices with...
-
Page 45: Error Codes And Flashing Sequences
Error codes and flashing sequences Error codes and flashing sequences Flashing code Meaning Solution Short orange Data transfer Wait until the flashing transmission is completed. 1x long green Operation You can continue lighting confirmed operation. 1x long red Operation Please try again. lighting failed Short orange... -
Page 46: Restore Factory Settings
• Release the system button to finish the procedure. The device will perform a restart. After the restart, you can again integrate your device into your Homematic IP system. Maintenance and cleaning The product does not require any maintenance. Enlist the help of an expert to carry out any repairs. -
Page 47: Technical Specifications
Technical specifications Technical specifications Device short name: HmIPW-BRC2 Supply voltage: 24 V , +5 % -20 %, SELV Current consumption: 10 mA max. Standby power consumption: 50 mW Cable type and cross section rigid cable 0.12-0.50 mm² Installation: only in normal... - Page 48 Technical specifications Instructions for disposal Do not dispose of the device with regular domestic waste! Electronic equipment must be disposed of at local collection points for waste electronic equipment in compliance with the Waste Electrical and Electronic Equipment Directive. Information about conformity The CE sign is a free trading sign addressed exclusively to the authorities and does not include any warranty of any properties.
- Page 49 Bevollmächtigter des Herstellers: Manufacturer’s authorised representative: eQ-3 AG Maiburger Straße 29 26789 Leer / GERMANY www.eQ-3.de...
Need help?
Do you have a question about the HmIPW-BRC2 and is the answer not in the manual?
Questions and answers