Table of Contents
Advertisement
Quick Links
UNIVERSAL SENDER KIT INSTALLATION INSTRUCTIONS
Temperature and/or Pressure Senders for use with Electrical Temperature and/or Pressure Gauges
Item
Description
1
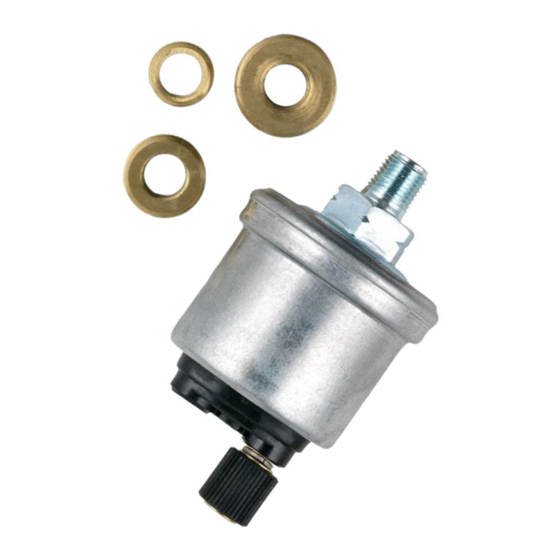
Temperature Sensor (250° Kit)
Or
Temperature Sensor (300° Kit)
2..
1/4" – 18NPT bushing (adapter)
3.
3/8" – 18NPT bushing (adapter)
4.
1/2" – 18NPT bushing (adapter)
5.
1/4" Female spade Terminal
9/16" (14mm) Wrench
Wire Cutter/Stripper
Pliers or other crimping tool
a length of 16 – Gauge insulated wire
---IMPORTANT---
For best results, install your sender in the order described in
these instructions. DO NOT USE TEFLON TAPE. Tape
keeps the sender from grounding itself properly. For the
same reason, do not use Lok-Tite of any sort. Finally, if you
are installing a temperature sender, make absolutely sure 3-
5mm of the sender is immersed in fluid. Mount only in the
engine block; mounting in the cylinder head will result in
faulty readings.
I. Installing the VDO Universal Temperature Sender
There are three bushings included in this kit – one is 1/4-18 NPT;
another is 3/8"-18NPT; and the third is 1/2"-NPT. The fitting on the
sender itself is 1/8-18NPT. Decide which bushing, if any, you will
need to adapt the sender to the opening in your engine block.
Discard the rest, or save them for use later in another project. But
be aware that you will have left-over bushings after you complete
your installation.
1. Select a location for mounting the temperature sender. The
location must be in the engine block – note in the cylinder head,
where exhaust heat would cause faulty readings.
2. Take the correct bushing, if needed, and screw it tightly onto the
send with your fingers.
VDO
PARTS LIST – TEMPERATURE SENDER KIT
Quantity Part number
1
323 900
1
323 905
1
1
1
1
®
Diagram B
Proper Wiring Between Gauge and Temperature Sender
3. Clean the opening in the engine block where the
sender unit will be inserted. Clean threads are
absolutely necessary if a good ground and reliable
operation are to be obtained.
4. Screw the sender unit finger-tight into the engine
block.
5. Use a 9/16" (14mm) wrench to crank the sender into
the block until it is secure. As you crank, you will tighten
the bushing into the block and the sender into the
bushing. Keep tightening until the sender assembly is
snug. Do not over-tighten. The sender unit is self-
sealing, and will not leak.
II. Wiring the VDO Universal Temperature Sender
1. Either run a new wire to the temperature gauge or find
the existing wire if a gauge is already installed.
2. Crimp the supplied 1/4 female spade terminal onto
the sender end of the wire. (Replace any old connectors
on an existing wire with the new spade terminal.)
3. Push the spade connector onto the "thumb tack"
terminal at the end of the send as show in Diagram A.
4. Maker sure the other end of the signal wire is properly
connected to the gauge (see Diagram B).
5. Power up the gauge, and make sure it is working. If it
isn't, recheck your wiring end and refer to the
troubleshooting guide on the other side of this instruction
sheet.
00'''
0 511 012 260
09/08
Advertisement
Table of Contents

Subscribe to Our Youtube Channel
Summary of Contents for VDO 360 900
- Page 1 Diagram B Proper Wiring Between Gauge and Temperature Sender I. Installing the VDO Universal Temperature Sender 3. Clean the opening in the engine block where the There are three bushings included in this kit – one is 1/4-18 NPT;...
- Page 2 VDO Corporation warrants all merchandise against defects in factory workmanship and materials for a period of 24 months after purchase. This warranty applies to the first retail purchaser and covers only those products exposed to normal use or service. Provisions of this warranty shall not apply to a VDO product used for a purpose for which it is not designed, or which has been altered in any way that would be detrimental to the performance of like of the product, or misapplication, misuse, negligence or accident.


Need help?
Do you have a question about the 360 900 and is the answer not in the manual?
Questions and answers